Timm's BMW E31
WINDSCREEN WASHER REPLACEMENT
:

The assembly can now be removed by tilting down the assembly near the rivet-hole:
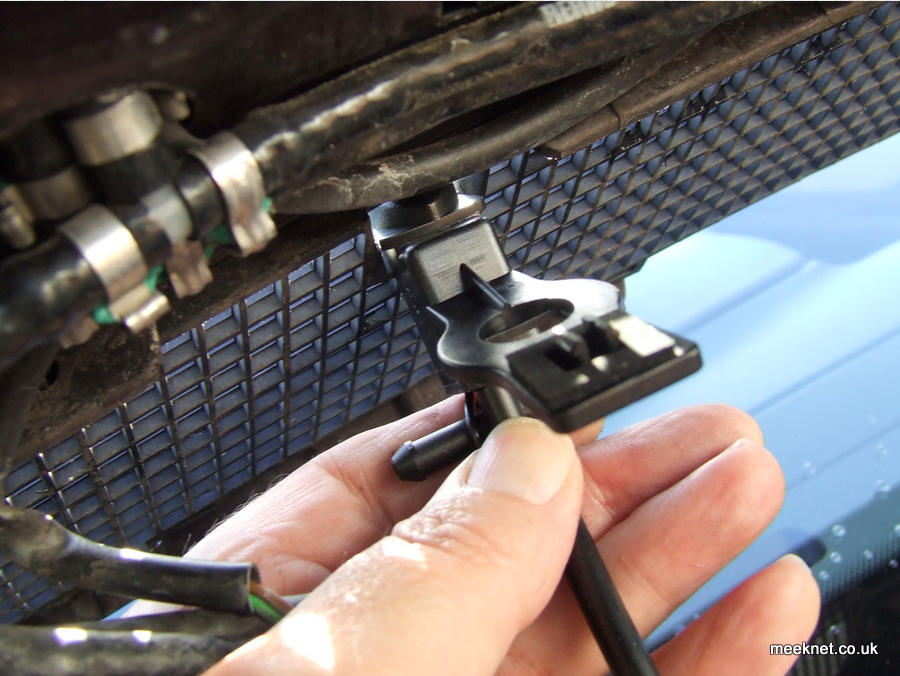
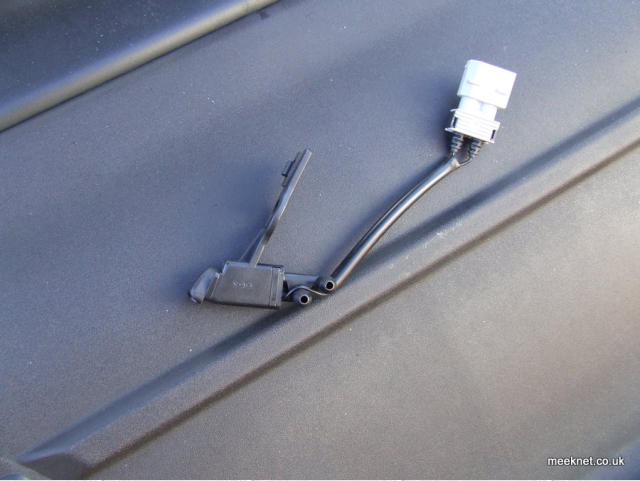
I'm using the new assembly to show how to tilt it out - the connector block would still be fitted at this point.
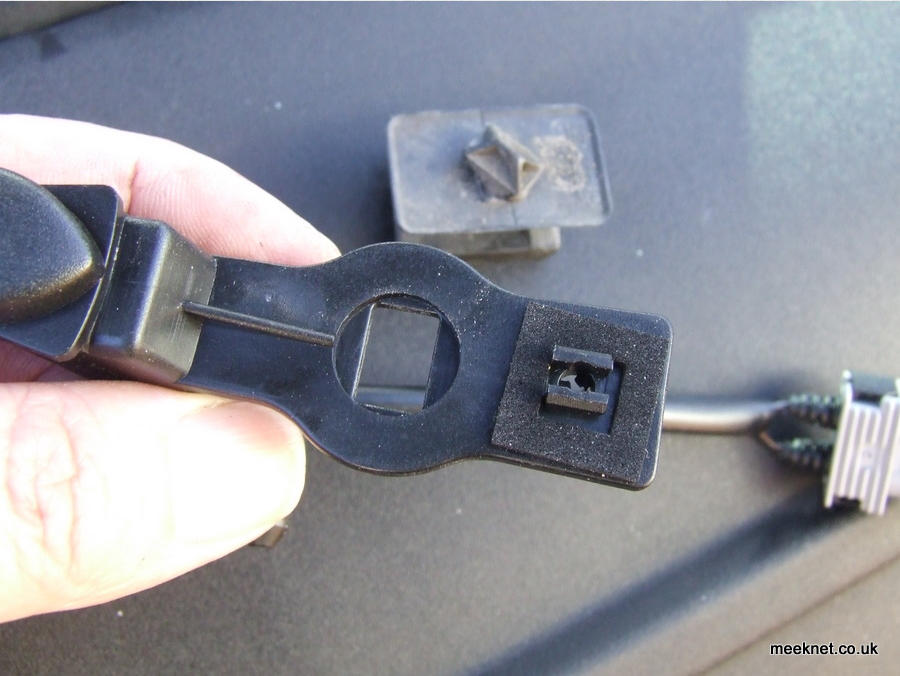
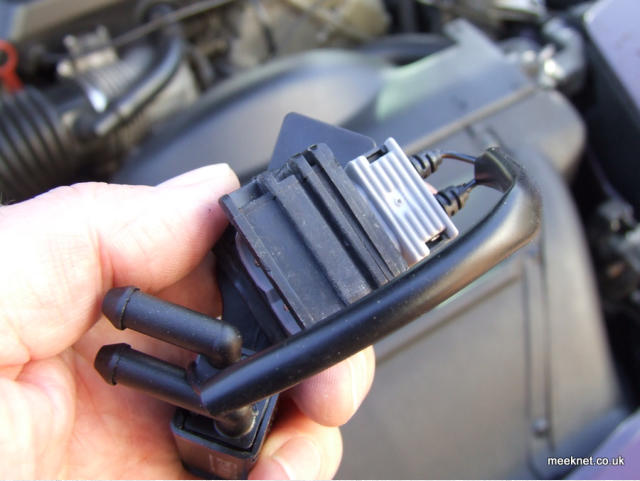
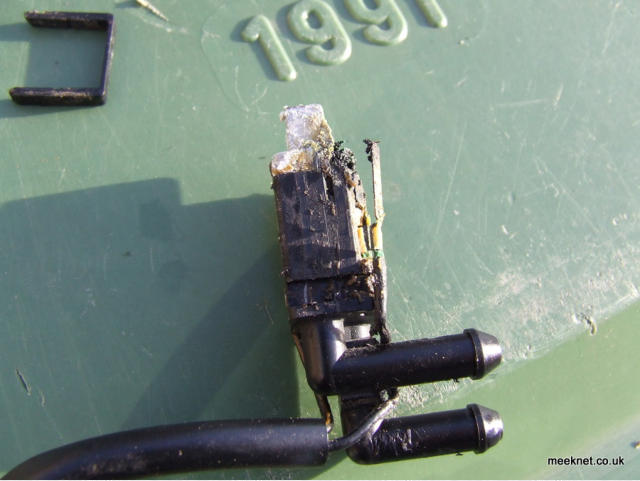
Twist the connector block and it can be removed, the next two pictures show how it is held together, once the block
is twisted off, the connector shell can be removed:


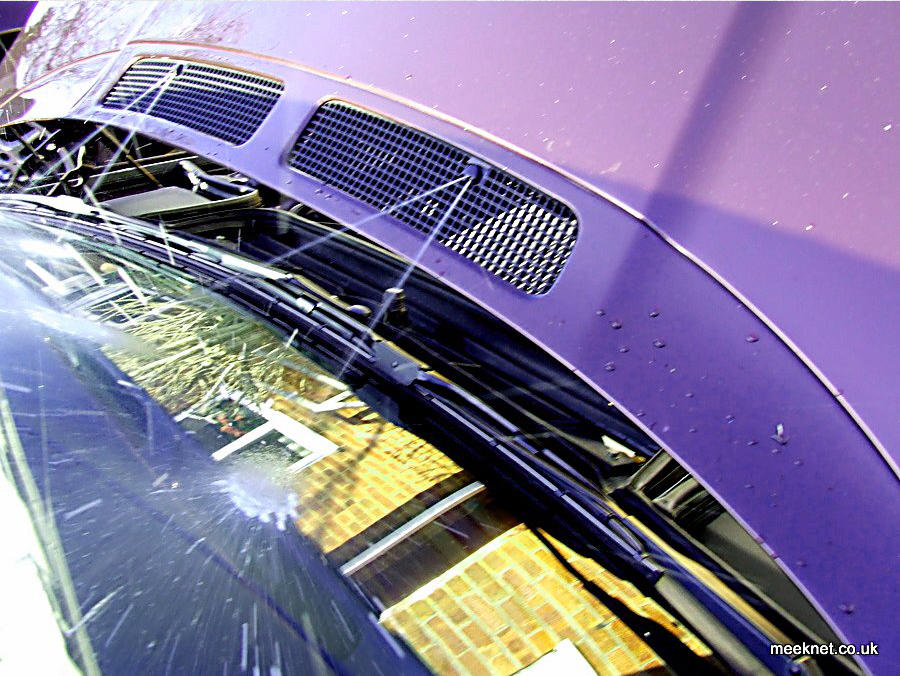
Tilt the new nozzle into the grille in the same way the old one was removed and then push the clasp into the bonnet
aperture. Give it a really good push as you refit the plastic rivet. It took a couple of goes to get the clasps to engage in
the bonnet - but once in it holds on well. Refit the loom, test, and aim the nozzles with a pin.
I dis-assembled the assembly to see if I could have cleaned it rather than replacing it. The assembly has a 'u' shaped clip that holds
the insides in place - use a small screwdriver to pull it out and then work the insides out from the housing:
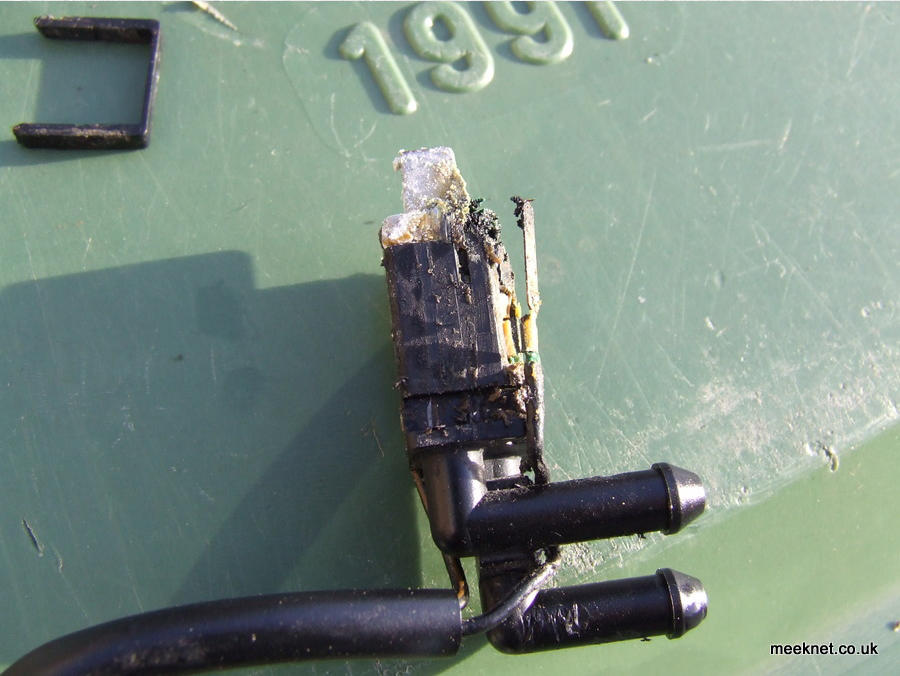
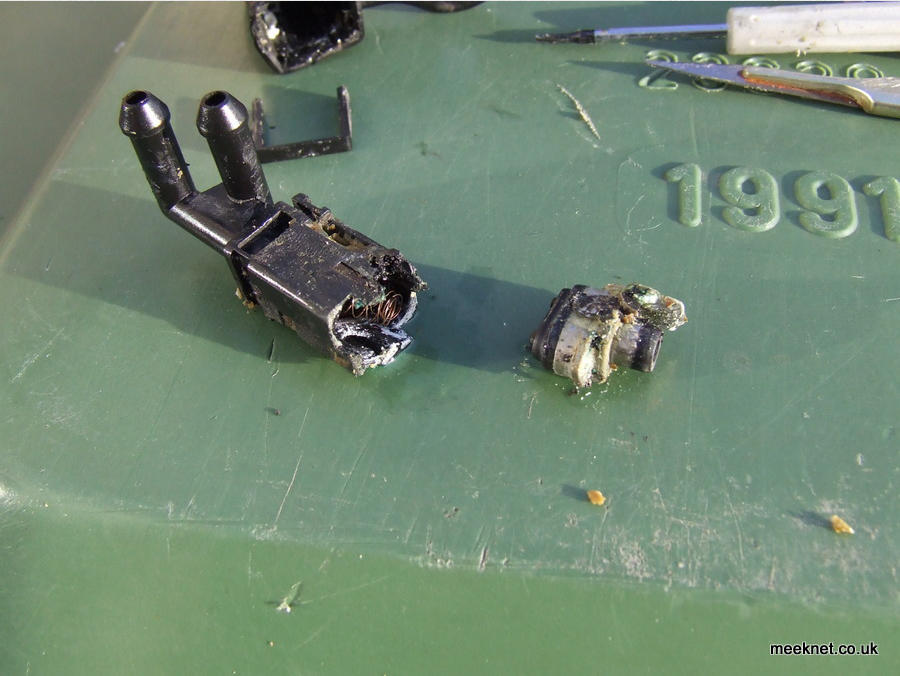
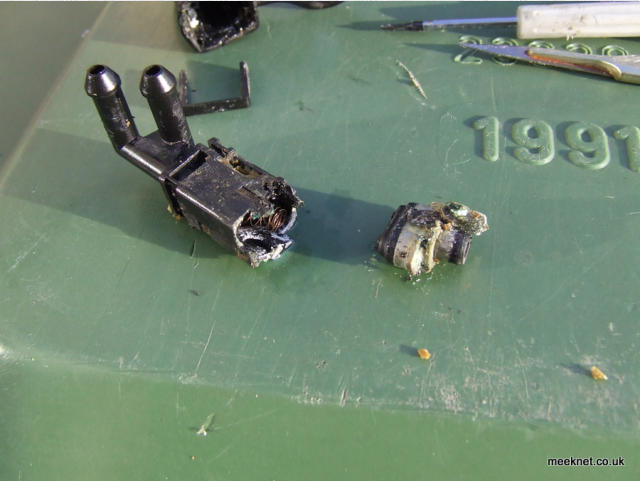
Let's face it, that wasn't going to be cleaned and working again! The heater connection has disintegrated and the
frizzled plastic is the source of the blockage. I levered off the heater:
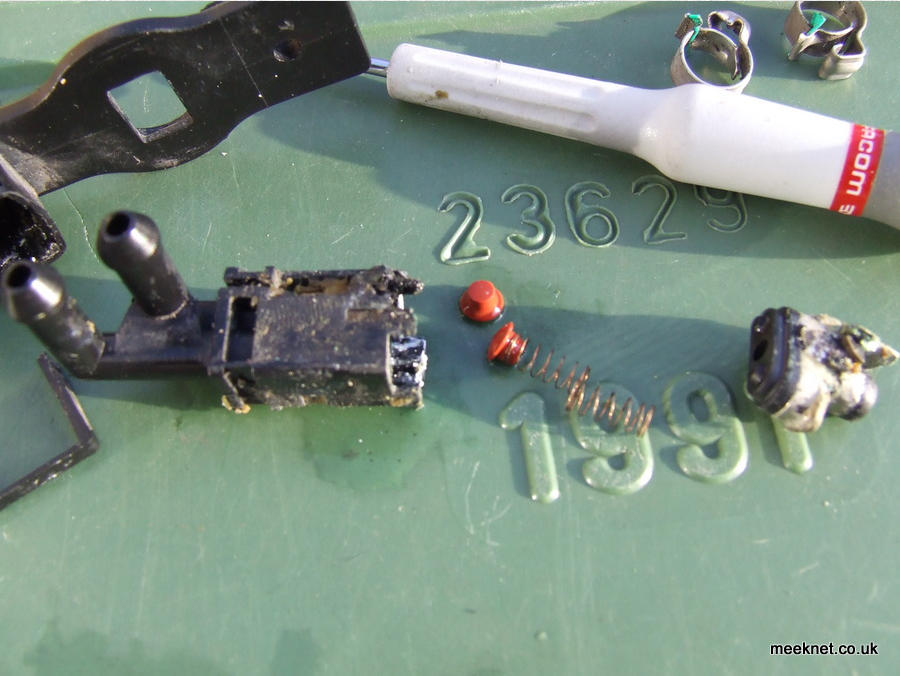
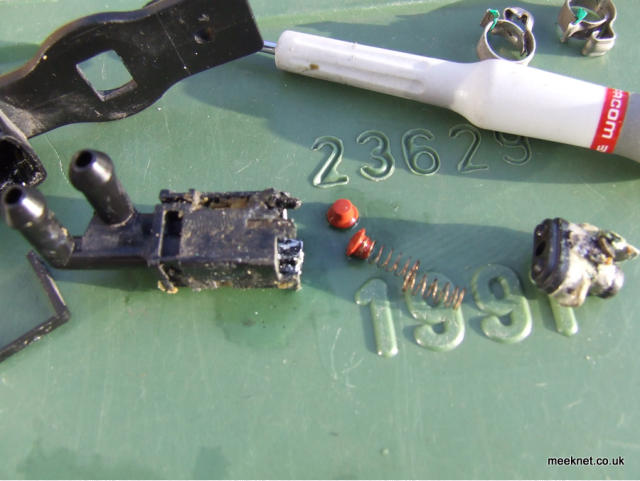
And pulled out the springs and one-way valves:
Glad I got a new one!
All done, time for a cup of tea......


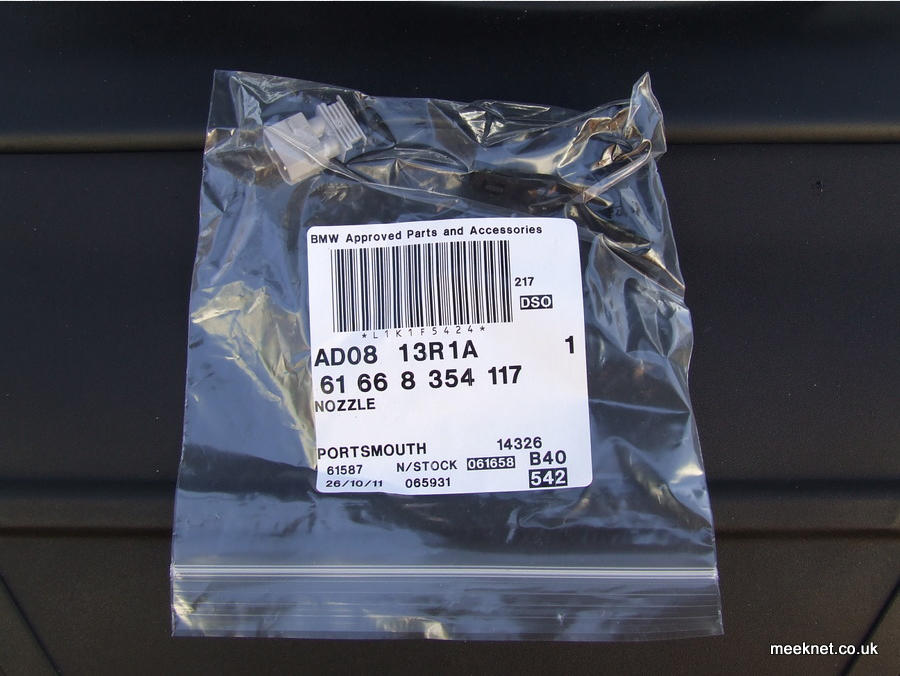
My Mora E31 840ci's windscreen washers on the drivers side were absolutely useless, only just enough water hit the screen to clear it,
whereas about a gallon reached the passengers side. Although the washers can sometimes be cleared out, I decided to hedge my bets
and get a new one, especially as they are only £25 or so. This repair also cures the 'fountain' of water that shoots out of the main tank
if the intensive wash is used.

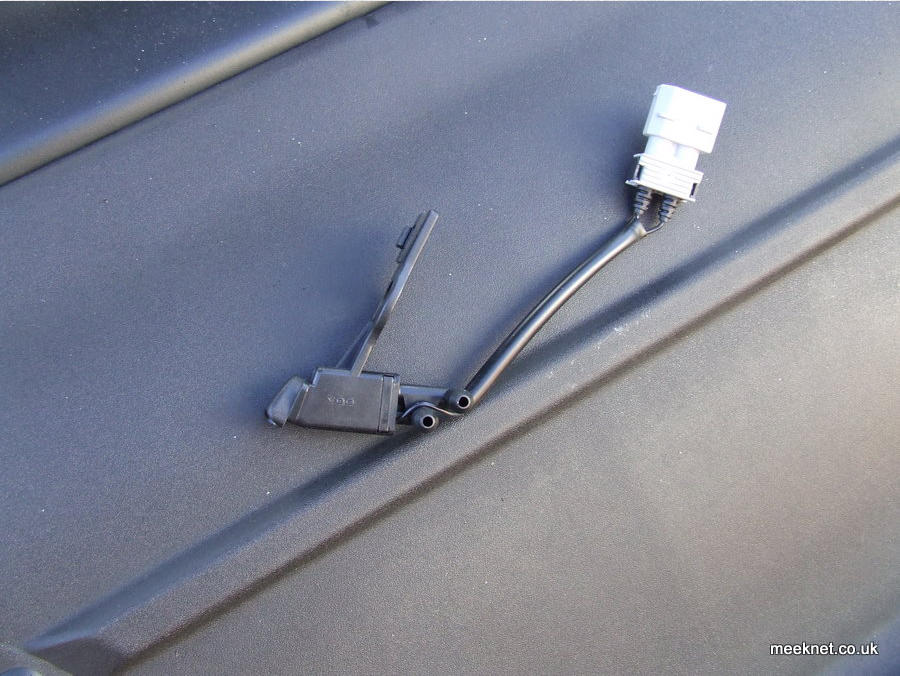
The washer assemblies have two inlet pipes, one is for standard wash, the other for the intensive fluid. Inside the unit are two one-way
valves, these stop the intensive wash fluid returning down the standard wash pipes and vice-versa. The valves can perish or debris can
be trapped under them and then the intensive wash returns to the standard wash tank causing it to overflow.
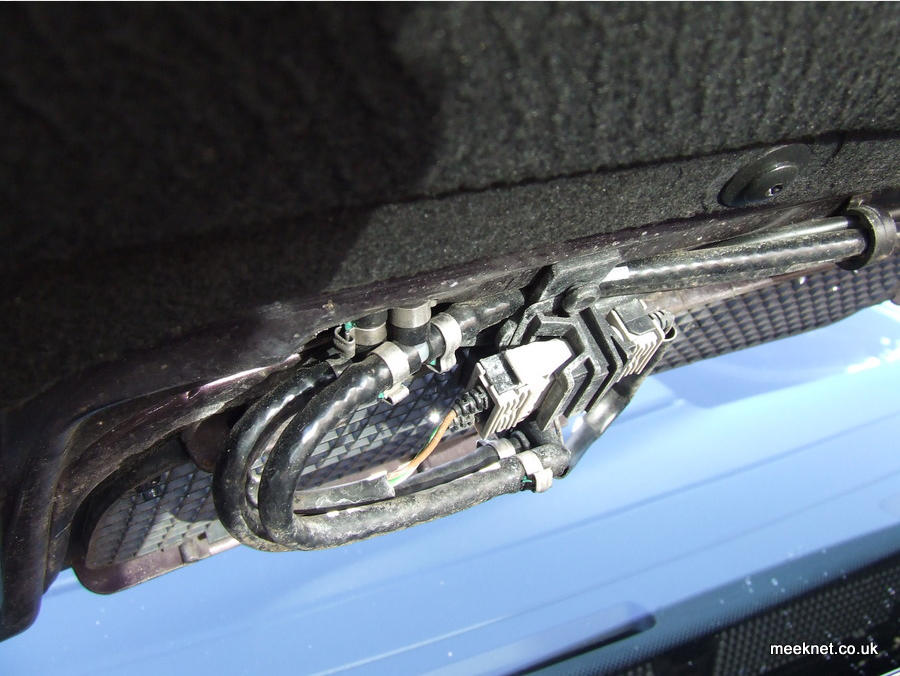
Bonnet open and here's the assembly
To be honest, I didn't have a clue how this came apart, I removed the grille above the nozzle's to get a better look, it had to be
twisted out to clear the assembly. The connector block wouldn't come off as the plastic lump above the block stopped it rotating. I
eventually realised that the lump above the connector block was a plastic rivet - and removing the rivet allowed all the other parts
to come off! For this reason, some of the photographs were taken after the removal/replacement and have old/new bits fitted
where they wouldn't be if the routine is followed.
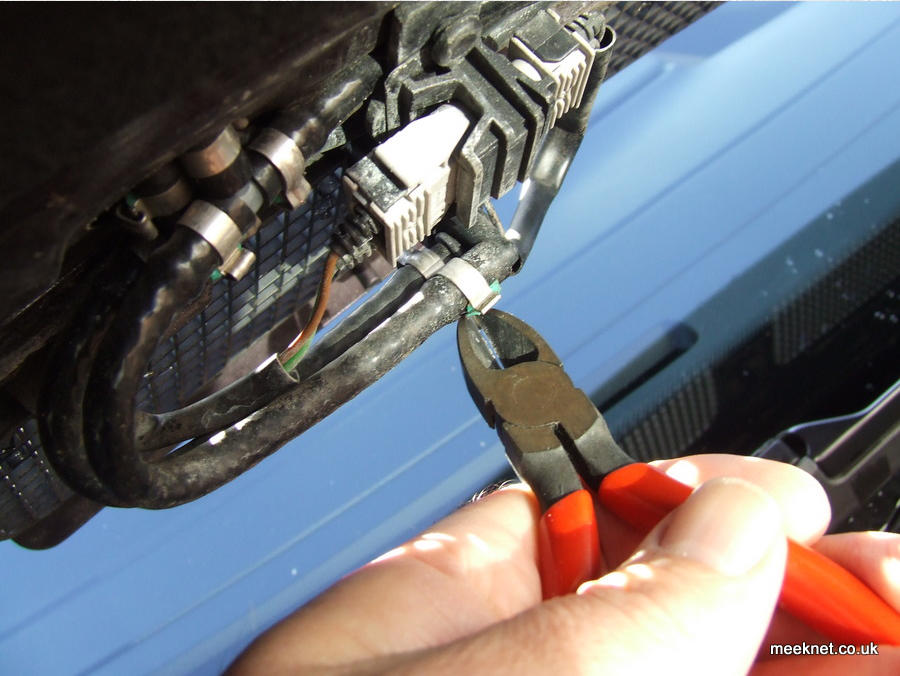
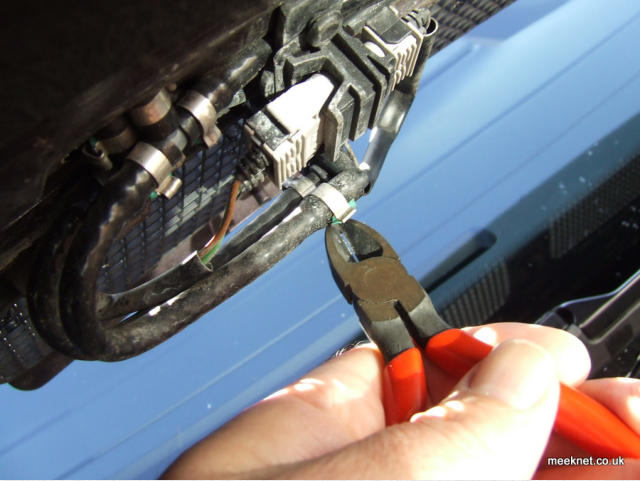
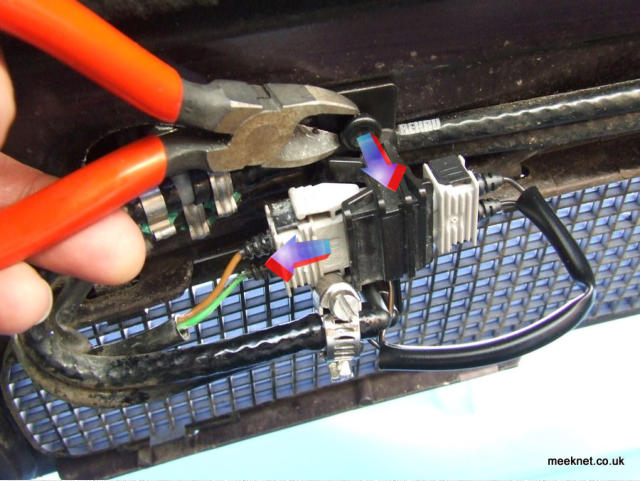
The clips need to be removed first, they are one-use clips and must be cut off. Remove the two pipes
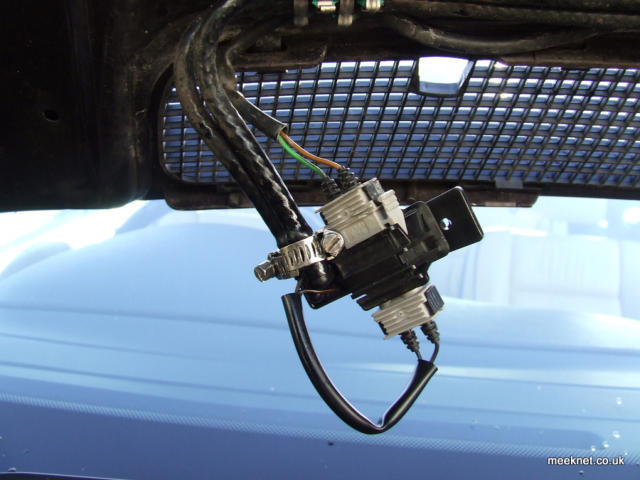
Disconnect the loom as shown here and then remove the expanding rivet, the right-hand side of the connector remains in the
black-plastic housing at this point. The picture shows two new Jubilee clips fitted, the picture was taken after I refitted the new unit
- at this point the pipes should be removed:
The picture above shows how the rivet holds the assembly to the bonnet, the rivet expands the clasp into the bonnet aperture.
When replacing the assembly, make sure that the plate shown above is pressed really hard into the aperture otherwise the clasp
fails to secure the assembly to the bonnet.
Fit the new connector shell to the housing and rotate it onto the new assembly, fit the two pipes with new Jubilee clips (lubricate
the Jubilee clip worms with engine oil, it makes tightening them easier and reduces the chance of snapping the inlet pipes from
the assembly).


Timm's BMW E31
WINDSCREEN WASHER REPLACEMENT


The assembly can now be removed by tilting down the assembly near the
rivet-hole:
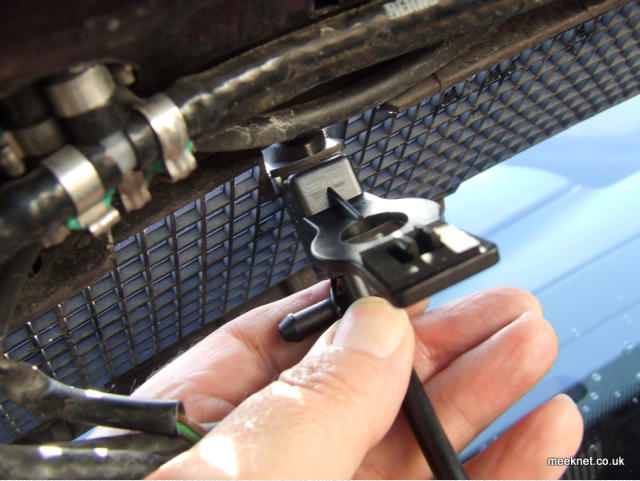
I'm using the new assembly to show how to tilt it out - the connector block
would still be fitted at this point.
Twist the connector block and it can be removed, the next two pictures
show how it is held together, once the block is twisted off, the connector
shell can be removed:

Tilt the new nozzle into the grille in the same way the old one was
removed and then push the clasp into the bonnet aperture. Give it a really
good push as you refit the plastic rivet. It took a couple of goes to get the
clasps to engage in the bonnet - but once in it holds on well. Refit the
loom, test, and aim the nozzles with a pin.

I dis-assembled the assembly to see if I could have cleaned it rather than
replacing it. The assembly has a 'u' shaped clip that holds the insides in
place - use a small screwdriver to pull it out and then work the insides
out from the housing:
Let's face it, that wasn't going to be cleaned and working again! The
heater connection has disintegrated and the frizzled plastic is the source
of the blockage. I levered off the heater:
And pulled out the springs and one-way valves:
Glad I got a new one!
All done, time for a cup of tea......


My Mora E31 840ci's windscreen washers on the drivers side were
absolutely useless, only just enough water hit the screen to clear it,
whereas about a gallon reached the passengers side. Although the
washers can sometimes be cleared out, I decided to hedge my bets and
get a new one, especially as they are only £25 or so. This repair also cures
the 'fountain' of water that shoots out of the main tank if the intensive
wash is used.

The washer assemblies have two inlet pipes, one is for standard wash, the
other for the intensive fluid. Inside the unit are two one-way valves, these
stop the intensive wash fluid returning down the standard wash pipes and
vice-versa. The valves can perish or debris can be trapped under them
and then the intensive wash returns to the standard wash tank causing it
to overflow.
Bonnet open and here's the assembly
To be honest, I didn't have a clue how this came apart, I removed the
grille above the nozzle's to get a better look, it had to be twisted out to
clear the assembly. The connector block wouldn't come off as the plastic
lump above the block stopped it rotating. I eventually realised that the
lump above the connector block was a plastic rivet - and removing the
rivet allowed all the other parts to come off! For this reason, some of the
photographs were taken after the removal/replacement and have old/new
bits fitted where they wouldn't be if the routine is followed.
The clips need to be removed first, they are one-use clips and must be
cut off. Remove the two pipes
Disconnect the loom as shown here and then remove the expanding rivet,
the right-hand side of the connector remains in the black-plastic housing
at this point. The picture shows two new Jubilee clips fitted, the picture
was taken after I refitted the new unit - at this point the pipes should be
removed:
The picture above shows how the rivet holds the assembly to the bonnet,
the rivet expands the clasp into the bonnet aperture. When replacing the
assembly, make sure that the plate shown above is pressed really hard
into the aperture otherwise the clasp fails to secure the assembly to the
bonnet.
Fit the new connector shell to the housing and rotate it onto the new
assembly, fit the two pipes with new Jubilee clips (lubricate the Jubilee
clip worms with engine oil, it makes tightening them easier and reduces
the chance of snapping the inlet pipes from the assembly).