Timm's BMW E31 8-Series Auxiliary Fan Replacement
Not too tricky - and while you are in there, clear out the leaves, bumblebees and small rodents
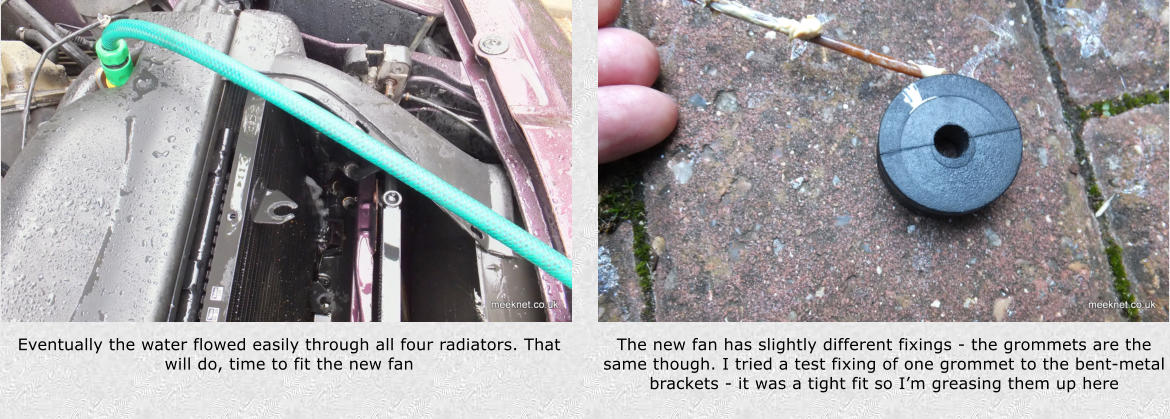
I got the A/C regassed at the local garage and it stayed cold for all of ten minutes on the drive back from the garage. While I sat in the car, getting hotter and hotter the revs picked up and the A/C got cool again - and that’s a sure sign that the refrigerant pressure was too high. Overpressure can happen if the refrigerant temperature is too high - to cool the refrigerant, the auxiliary fan runs at full speed. 
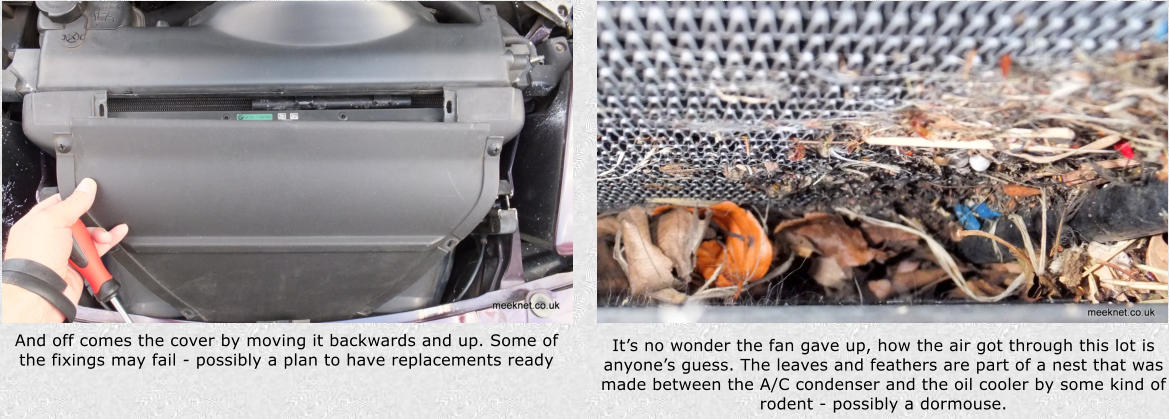
A quick grope of the auxiliary fan through the air scoop showed that the fan was completely seized up, and that was the cause of the high refrigerant pressure - a lack of cooling. So, off we go then. 
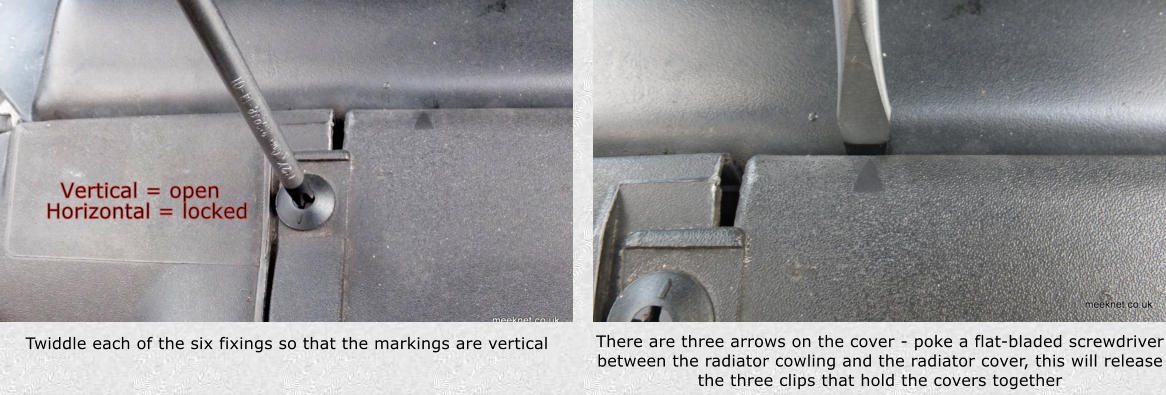
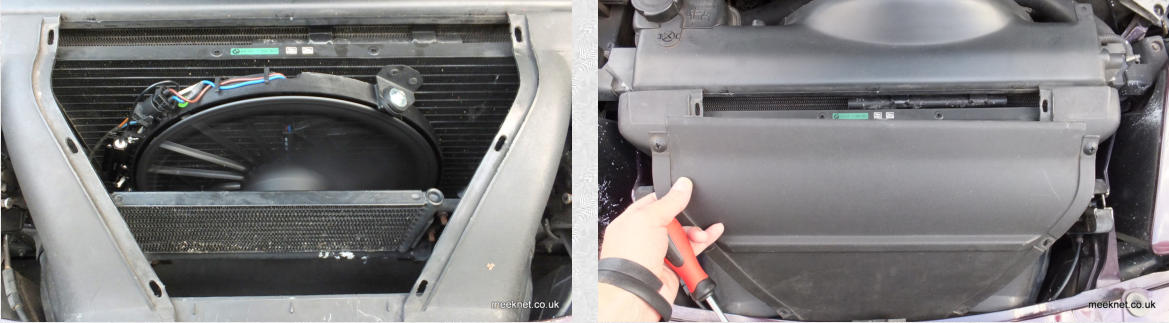
Start by removing the cover over the radiators - this is easy as long as you know where to poke a screwdriver:
Twiddle each of the six fixings so that the markings are vertical There are three arrows on the cover - poke a flat-bladed screwdriver between the radiator cowling and the radiator cover, this will release the three clips that hold the covers together And off comes the cover by moving it backwards and up. Some of the fixings may fail - possibly a plan to have replacements ready It’s no wonder the fan gave up, how the air got through this lot is anyone’s guess. The leaves and feathers are part of a nest that was made between the A/C condenser and the oil cooler by some kind of rodent - possibly a dormouse.
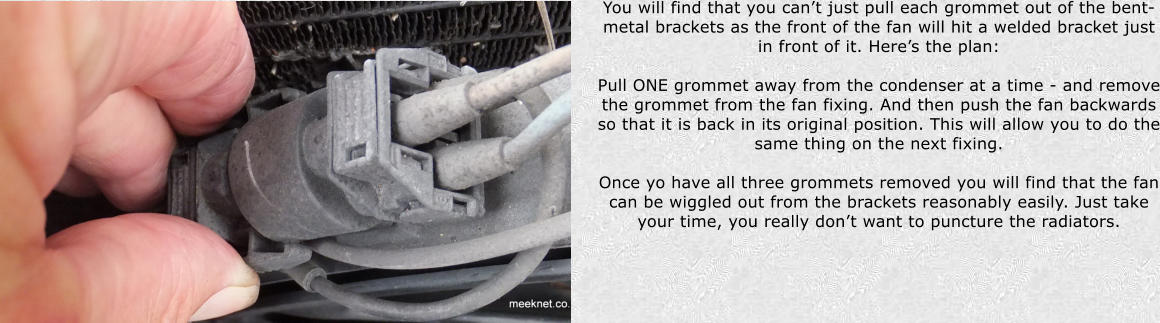
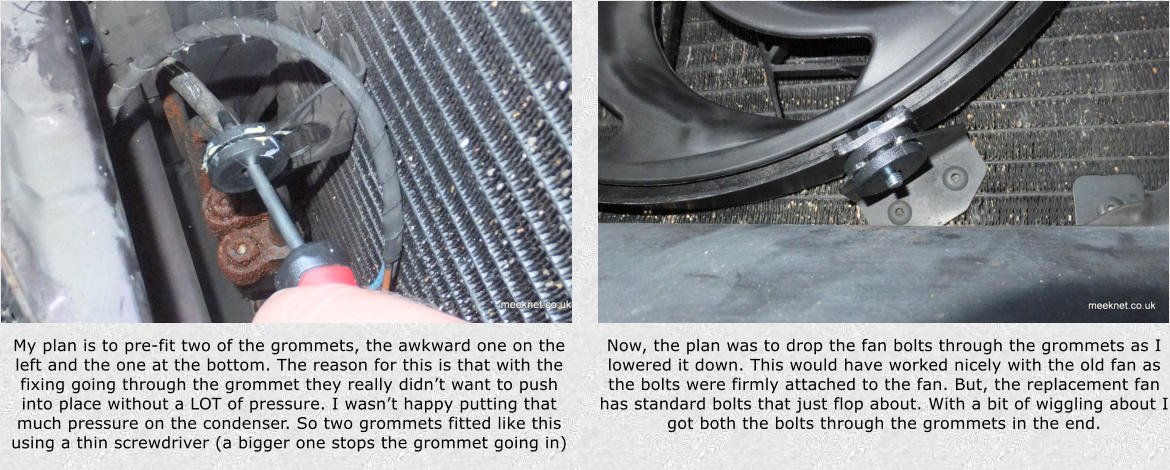
Disconnect the connector-pair before trying to remove the fan assembly
You will find that you can’t just pull each grommet out of the bent-metal brackets as the front of the fan will hit a welded bracket just in front of it. Here’s the plan:  Pull ONE grommet away from the condenser at a time - and remove the grommet from the fan fixing. And then push the fan backwards so that it is back in its original position. This will allow you to do the same thing on the next fixing.   Once yo have all three grommets removed you will find that the fan can be wiggled out from the brackets reasonably easily. Just take your time, you really don’t want to puncture the radiators. Here is one of the fixings, from the left are the fan frame with a special captive shaft (it can be bashed out though), a big rubber grommet, a large washer and a lock-nut Shown above is one of the three bent-metal brackets (auxiliary fan removed for clarity) that hold the fan to the condenser The nuts are 10mm and you will need to squirt each nut with WD40 or penetrating oil as they get pretty rusty in there. Remove each of the three nuts and washers (top one is easy, get to the lower one through the air scoop, the one on the left is awkward to say the least You may have noticed that the bent-metal fixings have a slot in them. This is just wide enough to pull the grommets out when the pressure from the nut is removed. Lubrication helps - a liberal squirt of WD40 will ease them out. And out it comes after a bit of wiggling - it only just fits between the cowling sides, but it’s out! The fan has failed in the normal fashion - the glue that holds one of the magnets on has failed and the magnet is now attached to the armature. I have heard of the E32 boys fixing this by taking the motor apart and re-attaching the magnet. ....but the housing is staked to the bearing housing and that doesn’t look like it wants to come apart. For £108 I’ve gone for a new one Look at the mess behind the fan, that’s munched-up paper, leaves and other stuff. As seen earlier there is a nest behind the condenser. So, time to clean it all up. A stick and a vacuum cleaner was the way to start, that removed the nest (I would guess the nest was not actually used as I drive the car at least three times a week) and the leaves and other debris. Next I got out the garden hose and gave all four radiators a good blast in all directions to clear out the fins - this worked really well. Eventually the water flowed easily through all four radiators. That will do, time to fit the new fan The new fan has slightly different fixings - the grommets are the same though. I tried a test fixing of one grommet to the bent-metal brackets - it was a tight fit so I’m greasing them up here My plan is to pre-fit two of the grommets, the awkward one on the left and the one at the bottom. The reason for this is that with the fixing going through the grommet they really didn’t want to push into place without a LOT of pressure. I wasn’t happy putting that much pressure on the condenser. So two grommets fitted like this using a thin screwdriver (a bigger one stops the grommet going in) Now, the plan was to drop the fan bolts through the grommets as I lowered it down. This would have worked nicely with the old fan as the bolts were firmly attached to the fan. But, the replacement fan has standard bolts that just flop about. With a bit of wiggling about I got both the bolts through the grommets in the end. Fit the washers and nuts  on the left and lower fixings - use Loctite 222 on the threads or the nuts will wobble off again. Loosely fit the washer and nut on the upper grommet and then push the grommet into the bent-metal brackets A bit of 222 on the threads of the upper fixing and nip the nut up - don’t over-tighten the nuts or the grommets will distort.
Open up the main fuse box...
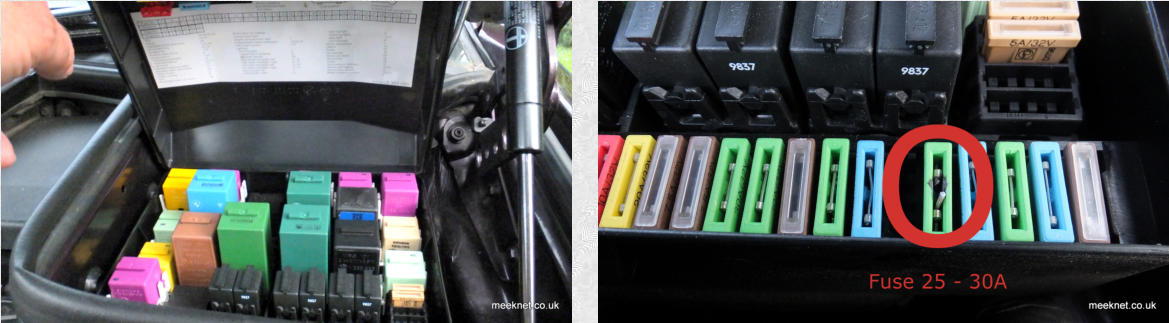
...and replace Fuse 25 (30A)
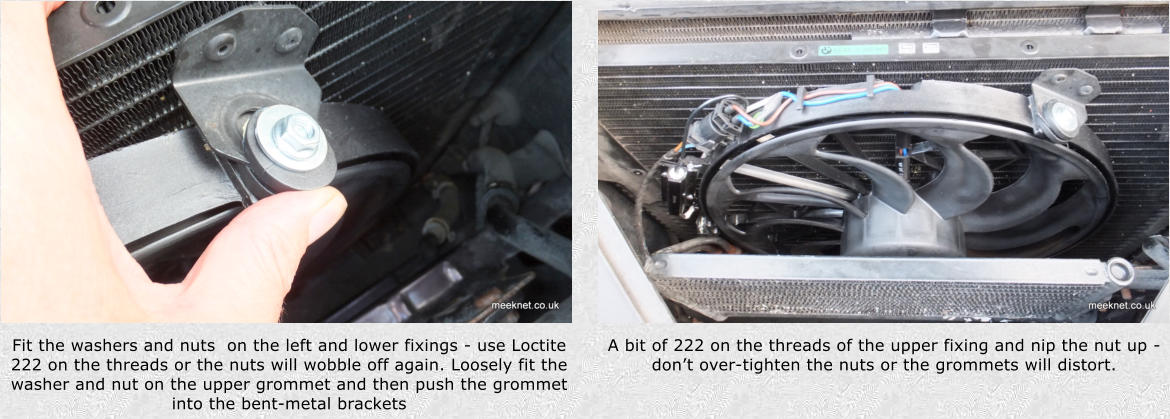
Ignition to position II, A/C ON and the fan should start spinning
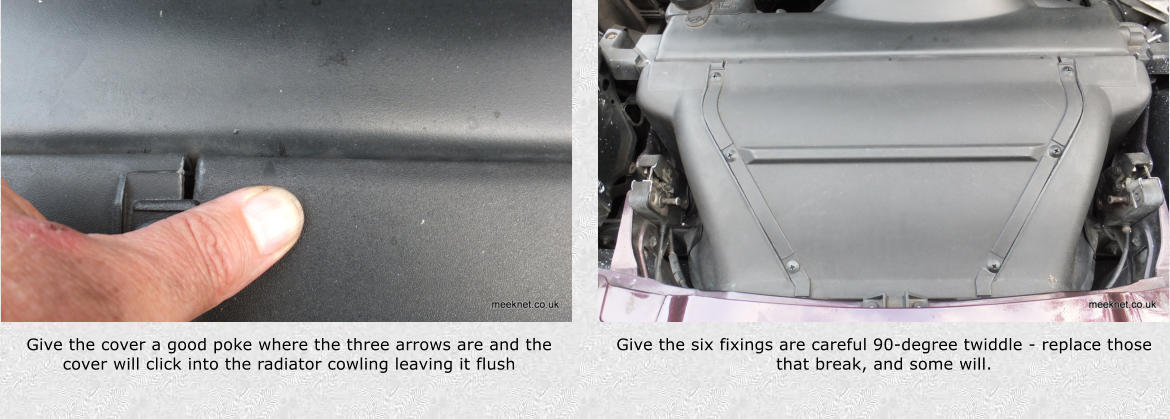
Cover back on, slot the front into the nose and line up all the fixings
Give the cover a good poke where the three arrows are and the cover will click into the radiator cowling leaving it flush Give the six fixings are careful 90-degree twiddle - replace those that break, and some will.
The A/C obviously works a whole lot better - but a strange side effect was that when the compressor cut out (as the evaporator temperature reached the cut-off point), instead of the revs dropping to a loping 450 RPM which it had been doing for a while, it reverted to dropping to 600 RPM as it should do - so all good! P.S. I found the reason for the reverting to a decent idle - Fuse 25 (which was blown due to the failing fan) also supplies power to relay K33 (Air Conditioning Relay). K33’s function is to tell the DME (EML on the V12) to increase the idle! All done, time for a Cup Of Tea!
Please keep meeknet online! Please keep meeknet online! Please keep meeknet online! Please keep meeknet online! timms BMW repairs and information