Timm’s BMW E31, E32 and E38 Torch Repair
Updated in 2018 to include the use of LED bulbs for excellent performance


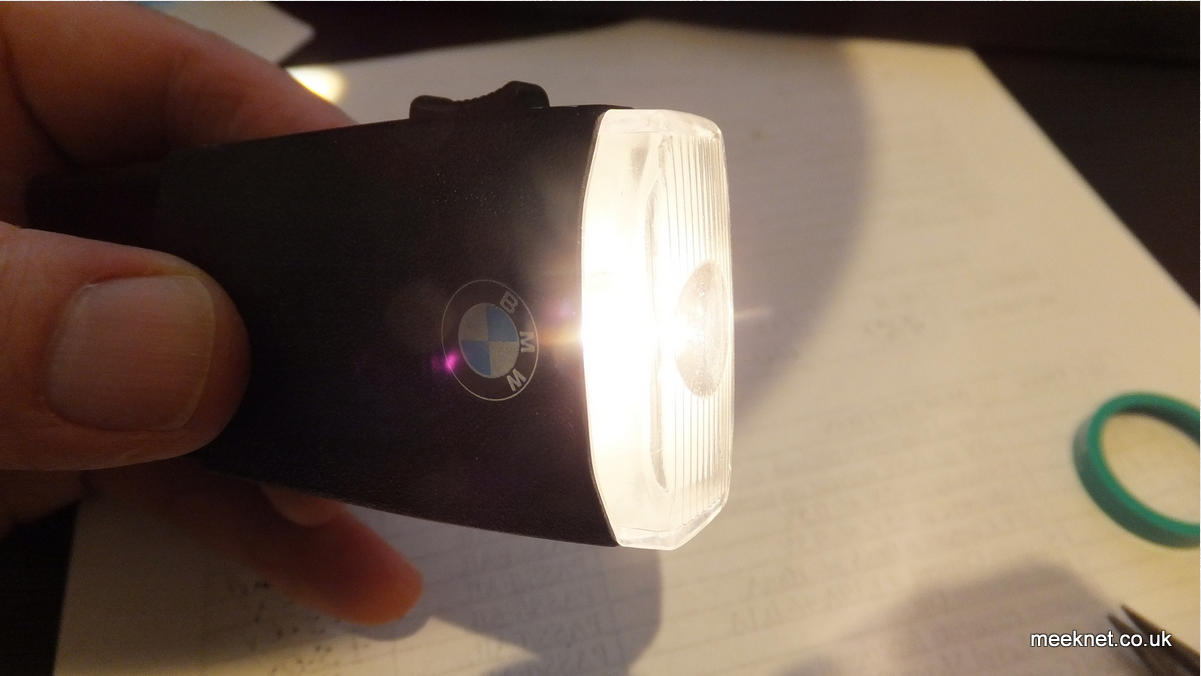
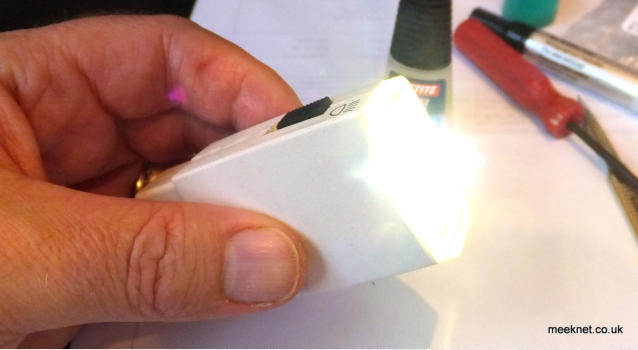
Look at that! That's the standard BMW torch used in the E31 and E32 - but it's got 10 x the light output of the original - it's actually a
useful torch that throws out some useful light - and it will stay lit for a good few hours as well. We’ll start with this torch and then move
onto the E38 version - here's how it is done.
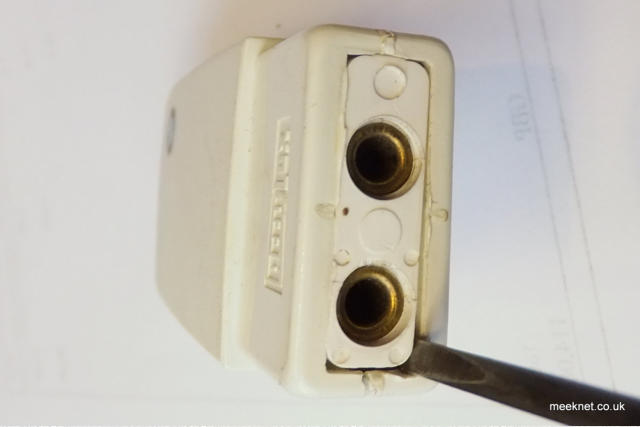
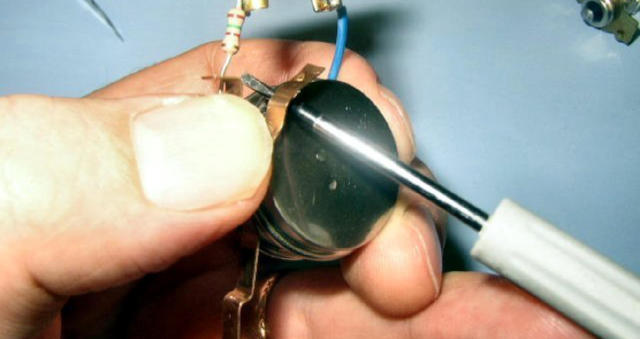
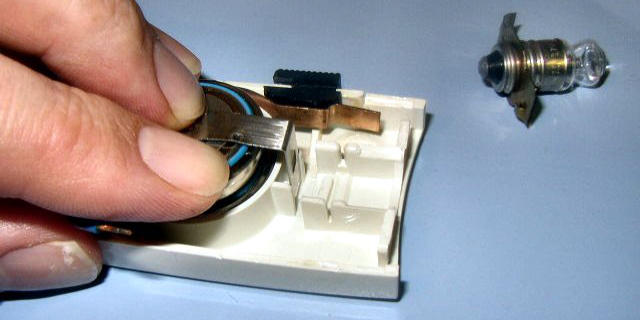
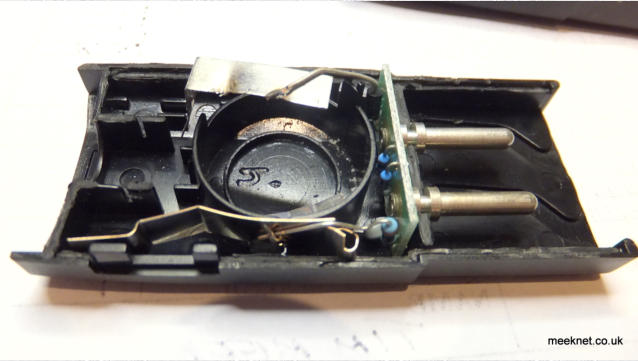
First - lever the torch apart, it comes apart reasonably easily without anything snapping by levering it here:

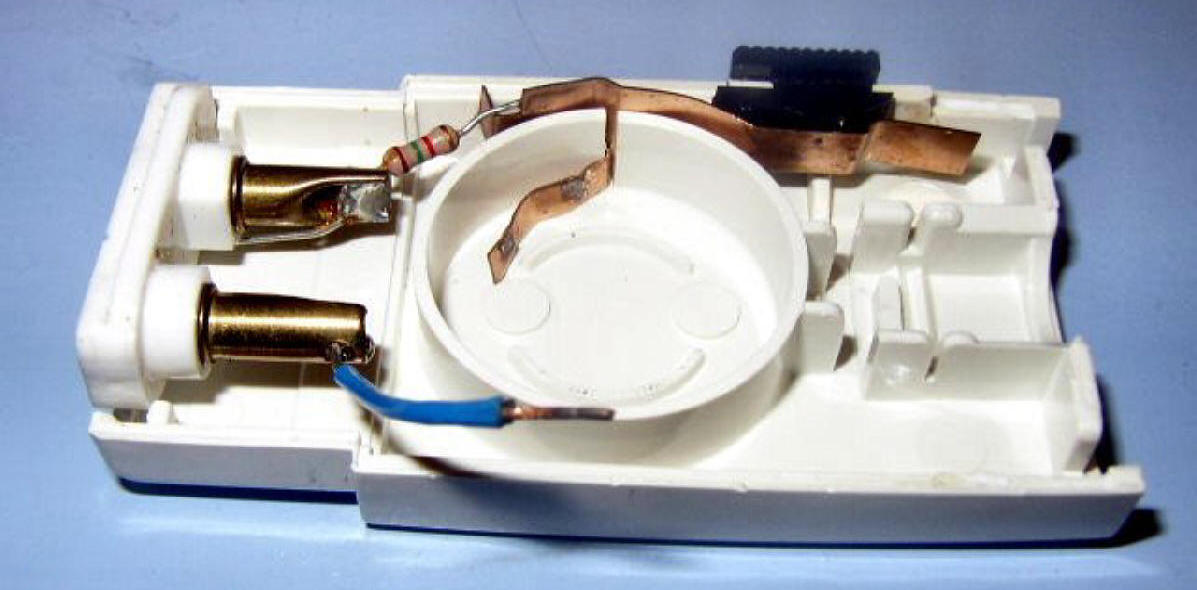
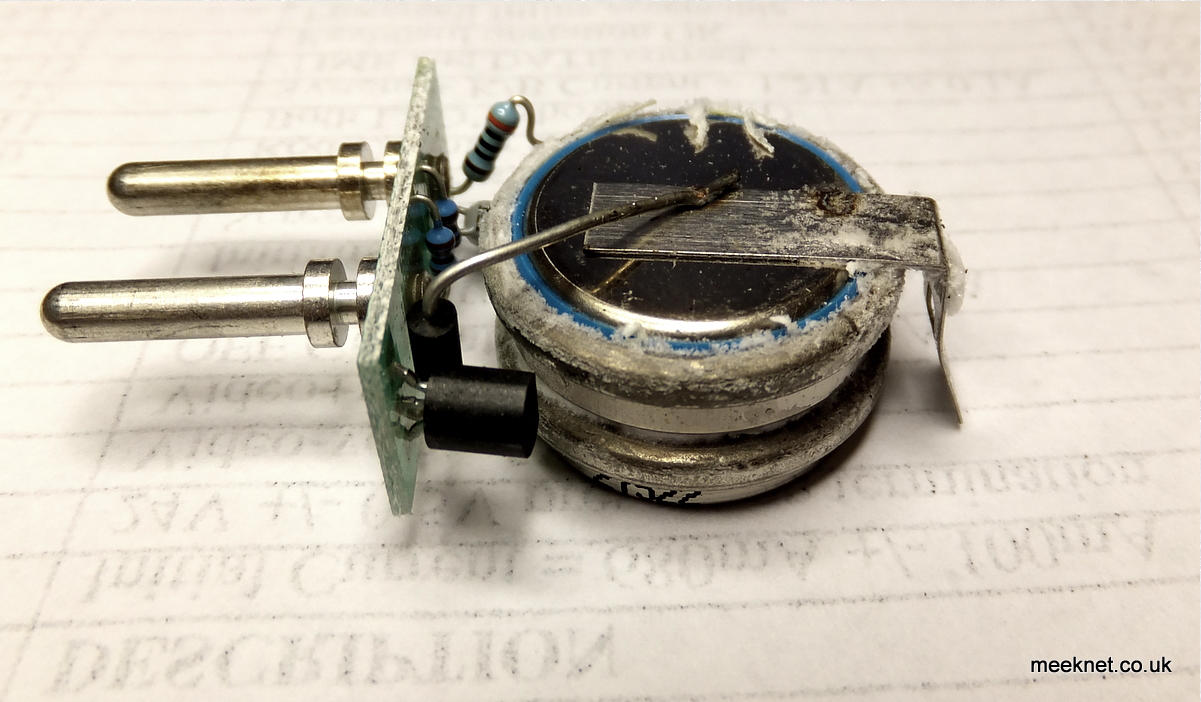
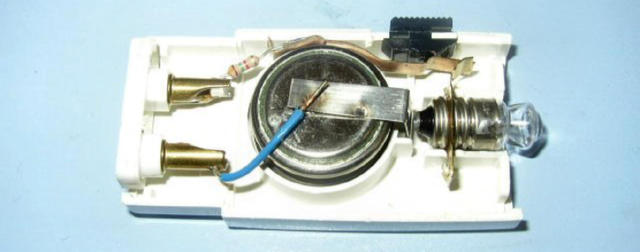
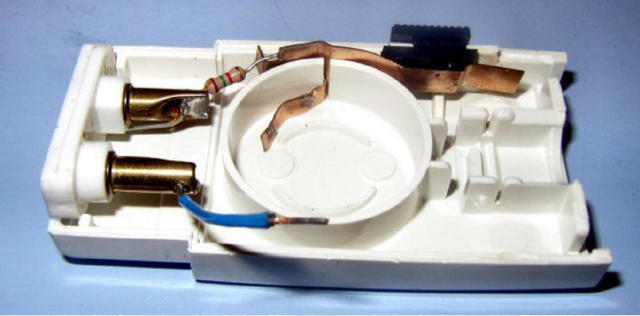
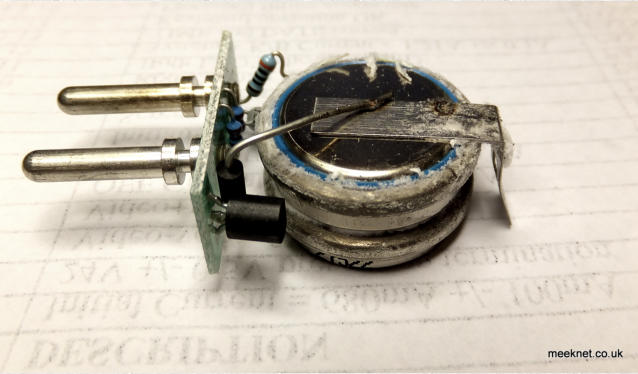
Here's what's inside:

The batteries start to fail after a few years or so, they are rechargeable but eventually cannot hold a charge for any
period of time. The plan is to hook them out and replace them with new ones. As this is the second time I've done this I
tried another plan - and if I needed to do it again on another torch I would use a third plan (blindingly obvious if I
bothered to think about it)
The problem for this 'How-To' is that
I haven't photographed the final, sensible method - so read the text!
So, let's start:
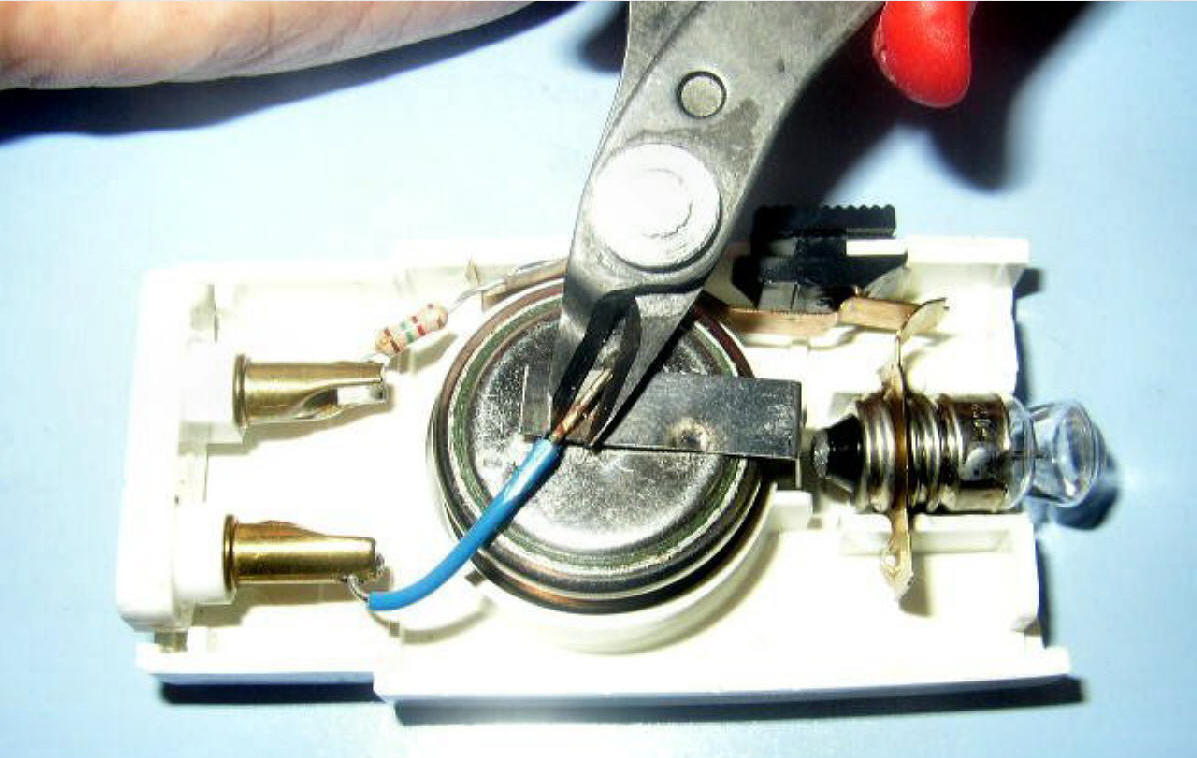
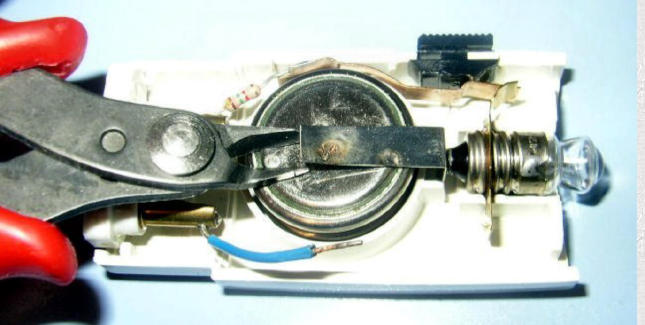
DON'T snip the wire off the metal tang - leave it connected
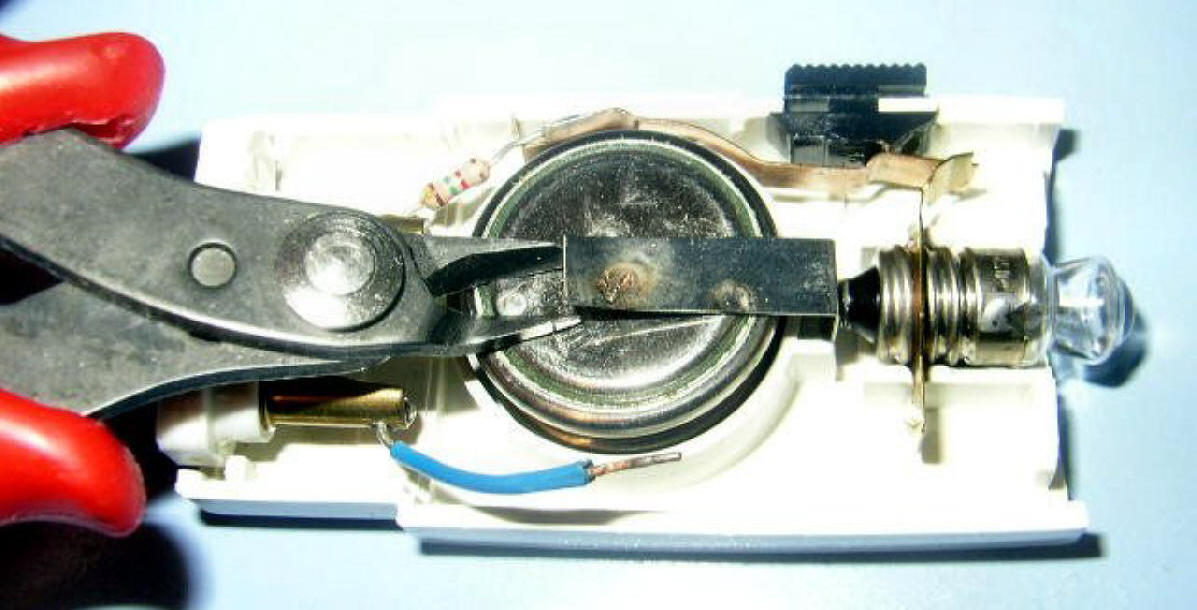
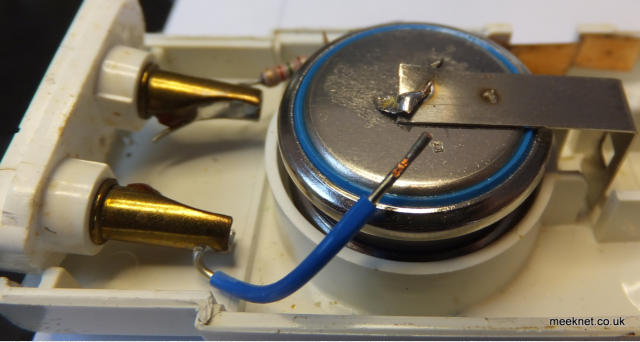
Remove the copper strip from the battery pair with the blue wire still connected - this saves soldering it back on later
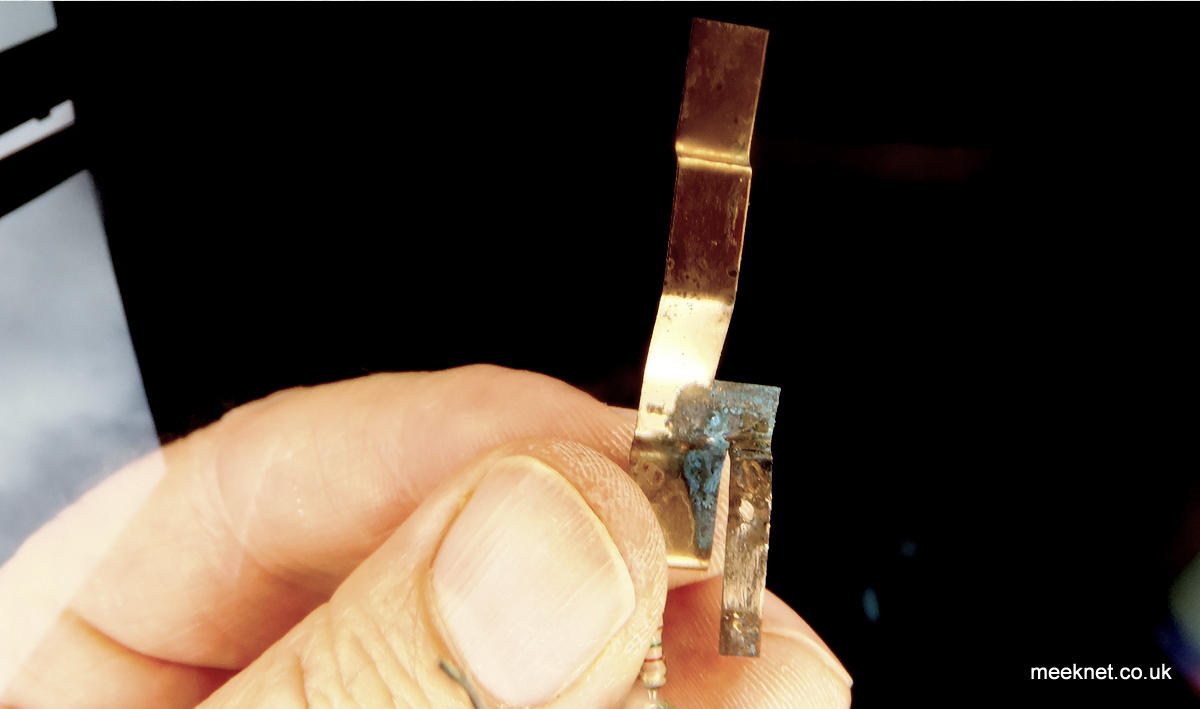
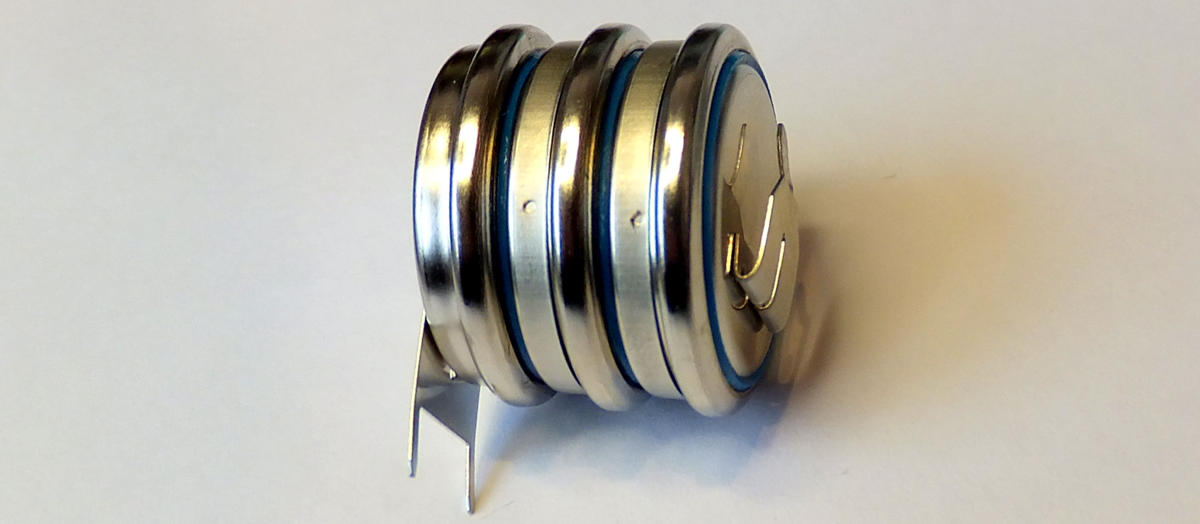
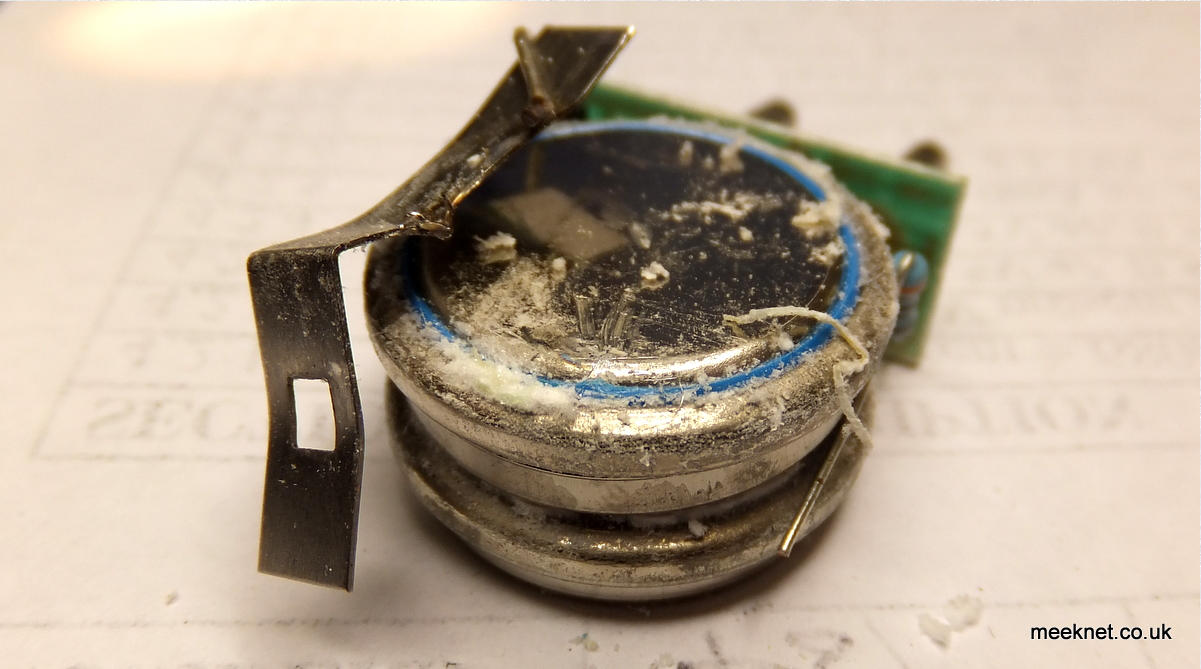
Remove the batteries and rear connector in one piece and then pry the lower tank from the side of the lower battery - it is spot-welded on:

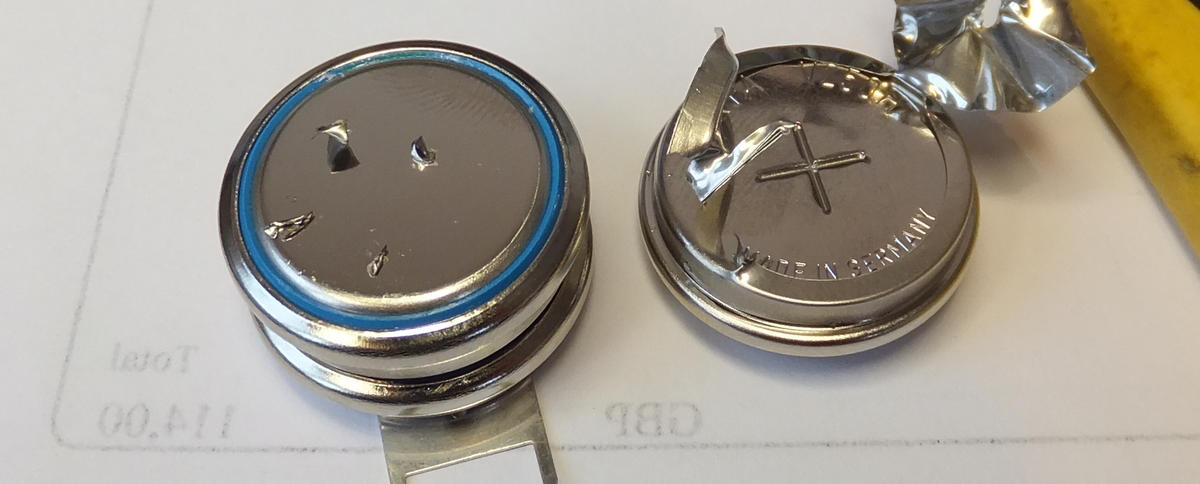
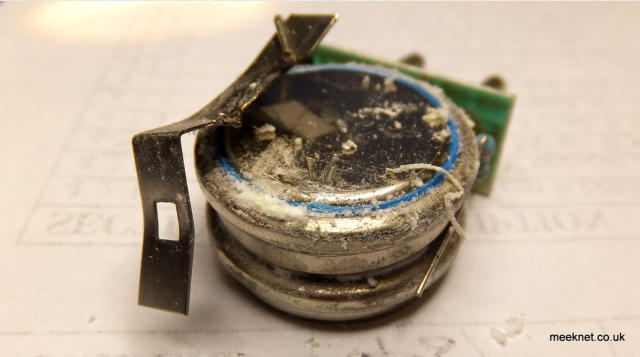
In 2015, the torch I took apart contained batteries that had leaked - so I had to remove the corrosion with the edge of a scalpel:
Sitck the copper strip and rear connector back in the case and give the lower tang of the strip a bend so that it
connects to the new batteries as shown here.
My new plan would be to leave the blue wire connected to the top metal tang:
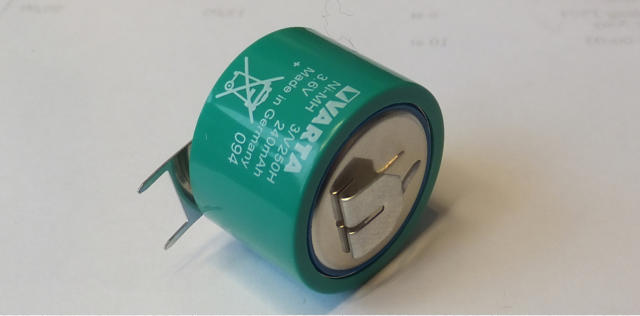
This is going to get a bit confusing, but, instead of two separate batteries you can buy them joined together as a pair - they are
available from the link below:
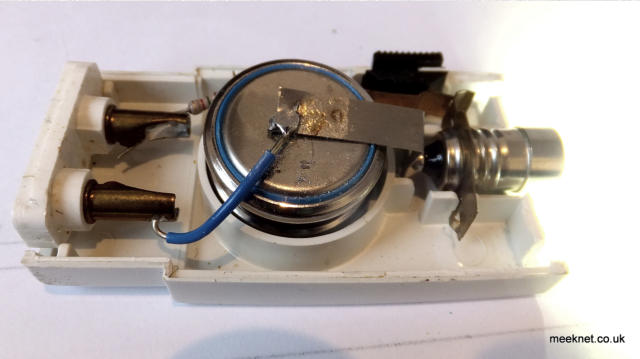
Cover off after bending the tag out of the way:
Now, if this was the double battery it would be easy - but it's a triple so I need to remove one using some side-cutters and a screwdriver:
I've left one of the spot-welded bits of metal long enough to solder - now if was a double battery I could have used the solder pins fitted, in
fact, if I had removed the lower battery I could have used the solder pins on the triple battery! Never mind. Remove the lower solder pins:
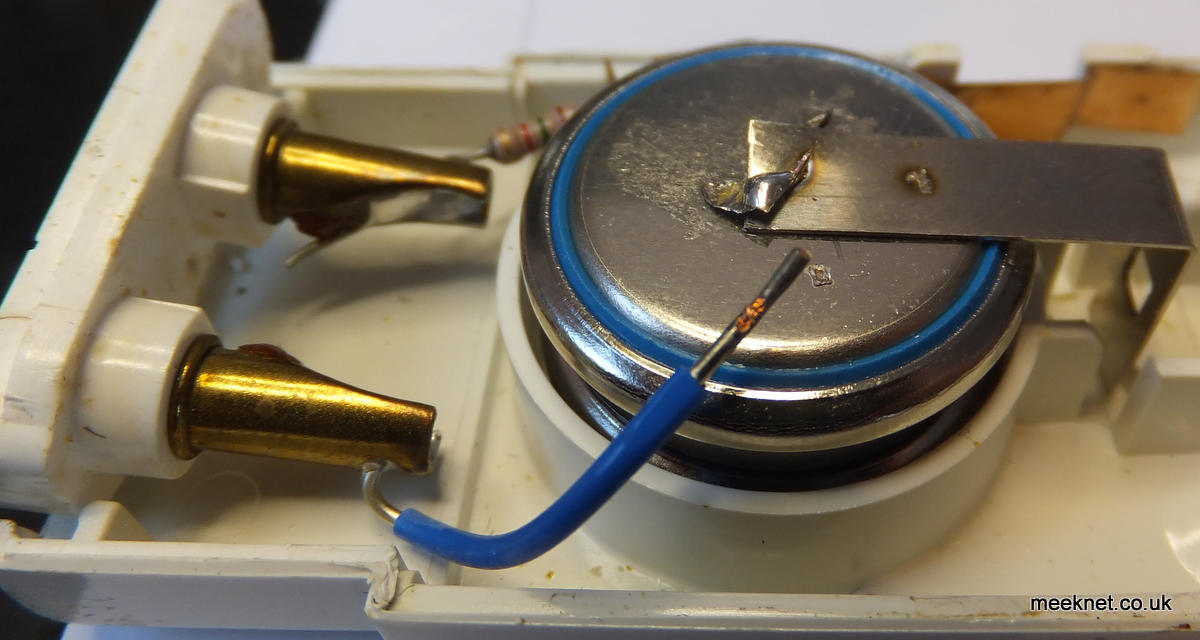
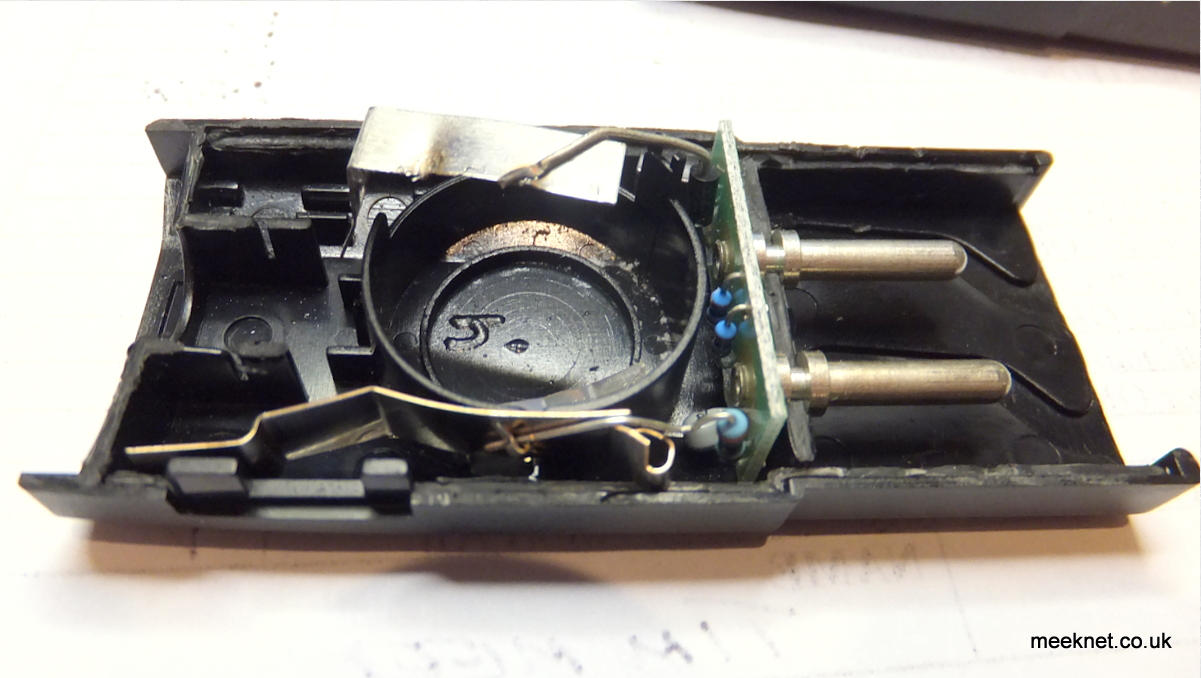
Then poke the battery pair into the case
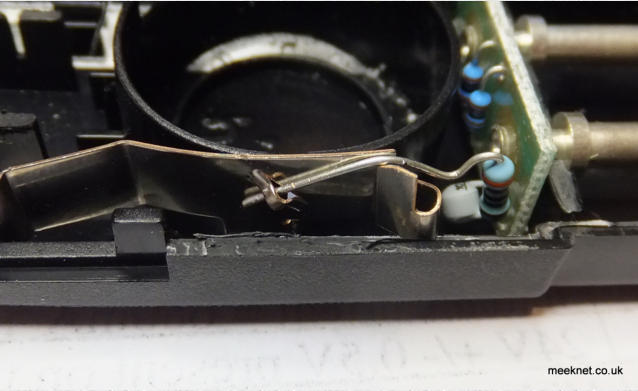
Solder the little strip of metal left on the top battery to the top metal tang and the BLUE wire (which should have been left spot welded to
the tang) - I, of course, didn't think of this, so I have had to solder both the tang and the wire back on:
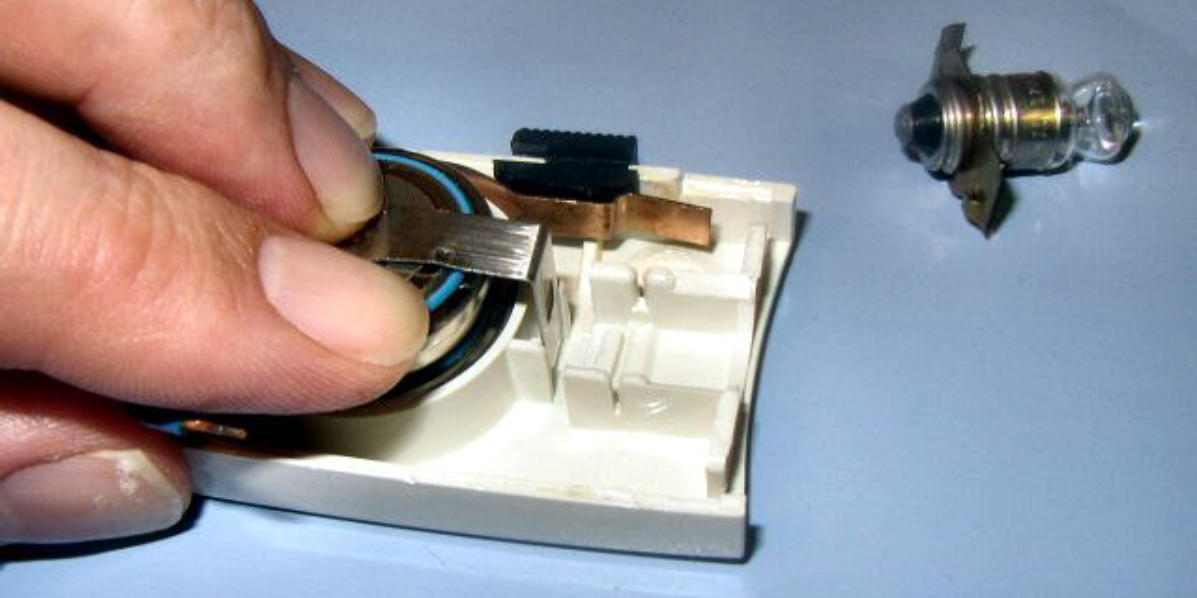
Here's a new plan though - a member on BimmerForums mentioned that you can now get LED versions of the bulb - so I bought one:

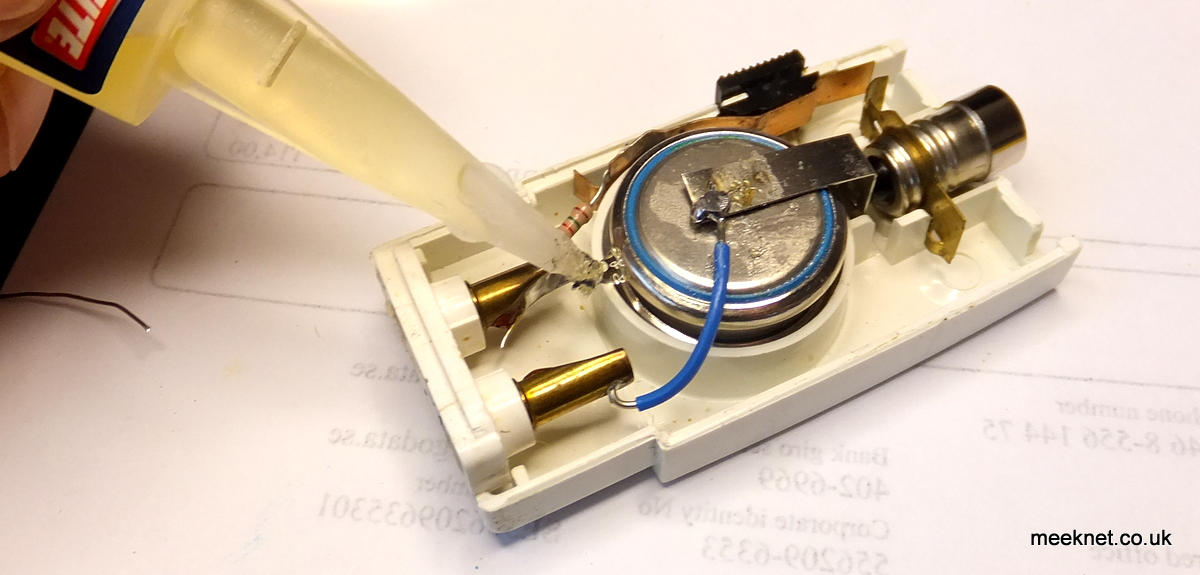
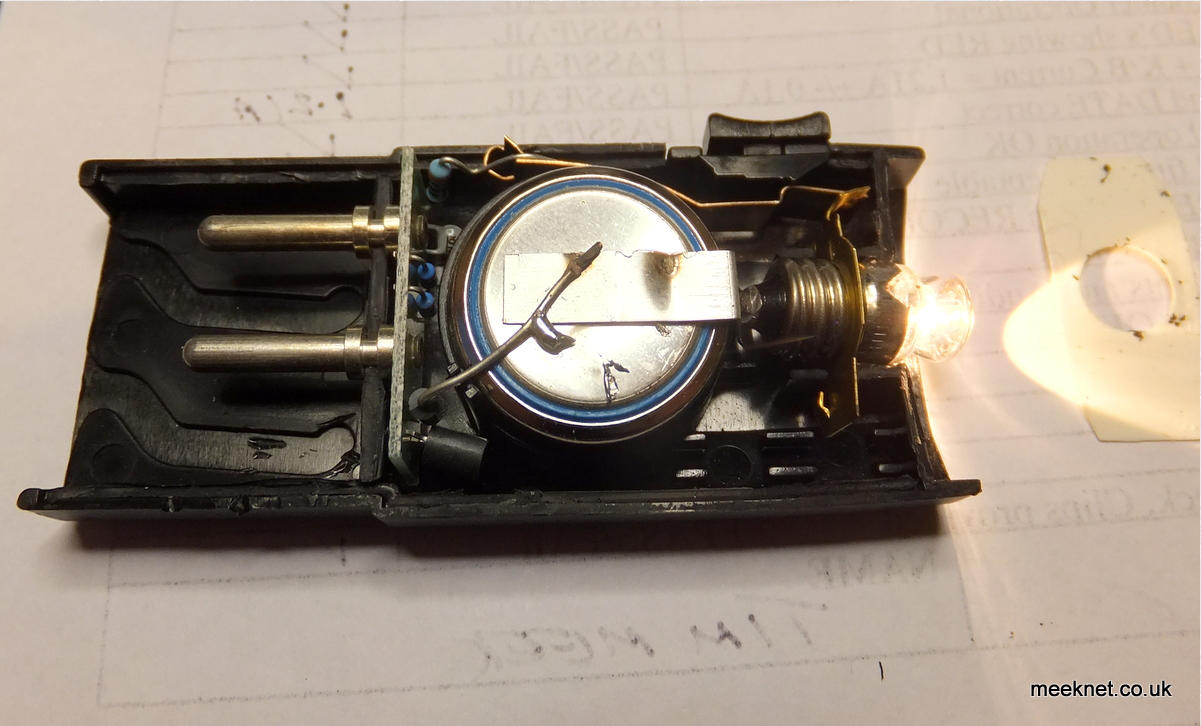
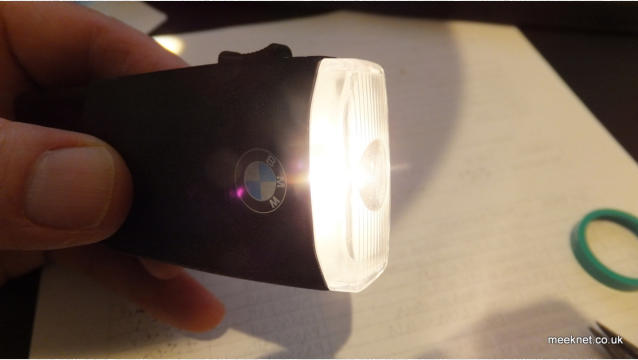
Right, all soldered and new bulb fitted - time for a test before final assembly:

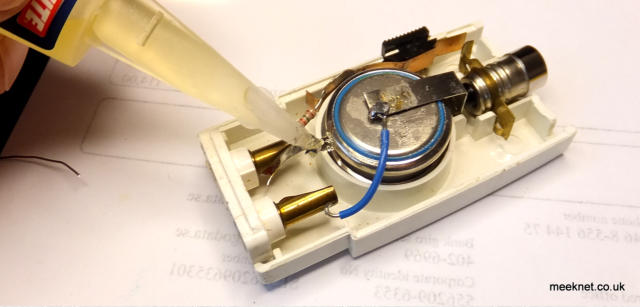
Blimey - that's bright! Time to get the Superglue out, I seem to be aiming the bottle in completely the wrong place,
but you get the idea. Bung the glue on the break line - obviously avoiding the ON/OFF switch area:
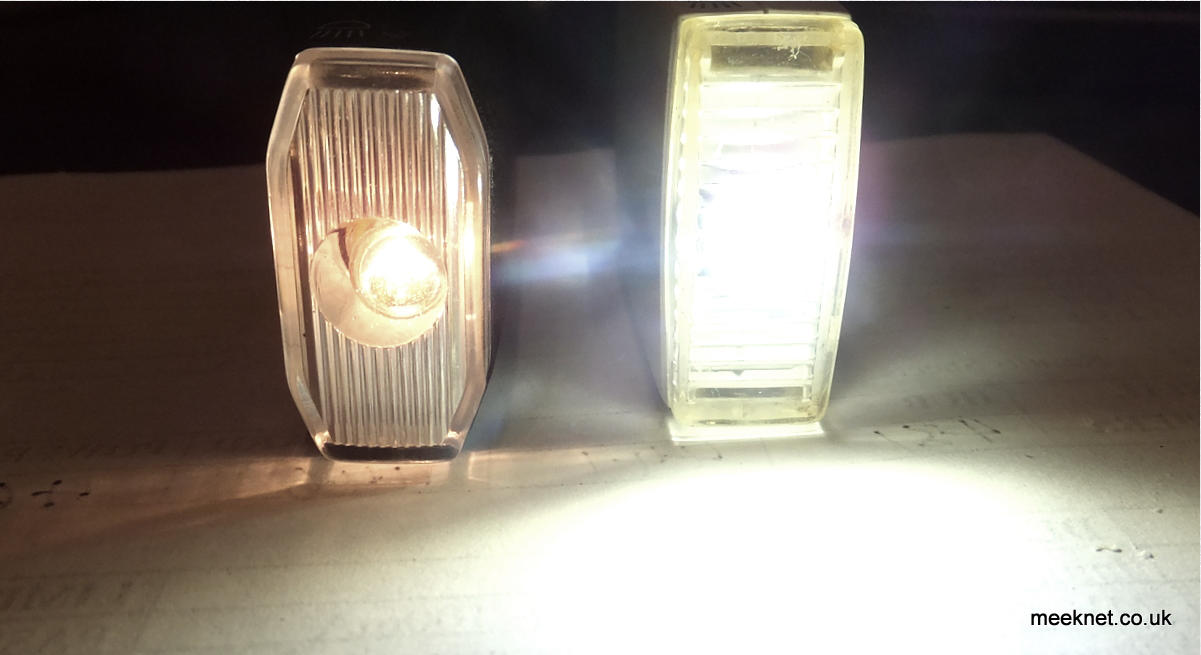
I'm very impressed with the tiddly LED bulb, it is extremely bright:

I've just replaced the batteries in an E38 torch but retained the standard bulb - so, same voltage, different
bulb comparison:
And that's it for the E31 and E32 versions - below is the same routine on the E38 version (black case) - I used the same
batteries, and you can see the corrosion that was inside both batteries - at least this time I didn't snip the wire off the
top tang. So, same routine, pictures only:
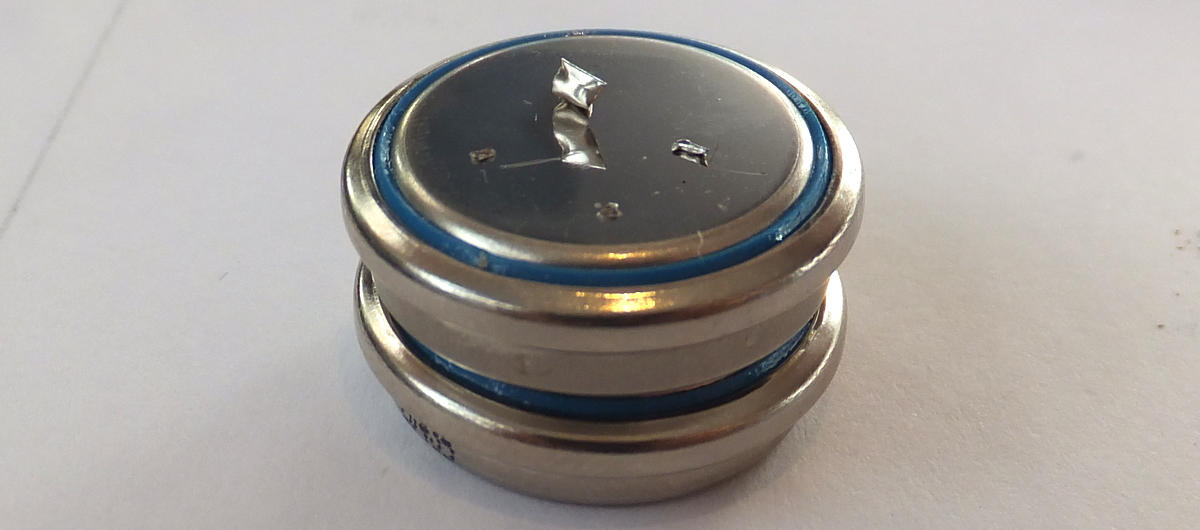
A bit of corrosion - the E31 version had the same leakage

All done, Time for a cup of tea
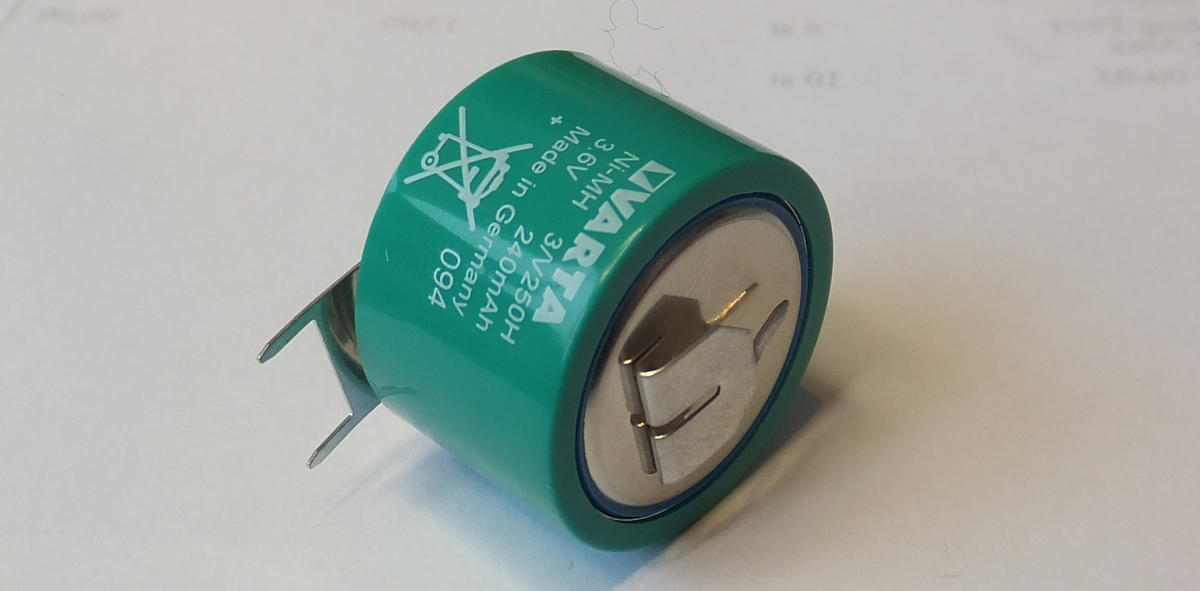
Parts used below:


Timm’s BMW E31, E32 and E38 Torch
Repair
Updated in 2018 to include the use of LED bulbs
for excellent performance


Look at that! That's the standard BMW torch used in the E31 and E32 -
but it's got 10 x the light output of the original - it's actually a useful
torch that throws out some useful light - and it will stay lit for a good few
hours as well. We’ll start with this torch and then move onto the E38
version - here's how it is done.
First - lever the torch apart, it comes apart reasonably easily without
anything snapping by levering it here:
Here's what's inside:
The batteries start to fail after a few years or so, they are
rechargeable but eventually cannot hold a charge for any period of
time. The plan is to hook them out and replace them with new ones.
As this is the second time I've done this I tried another plan - and if I
needed to do it again on another torch I would use a third plan
(blindingly obvious if I bothered to think about it)
The problem for this 'How-To' is that I haven't photographed the
final, sensible method - so read the text!
So, let's start: DON'T snip the wire off the metal tang - leave it
connected

Remove the copper strip from the battery pair with the blue wire still
connected - this saves soldering it back on later
Remove the batteries and rear connector in one piece and then pry the
lower tank from the side of the lower battery - it is spot-welded on:
In 2015, the torch I took apart contained batteries that had leaked - so I
had to remove the corrosion with the edge of a scalpel:

Sitck the copper strip and rear connector back in the case and give the
lower tang of the strip a bend so that it connects to the new batteries as
shown here.
My new plan would be to leave the blue wire connected to the top
metal tang:
This is going to get a bit confusing, but, instead of two separate batteries
you can buy them joined together as a pair - they are available from the
link below:
Cover off after bending the tag out of the way:
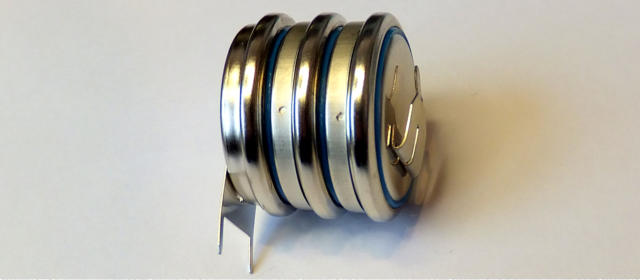
Now, if this was the double battery it would be easy - but it's a triple so I
need to remove one using some side-cutters and a screwdriver:

I've left one of the spot-welded bits of metal long enough to solder - now if
was a double battery I could have used the solder pins fitted, in fact, if I
had removed the lower battery I could have used the solder pins on the
triple battery! Never mind. Remove the lower solder pins:

Then poke the battery pair into the case
Solder the little strip of metal left on the top battery to the top metal
tang and the BLUE wire (which should have been left spot welded to the
tang) - I, of course, didn't think of this, so I have had to solder both the
tang and the wire back on:
Here's a new plan though - a member on BimmerForums mentioned that
you can now get LED versions of the bulb - so I bought one:

Right, all soldered and new bulb fitted - time for a test before final
assembly:
Blimey - that's bright! Time to get the Superglue out, I seem to be aiming
the bottle in completely the wrong place, but you get the idea. Bung the
glue on the break line - obviously avoiding the ON/OFF switch area:
I'm very impressed with the tiddly LED bulb, it is extremely bright:
I've just replaced the batteries in an E38 torch but retained the standard
bulb - so, same voltage, different bulb comparison:

And that's it for the E31 and E32 versions - below is the same routine on
the E38 version (black case) - I used the same batteries, and you can see
the corrosion that was inside both batteries - at least this time I didn't snip
the wire off the top tang. So, same routine, pictures only:
A bit of corrosion - the E31 version had the same leakage

All done, Time for a cup of tea
Parts used below: