Timm's BMW E63 and E64 Heated Seat Problems
The fix was easy, getting to the point of where to look took forever
Just as Winter set in my Driver’s heated seat gave up - it was a bit temperamental for a couple of weeks and then gave up completely.
Pressing the heated seat button would illuminate all three LED’s - and then a second later they would all go off again.
First stop was Diagnostics, and they were woefully inadequate, DIS would run through a test routine and the final outcome was something
along the lines of ‘A signal or measurement is beyond expected limits’. Yes, fat lot of good that was, INPA wasn’t any help either.
On the E31 this would be just a case of reading the circuit diagram and then tracing the wiring from the seat to the switch. On the E63/E64
the source of information is the WDS - and that covers all years, models and regional variants. It has taken two months to realise that the
WDS is horribly confused as to what is actually fitted to the UK version of the E64 - there are at least three circuit diagrams that show
different variants which are completely different to each other. This is as close as it got:
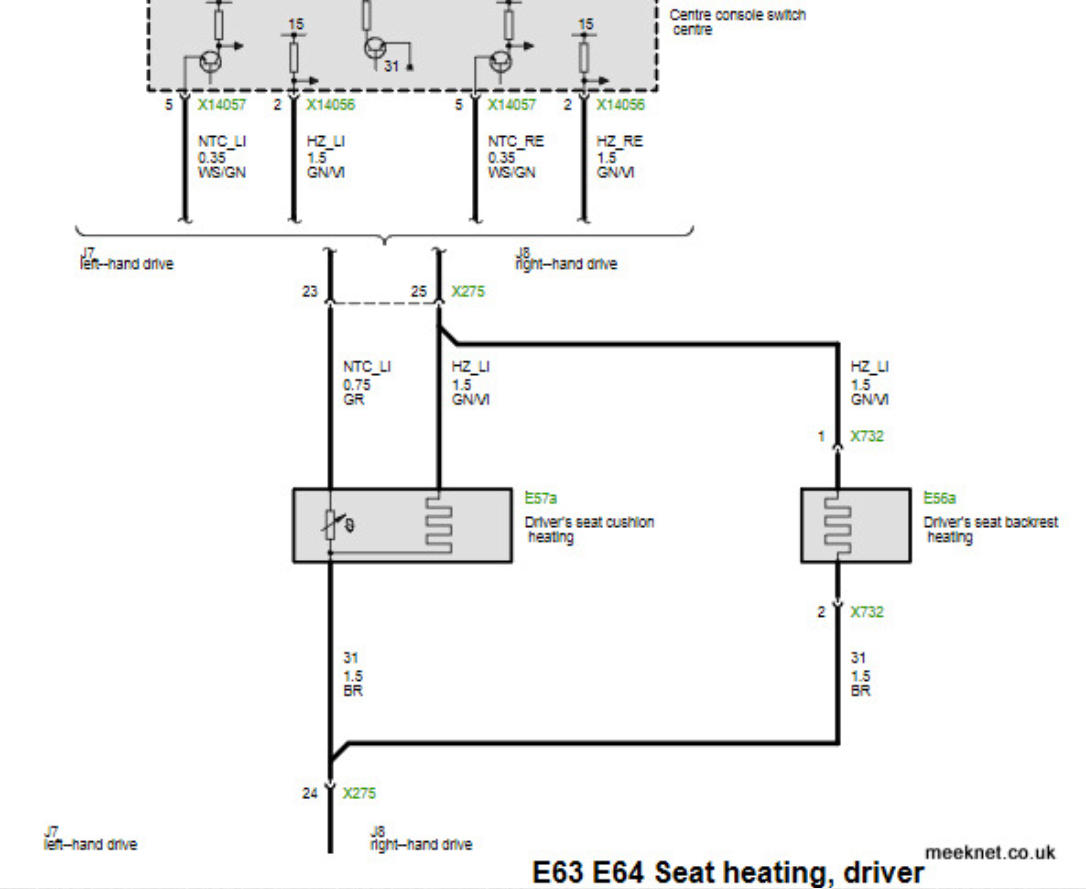
Notice the difference between the left-hand drive and right-hand drive wire colours - there isn’t any on the diagram, but there is in real
life and that caused quite a bit of confusion. To make testing a bit easier a bought a Switch Centre from Ebay, but the method of
removal in the TIS and on YouTube was long-winded and involved disconnecting all sorts of modules - so I had a go at removing the
switch centre from the other end - and it’s very easy indeed:
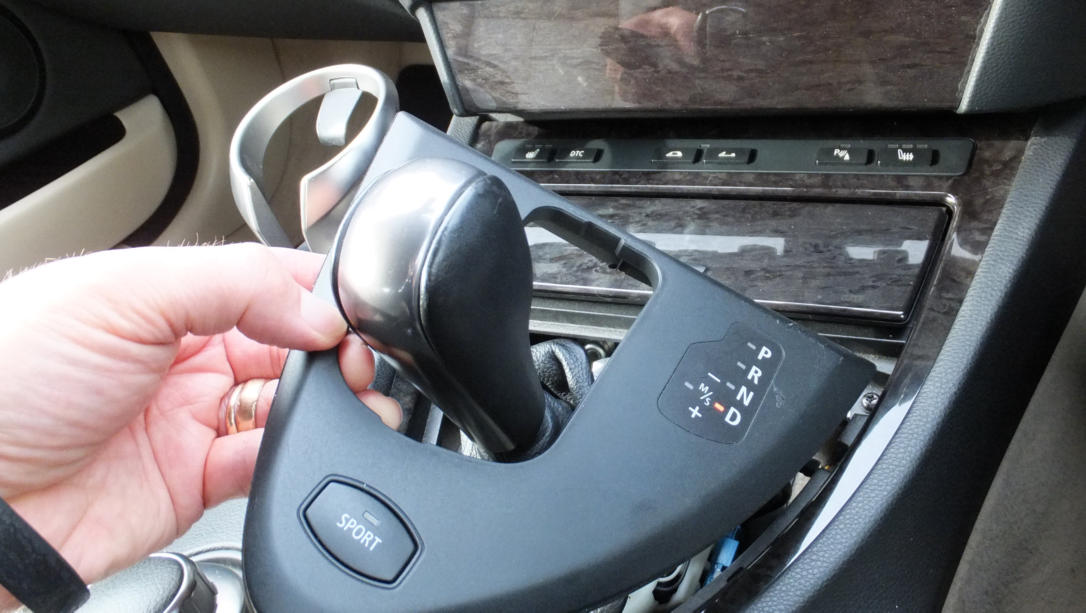
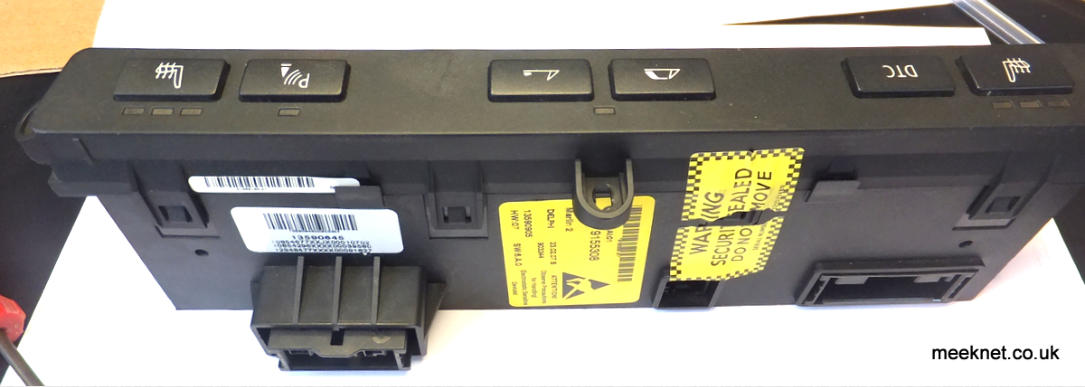
Not shown is the Sport switch which has a separate connector
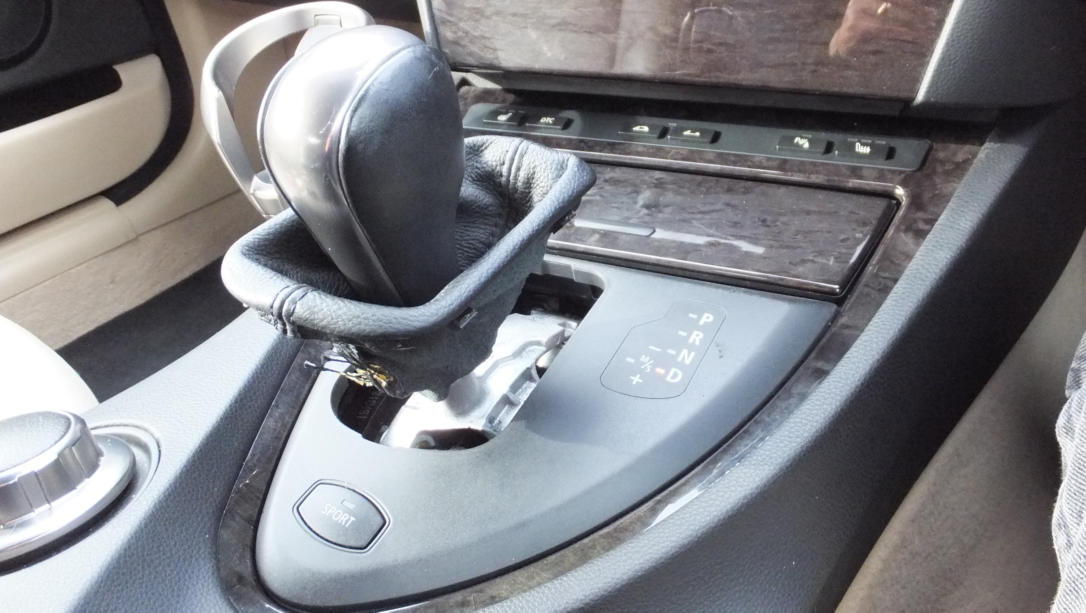
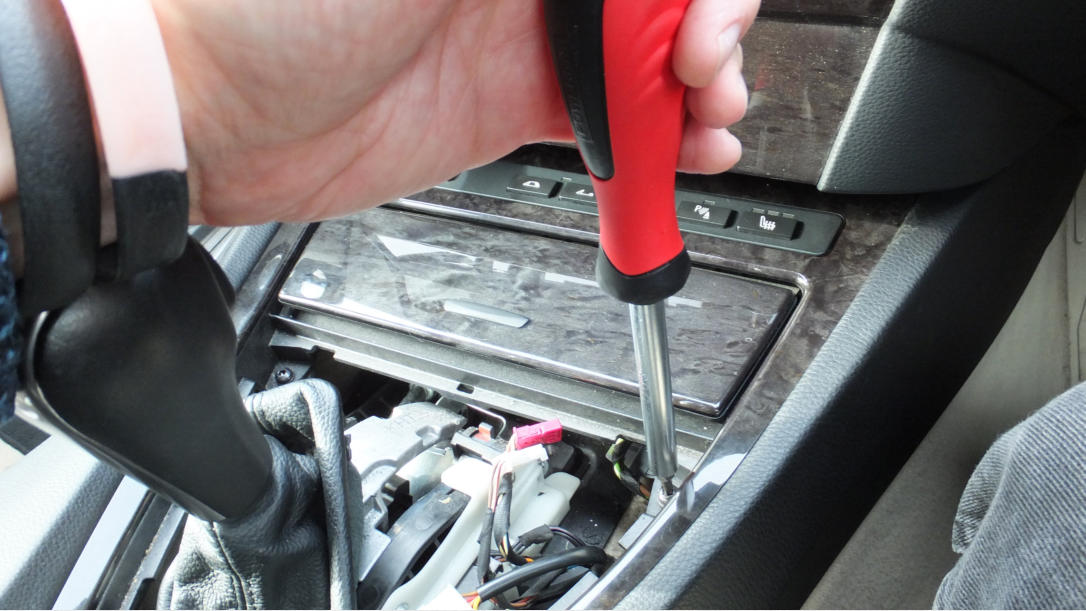
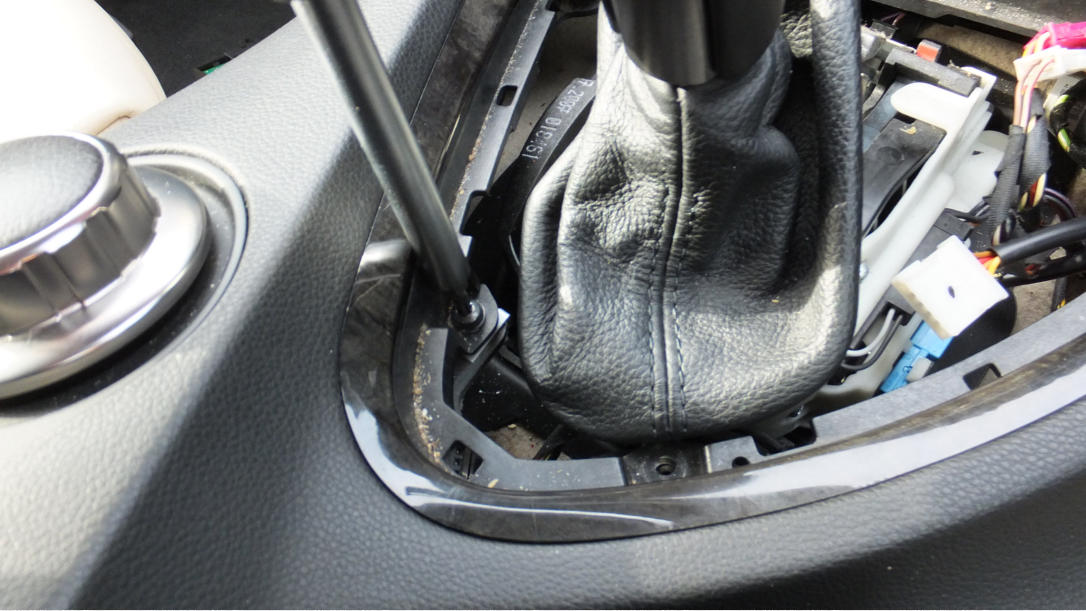
Four Torx screws hold the surround in place - with them removed the surround can be lifted up at the rear. There is an upturn at
the front end which slots behind the vertical trim - lift the back end up until the front is released
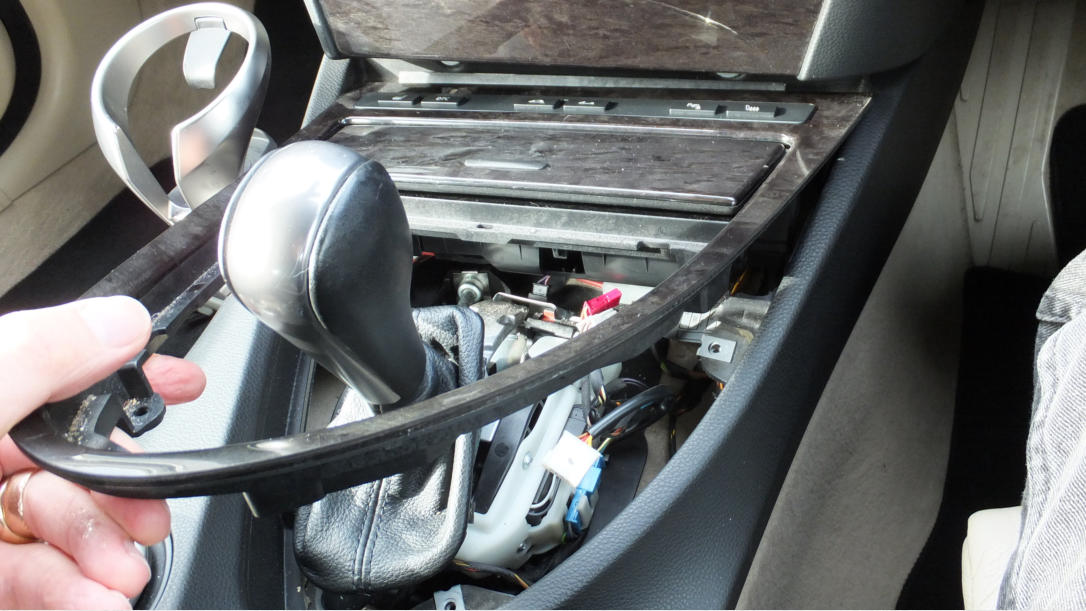
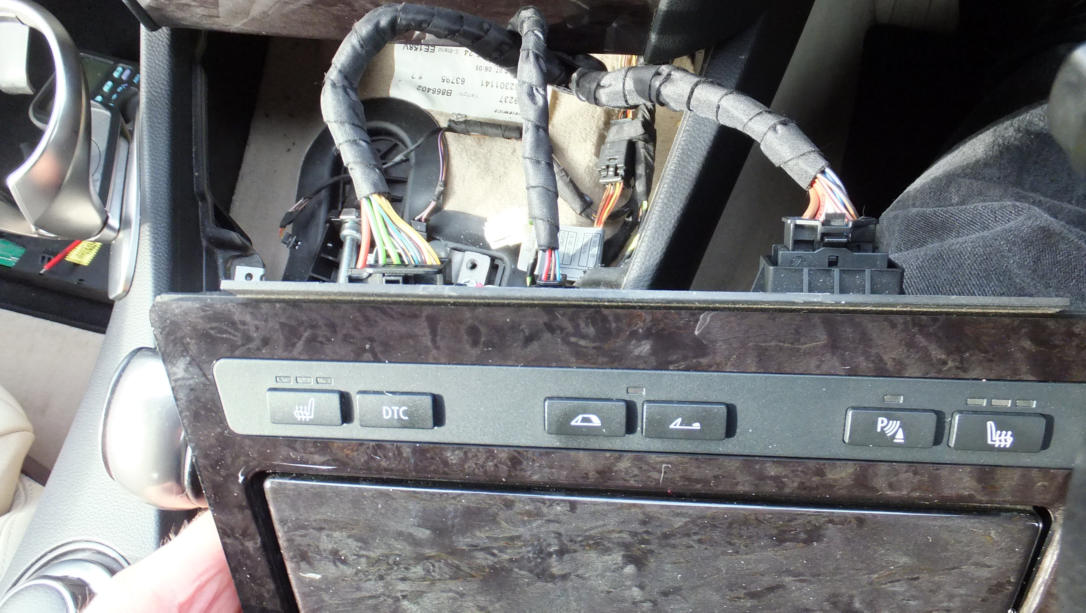
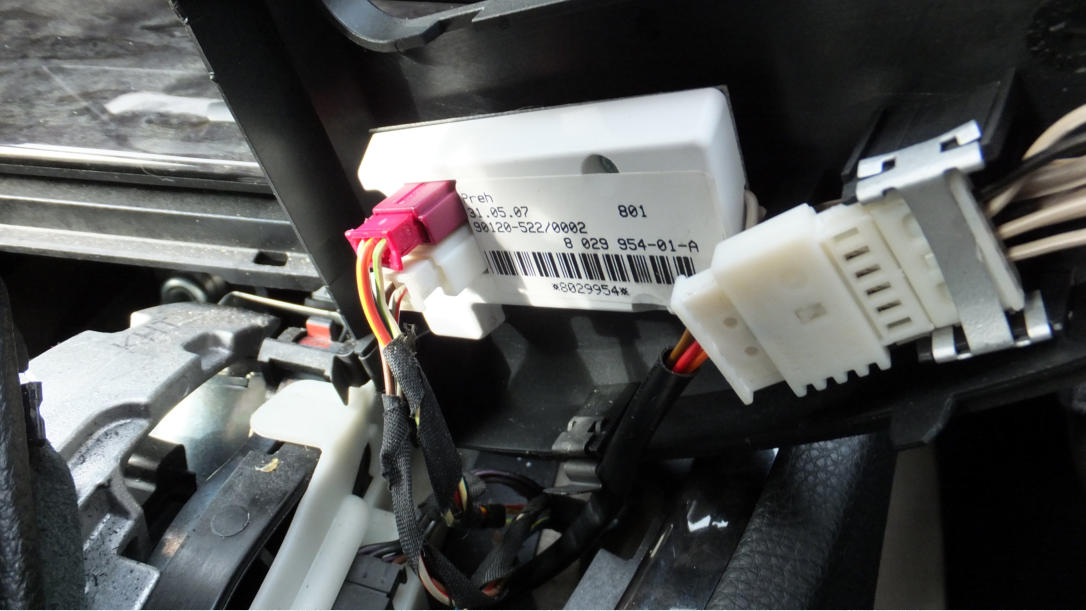
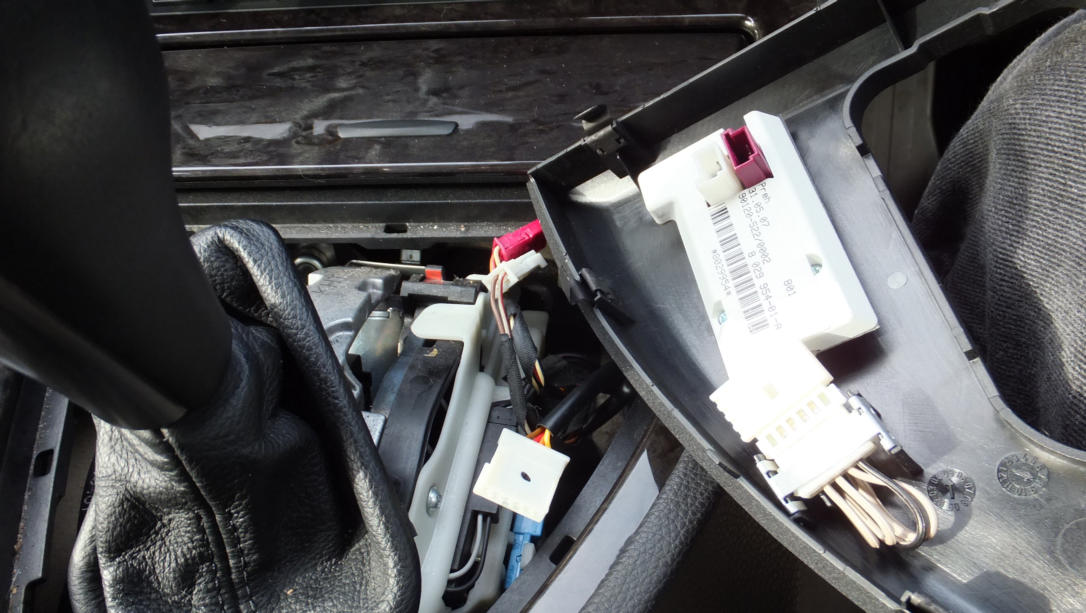
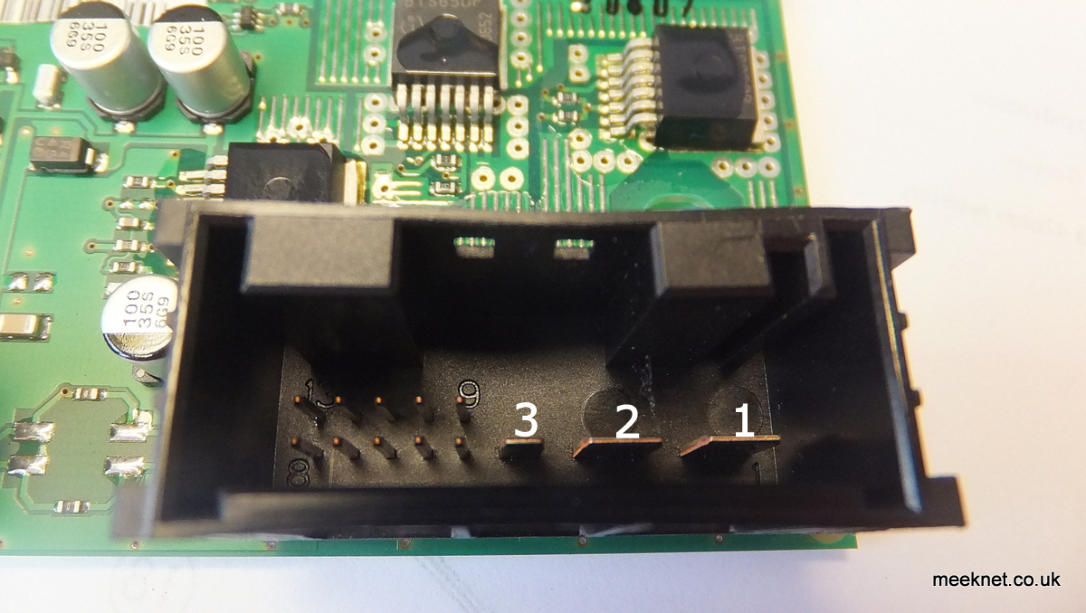
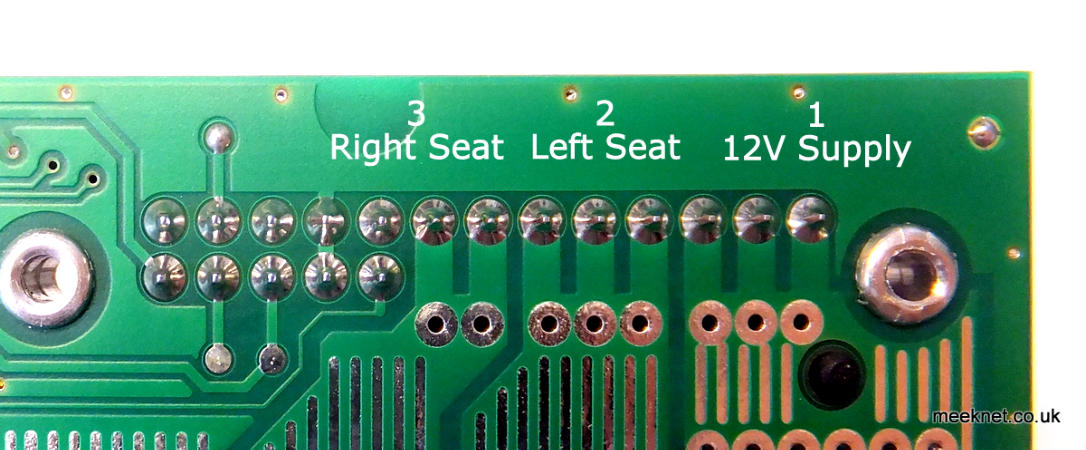
That was a darn sight easier than expected - I’ve reached the conductors for the heated seat. If you want to know, the left-hand
connector is the one we need, The conductors are shown below. From the left, the conductors are: RED = Constant Power Supply
via Fuse 33; GREEN/VIOLET = Left-hand heated seat switched supply; GREEN/YELLOW = Right-hand heated seat switched supply:

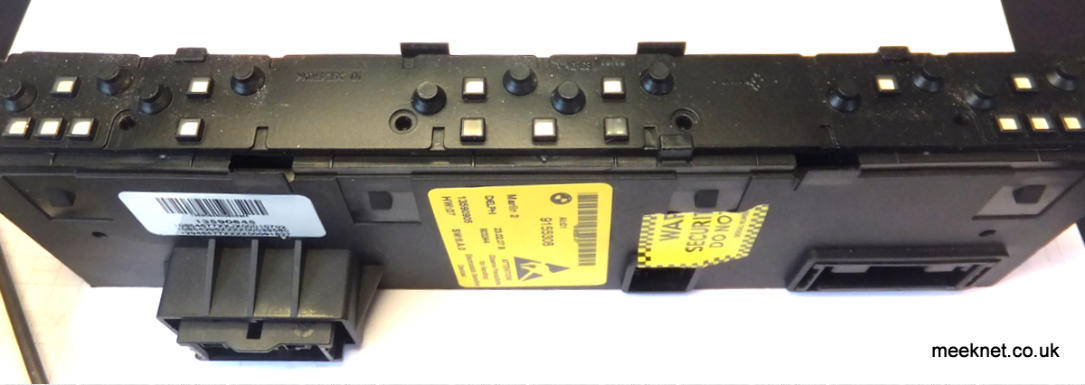
The smaller connector shown above contains the temperature sensors for the seats on pins 5 and 6. The large right-hand
connector contains the 0V (chassis) return from the seats on the left-hand BROWN conductor. I was expecting the seat conductors
to be on one connector but no, they are spread out over all three.
I tested the resistance of the heating elements from these conductors - the passenger seat showed a resistance of around 3 Ohms
- the driver’s seat showed around 1 Ohm. While I was at it I stuck the meter on Amps and measured between the RED (constant
12V) and the GREEN/VIOLET (heater supply to left seat) - the meter showed around 7A which sounded about right at 85W or so
for the heating elements.
I then tried between RED and GREEN/YELLOW (heater supply to the right seat). The meter said ‘BEEEEEP’ which meant the
current was above 20A and there must be a dead short to 0V (chassis) somewhere. So, time to move onto the seat.
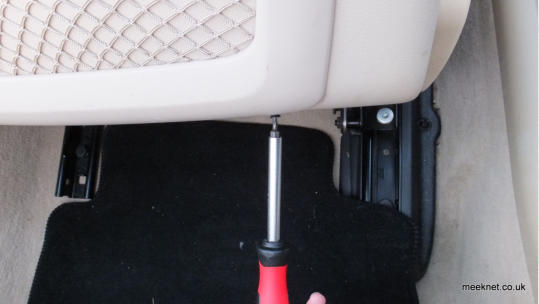
Below is the view looking backwards under the drivers seat - I adjusted the seat fully upwards and backwards
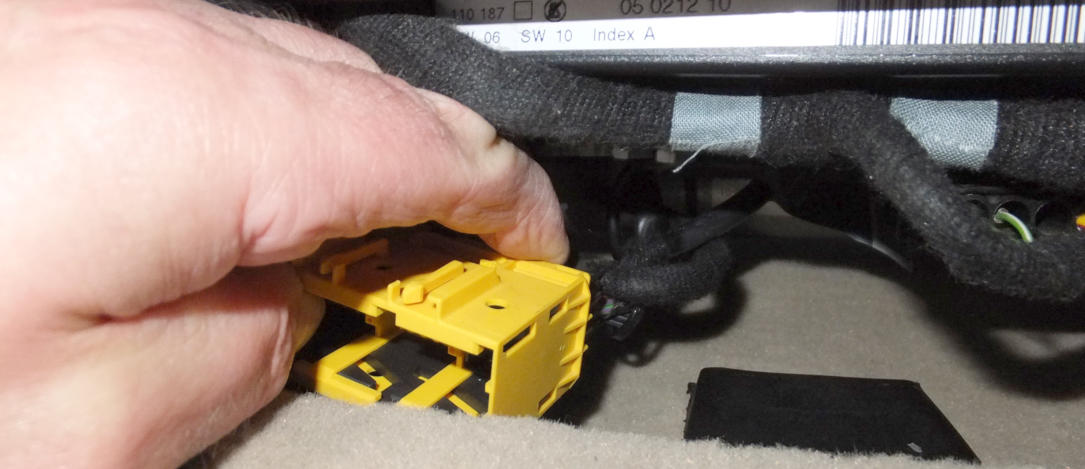
There is a single connector for the seat - it has a yellow surround as seen above - the yellow means that the connector includes
SRS conductors (Supplementary Restraint System) - in this case for the seat belt pre-tensioner and the pyrotechnic head restraint.
This also means that if you unplug this connector when the ignition is switched ON you will get an SRS warning on the dash which
can only be reset with diagnostics.
To start with I cut the binding around the loom
A checked the resistance between the BROWN and GREEN/YELLOW conductors - dead short. So, I then disconnected the connector
from the seat and measured again - and no short, so the dead short is in the seat. This where it got a bit confusing as the wire
colour changes as it goes through the connector pair - after the connector the wire colour is GREEN/VIOLET.
There are quite a few heating elements in our seats - unfortunately the elements are bonded to the leather, if your element fails
you need to replace the leather. I have seen a repair made with soldering and short wires to bypass the burnt part of the element
- by the way, before the element goes open-circuit it usually burns a hole through the leather - and your backside if you don’t
notice it happening.
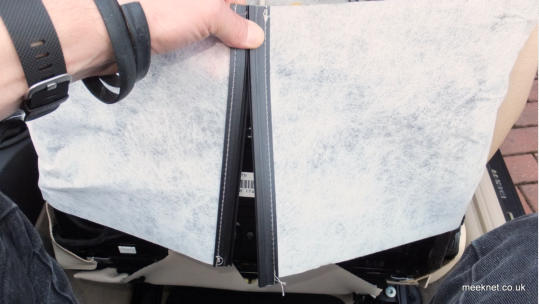
This isn’t the case here, we have a dead short somewhere. So, off came the back of the seat to check the wiring where the WDS
says the only connector is for the heated elements

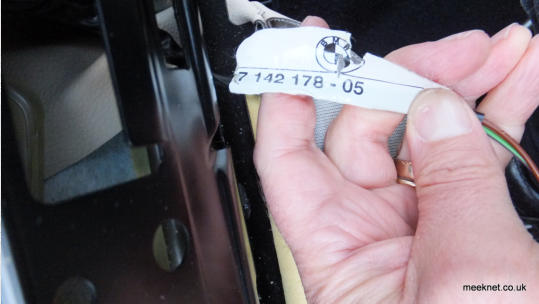
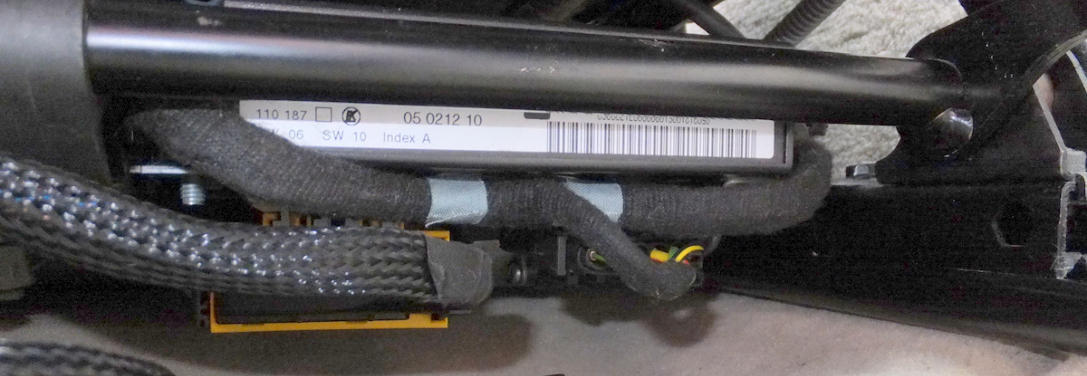
The last picture shows me holding a loom with a part number on it. This is a repair cable which must have been retro-fitted by
BMW at some point due to seat heating problems as it contains the BROWN and GREEN/VIOLET conductors. The sheathing is
smooth rather than the usual woven stuff - I would guess that this was a wear problem at the hinge as this is where it ran:
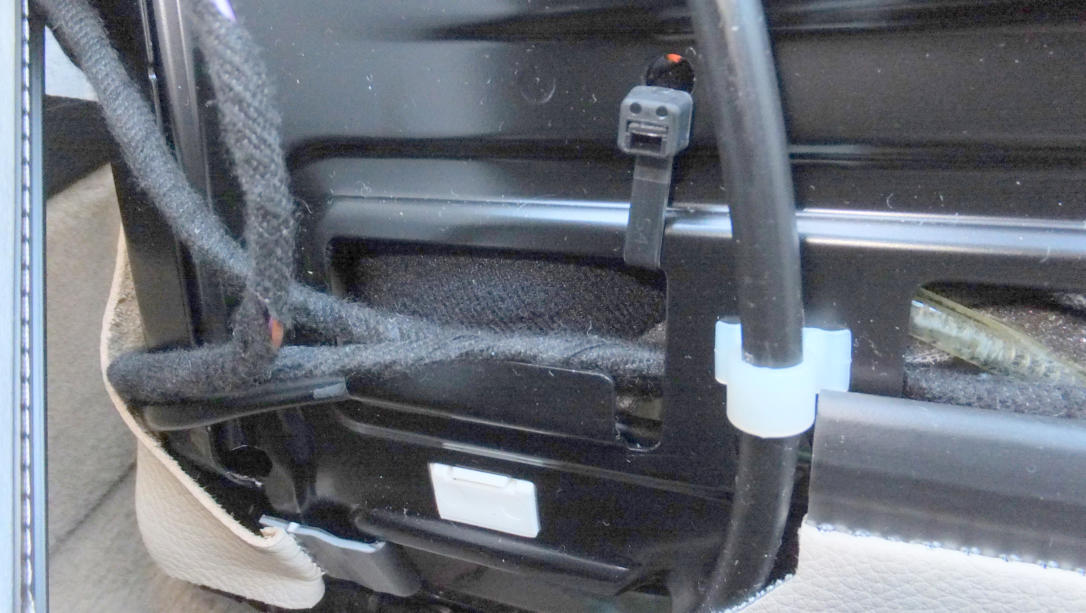
The smooth-covered loom can be seen above where it goes around the hinge between the seat base and the seat back. The WDS
says there is a single connector in the heating loom - but there’s three of them dotted around. This is a view down the back of the
seat and I have disconnected a connector pair to see if the fault is in the seat back (which is where the mating half goes). The
heating element in the seat back measured 12 Ohms - the left-hand connector (as shown above) still showed that the short was
elsewhere.
At this point I should have removed the seat from the car to find the short - but I actually found the short by accident when I
went back to the front of the seat and had a look at the main connector to see where the single pins at the connector actually
spread out to the numerous conductors for each of the heating areas.
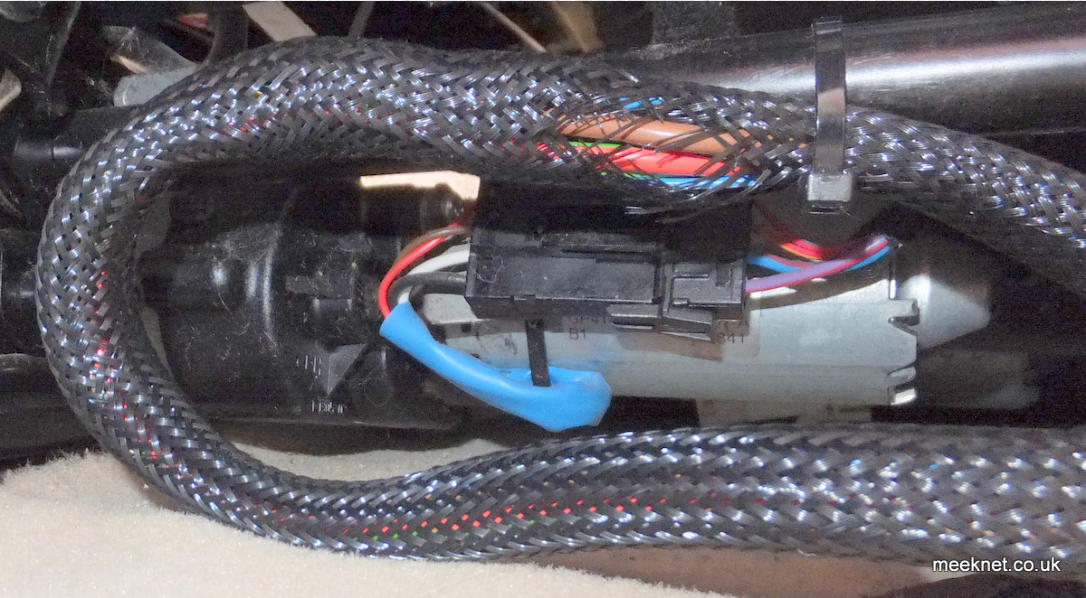
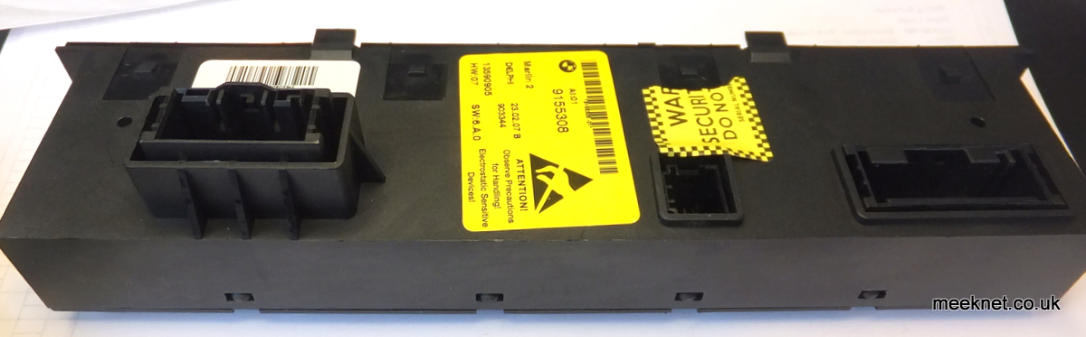
The main branch in the loom is actually in X275:
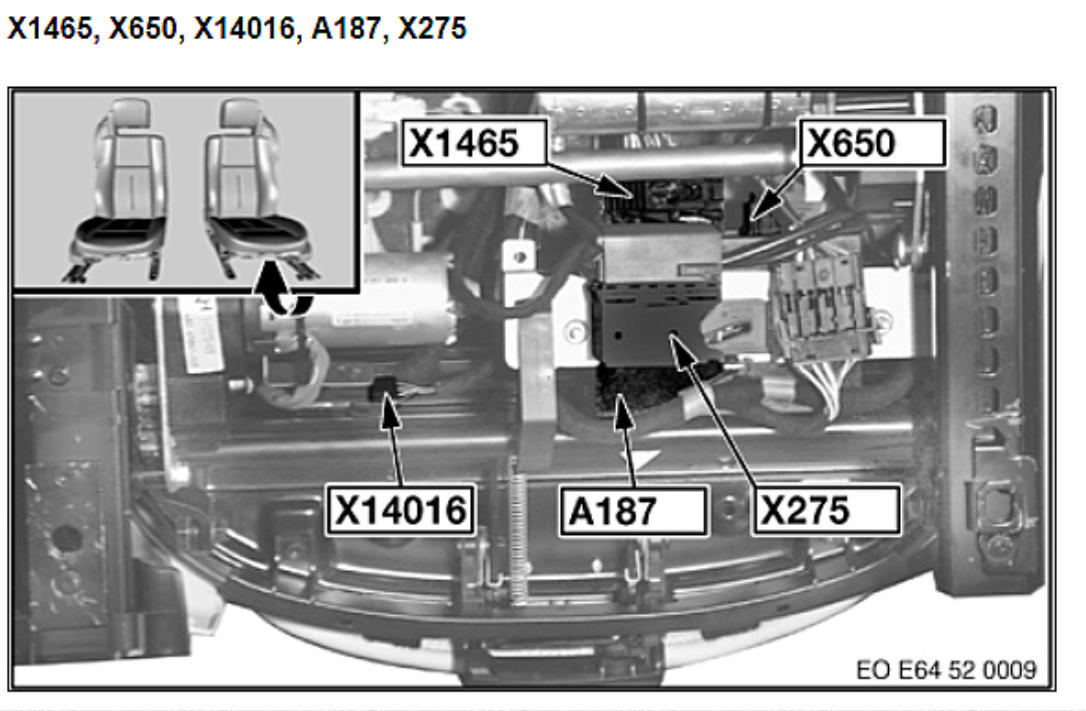
X275 is the main connector as seen earlier with the yellow surround:
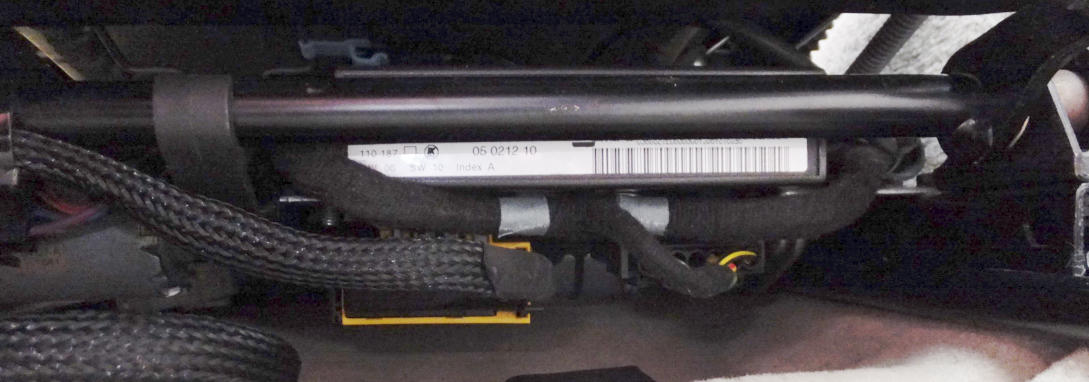
The connector pair is held on the underside of the module above it (which is the memory module) by a sliding clamp - with the
input connector removed I gave the mating half a good pull to see what is going on:
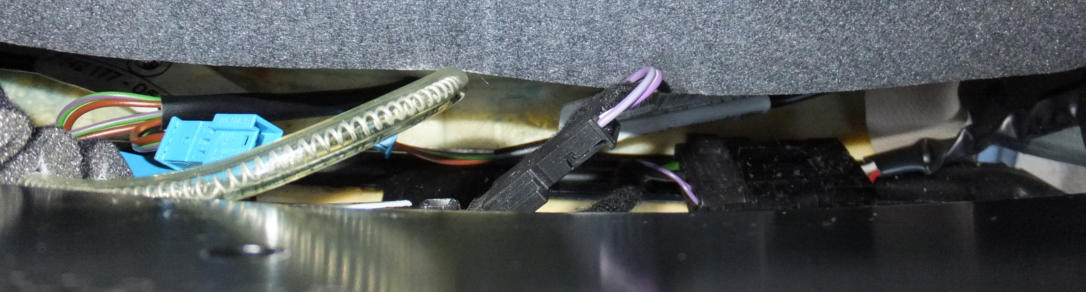
That loom really doesn’t want to move much - but I can see a bundle of conductors that go to the heaters that were strapped in
position with a tie-wrap. As soon as I cut that tie-wrap the short disappeared.
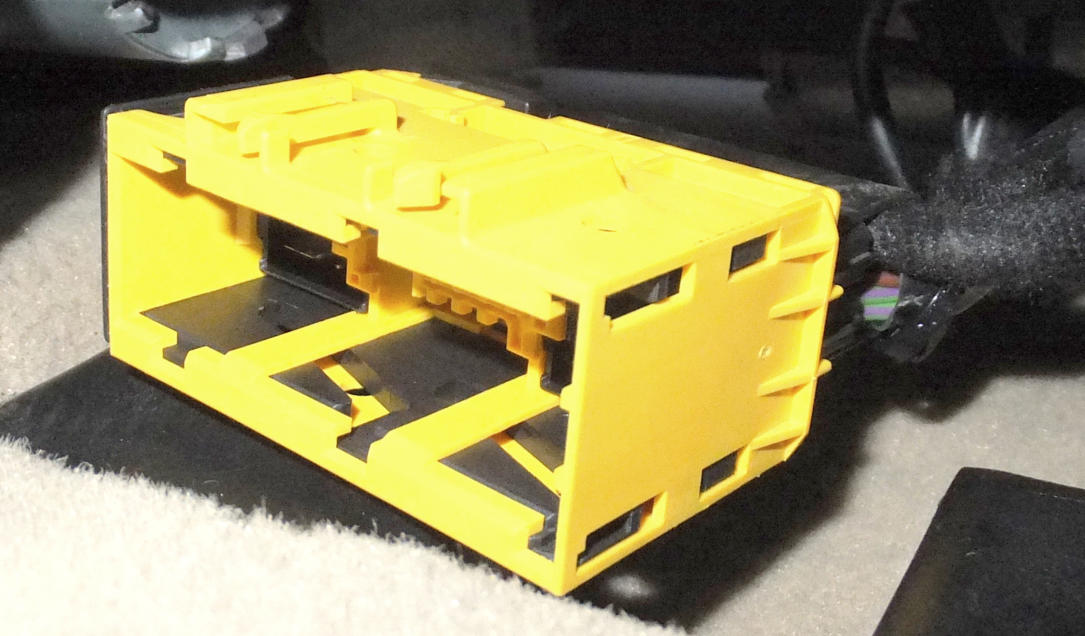
Above can be seen the BROWN and the GREEN/VIOLET conductors - the tie-wrap had pulled the two pins together that caused
the short - right at the bottom can be seen the smooth-sleeve where an update had been made and it was the process of
updating the loom that caused the problem - typical!
Right, that’s it, fix done and still working a couple of weeks later. Below is the dissassembly of the Centre Console Switch Centre.
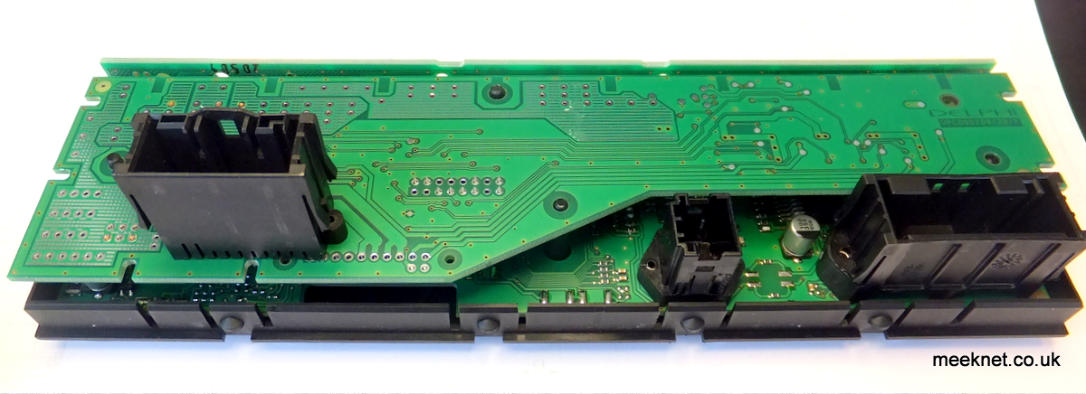
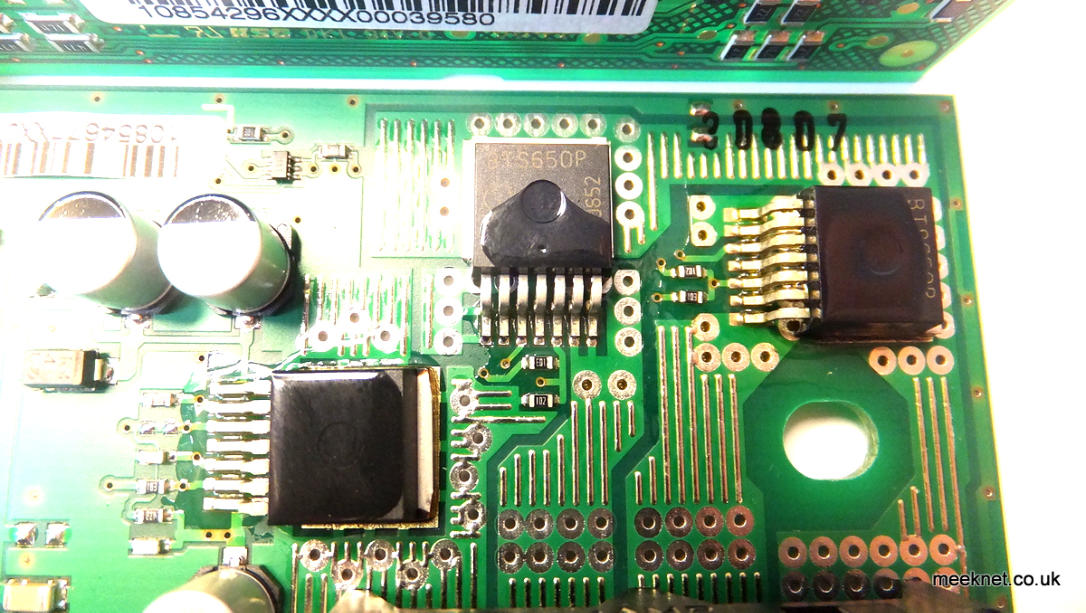

That will do
All done, time for a Cup Of Tea
Not shown (and not noticed at the time), there is a loom to the cigarette lighter socket - disconnect it at the connector pair