Timm's BMW E31 - How To Fit a WiFi Dash Cam
A method that allows remote file downloading
I’ve fancied a dash cam for a while - but the standard method of installing one didn’t appeal with a trailing wire being poked behind the A
pillar and plugged into the cigarette lighter socket, no chance of removing any trim on the E31 without something self-destructing. So, here’s
a plan that adds a few features:
•
The camera will stay live for 16 minutes after the car is locked
•
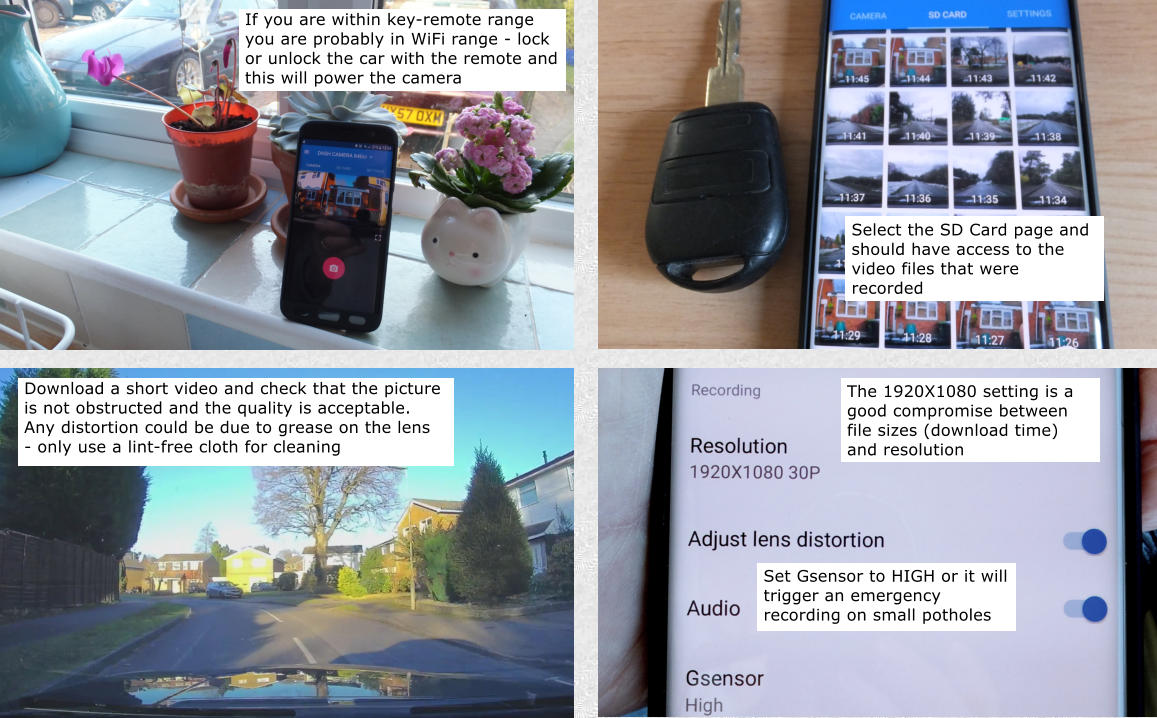
The video files can be remotely viewed and downloaded if within WiFi range
•
No trailing wires
•
No trim removal required
•
No need to plug into the cigarette lighter socket
•
Remote camera activation if within key remote range
•
Will not discharge the car batteries
We will be using the Yi 2.7K Ultra Dash Cam wired into the interior light system
The interior lights on the E31 are powered via the Consumer Cut-off relay - which is controlled by the General Module. This is done so that if
the lights are left ON when the car is shut they will switch off automatically after 16 minutes. I have used this supply in the past for the
ambient lighting. The relay has oodles of capacity in reserve for running the camera.
Won’t the camera flatten the batteries? As I was messing about with measuring closed-circuit current I measured the addition load from
the camera - which was 150mA, pushing the 16-minute countdown current from 500mA to 650mA - an additional 0.04Ah from 150Ah
batteries. So, no, it will make absolutely no difference, the current is small compared with the cars electrical system demand.
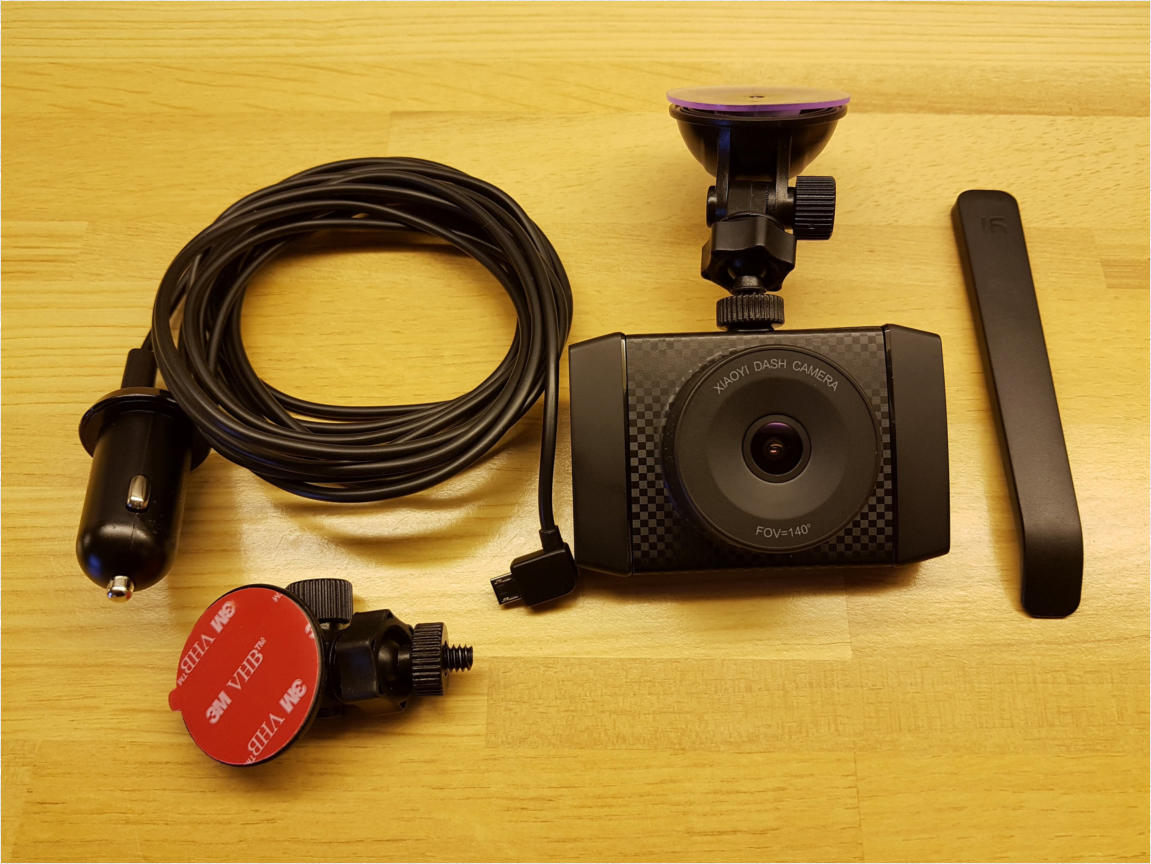
Here’s what you get when you buy the Yi Ultra:
Preparing the wiring and power supply
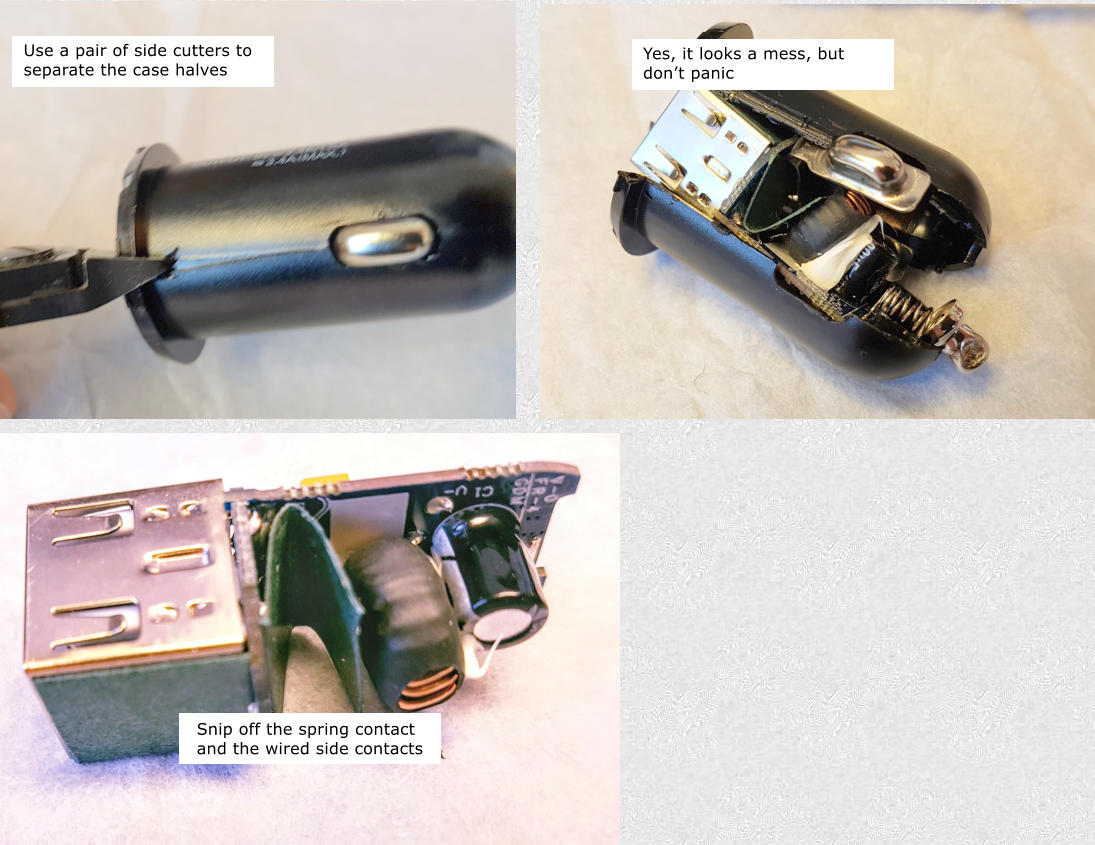
The camera requires a 5V supply at around 1A maximum - rather than use the supplied converter I bought a hard-wired unit from Ebay - and
that powered up the camera OK but blasted out so much interference it stopped the radio working! So, we will be using the supplied converter
instead - and that means a bit of soldering.
Below is what we are aiming for:

We need to do a couple of changes to the kit that is supplied with the Yi Dashcam
•
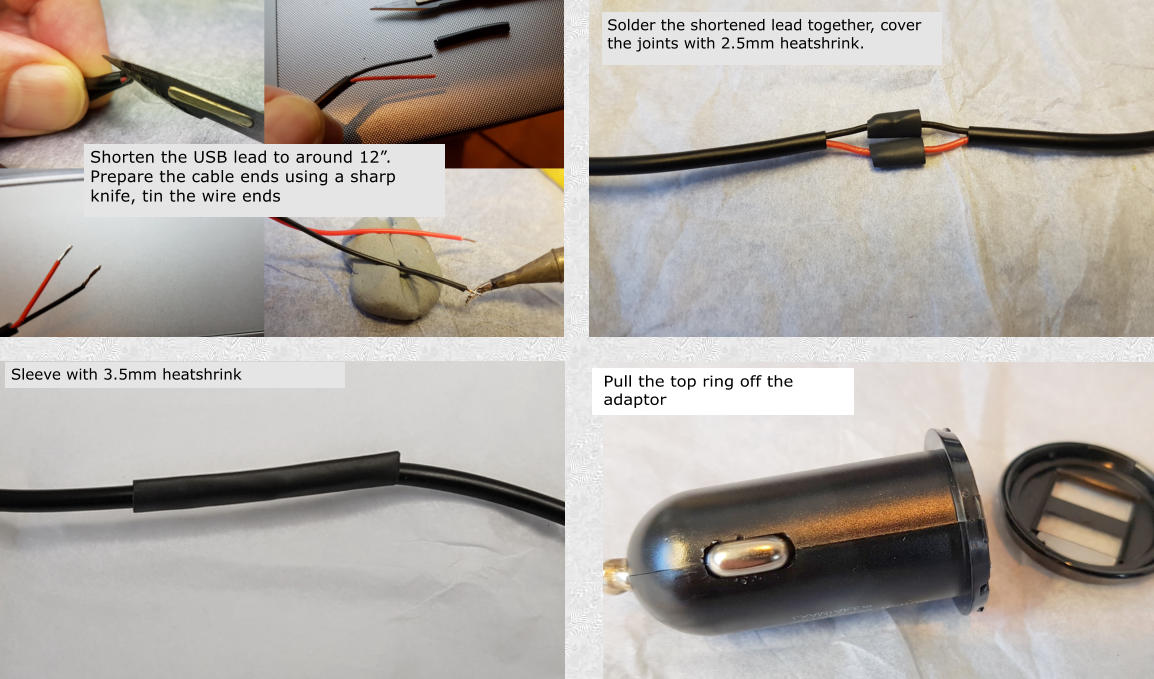
Shorten the miles-long USB lead
•
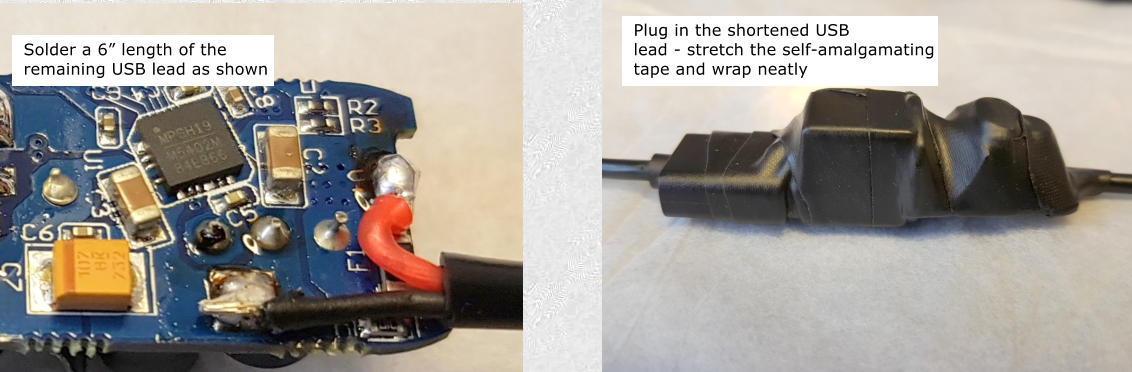
Open the cigarette lighter USB 5V adaptor and solder wires to it
•
Wire the cigarette lighter USB 5V adaptor to the interior light timed 12V supply
For the lilly-livered, there is an alternative to chopping stuff up - and I did this when fitting a dash cam to the 650i (and then took it apart
again and did it as detailed here) - you can keep the USB lead at its original 2 metres, find a couple of short bits of wire to connect the
adaptor to the interior light (poke the negative into the side of the adaptor, slightly squish the positive pip and twiddle the second wire
around it)
But, here’s the proper way to do it:
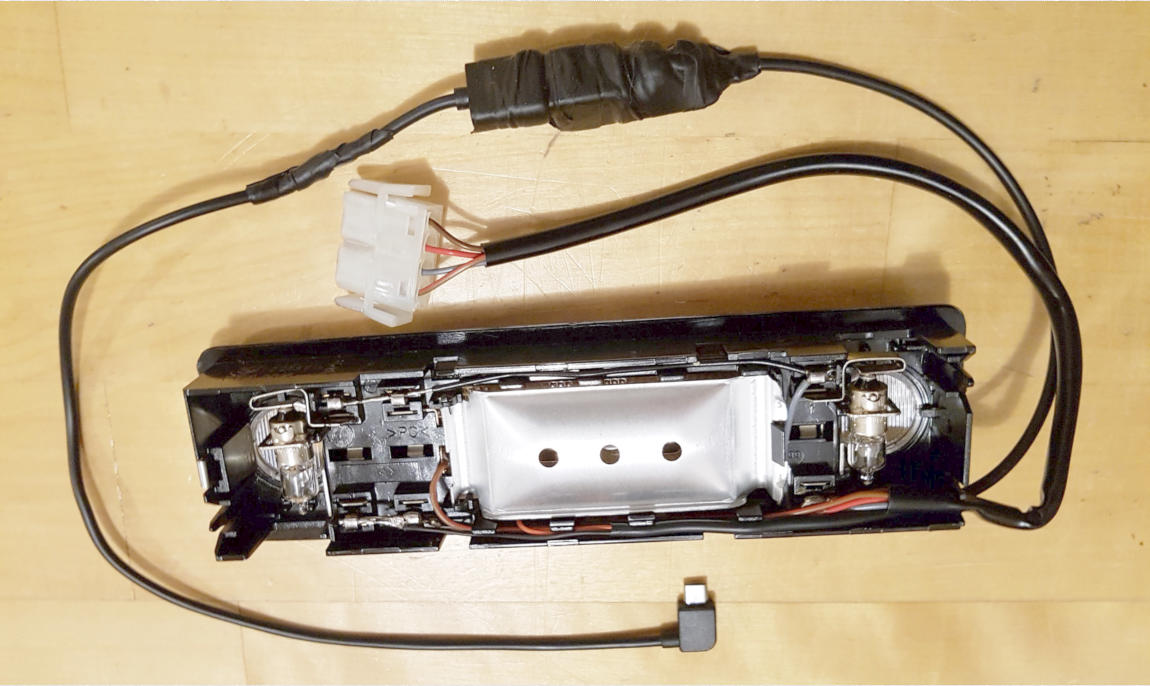
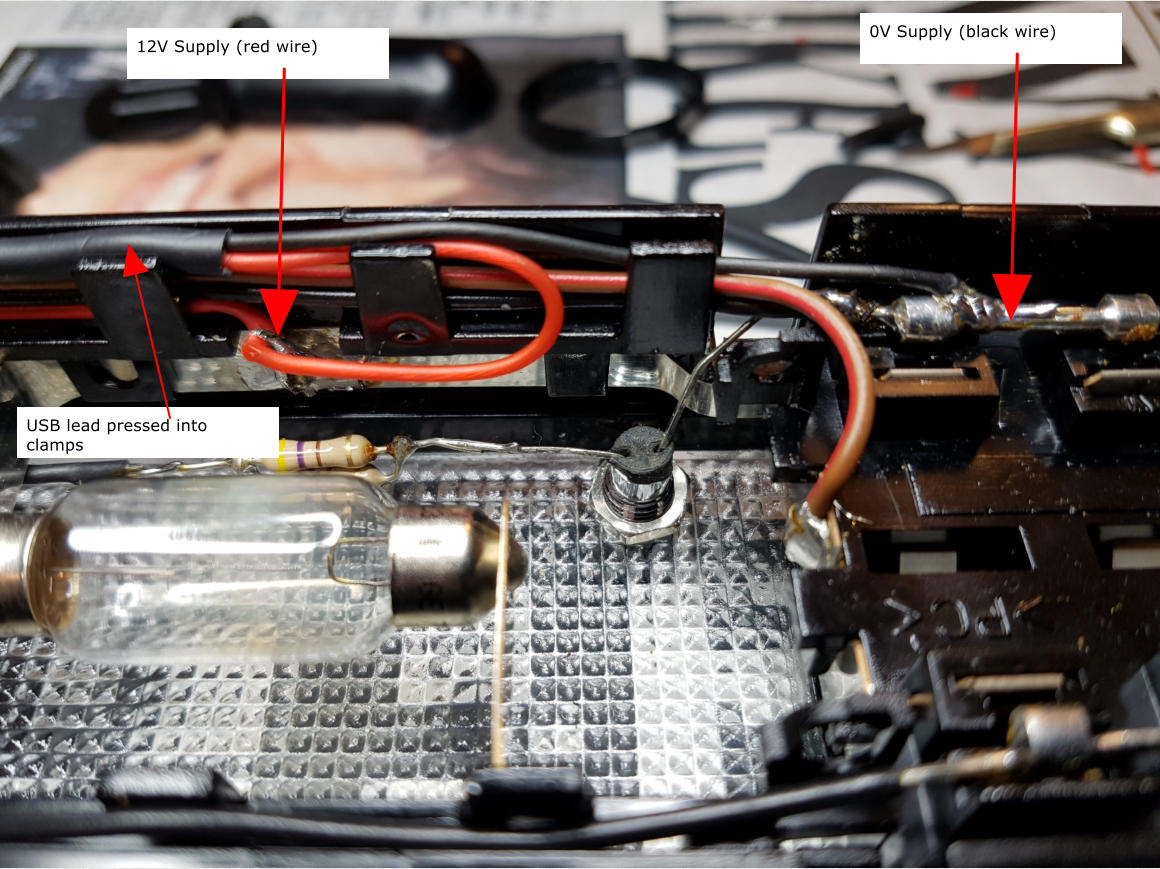
That’s the 5V supply ready - now on to the interior light. We will be soldering the input to the 5V converter to the 16-minute timed 12V
supply - the same one as used by the Ambient Light modification. This supply is activated as soon as the car is unlocked and remains live
while the car is driven, it switches OFF when the car is switched off and left for 16 minutes - it does this whether the car is left locked or
unlocked, it even switches off if the bonnet or boot is left open.
Next we wire the 12V timed output from the interior light to the 12V/5V converter. Strip back a good 4” of outer insulation, strip and tin
the ends and solder them to the interior light as shown below. The negative is easy enough - the positive is best soldered to the short
exposed core of the existing red conductor rather than the strip which doesn’t take solder too happily:
Fitting and operating the system
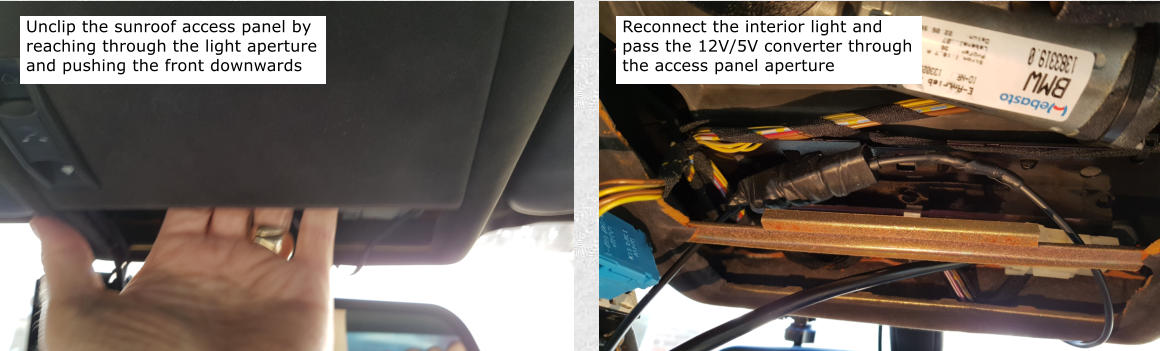
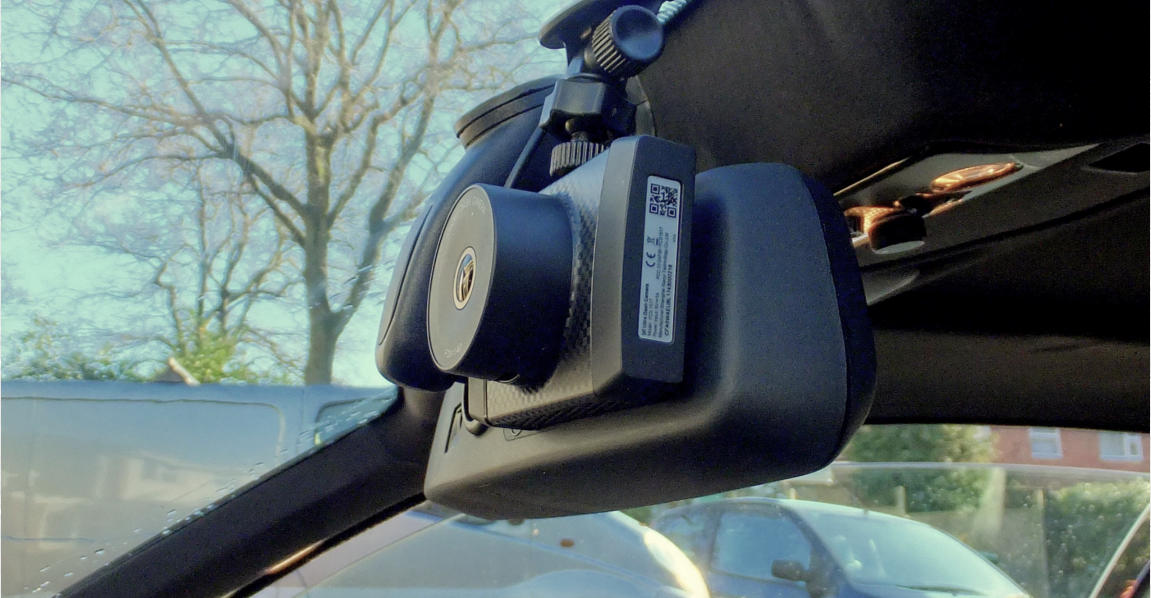
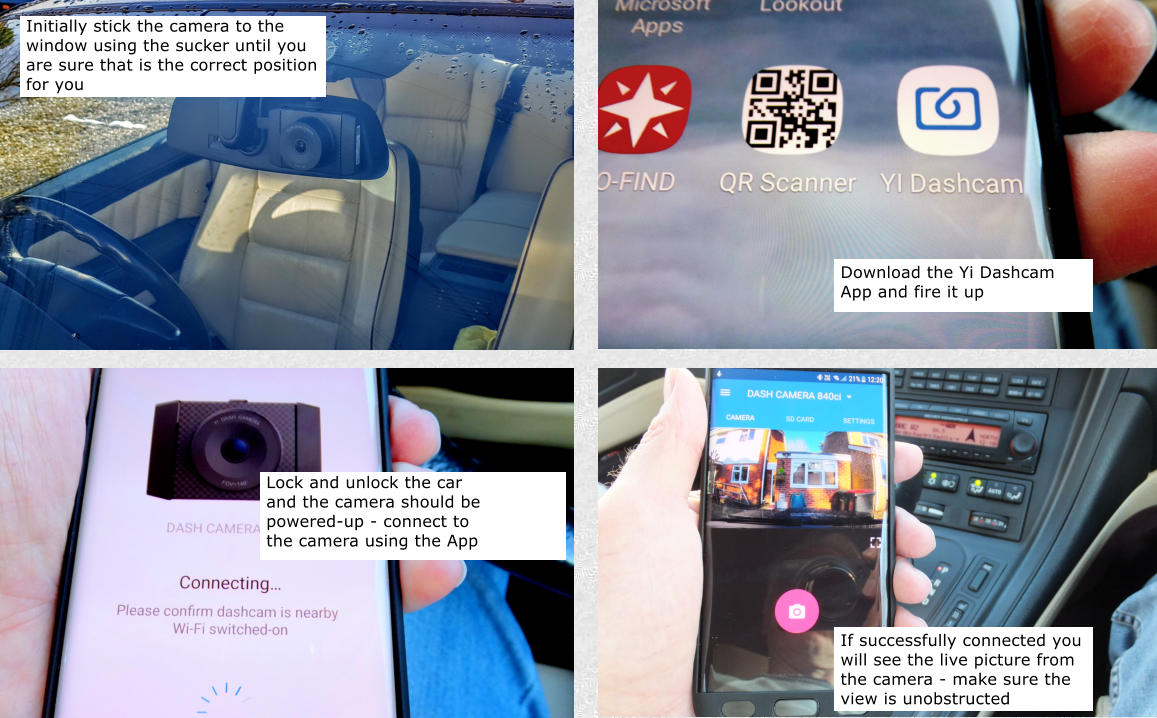
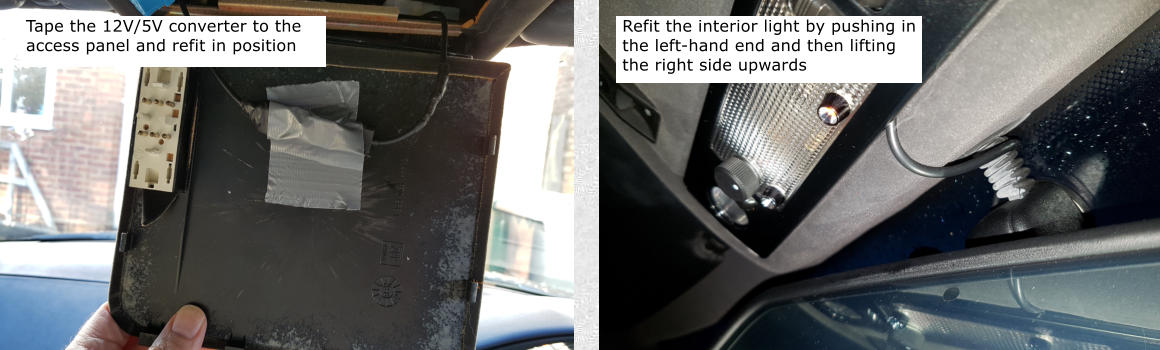
Once the interior light is complete with the wiring and 12V/5V converter it is time to fit it to the car. I looked at the possibility of passing
the USB lead through the headlining towards the windscreen, possibly using the grommet for the rear-view mirror - but there is not
enough room through the grommet and I really didn’t fancy making a new hole. The rigid material would not have been a problem, but the
orange foam/adhesive and the headlining material is extremely fragile, so instead I have routed the USB lead as shown below.
That’s about it - it looks much more complicated here than it is to do in real life. My dash cam has already recorded some dodgy driving -
and - managed to record lightening during a thunderstorm with the camera being activated by the key remote!
The best review of this camera is by Techmoan here
Time for a cup of tea!

Remote file downloading and control
With the camera fitted and working
12V-5V Converter wrapped
in self-amalgamating tape
Interior Light connector
Micro USB Dash cam input
Interior Light assembly
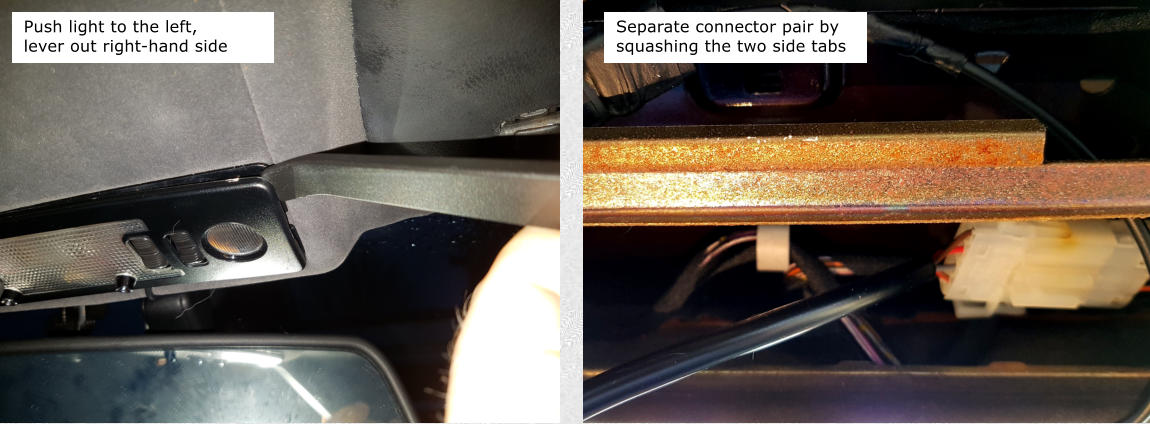
Remove the interior light from the car:
Go for a good blast to check everything works as it should