ANGEL-EYE FITTING
INSTRUCTIONS
FOR FACELIFT + XENON
After fitting Chromeline Designs Angel
Eyes to a pre-facelift E38 I had a go at fitting them to my facelift E38. There
are quite a few differences so instead of adding these instructions to the
previous thread I thought I would start a new one.
I reckon on around 1 hour per side, you need to do a bit of soldering but it is
all pretty easy stuff. The photographs are from three different cars, one of
them being pre-facelift but only where the facelift changes do not make a
difference. These instructions make the task seem a lot harder than it actually
is, it is all pretty straightforward really:
They can be purchased on-line from here for £99.95:
Chromeline Design
Indicator removal
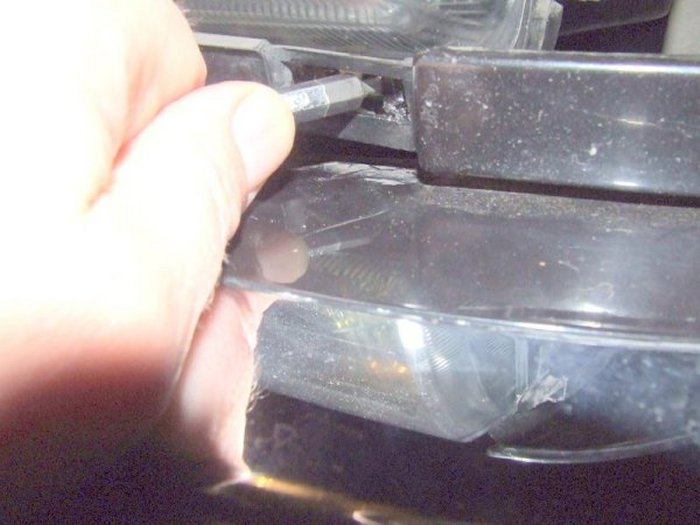
Straight forward one this.....There is an access hole in the bonnet gutter. If
no-one's been in there before it should have a little plastic cover which pulls
off. use a long Pozi-drive screwdriver to loosen the indicator clamp (indicator
removed for clarity!):

Once the clamp is loosened (around 5 turns) the indicator assembly will pull out
straight forward. When replacing use these guides and the clamp will line up
again:
Headlight removal
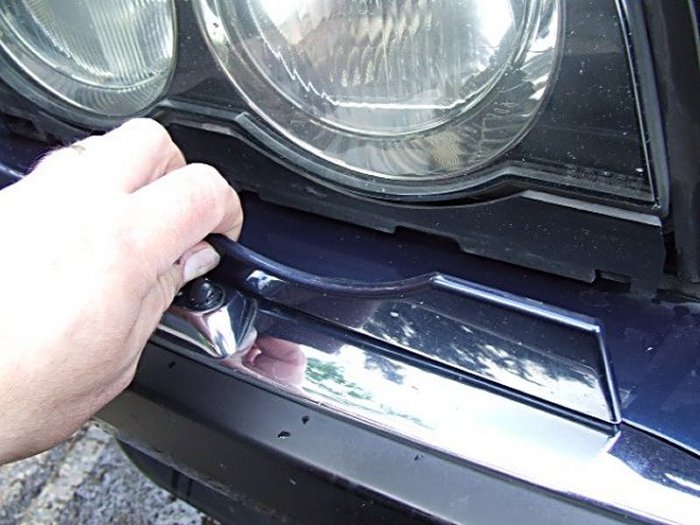
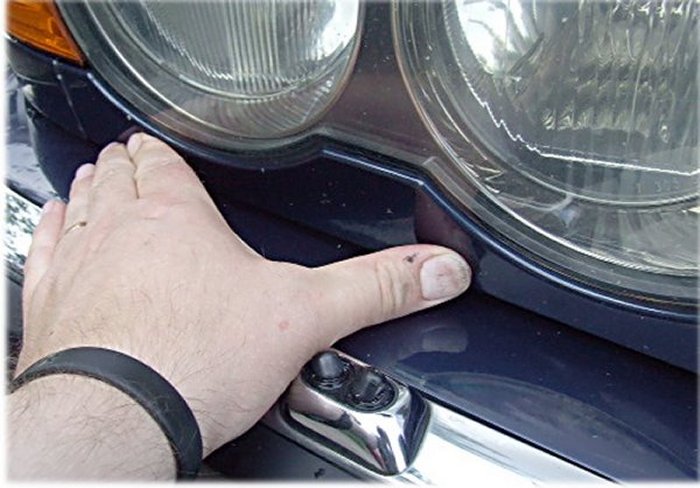
Pull the lower trim from the top surface along the complete length and it will
pop off from the top. Unhook the lower surface by pulling down slightly and
lifting away.

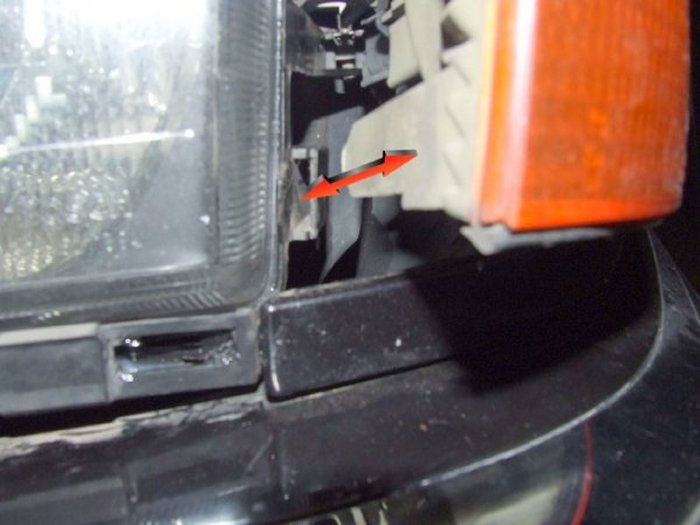
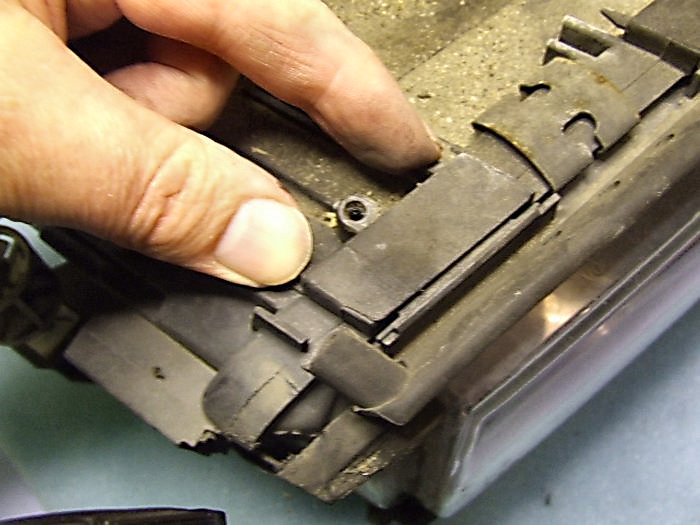
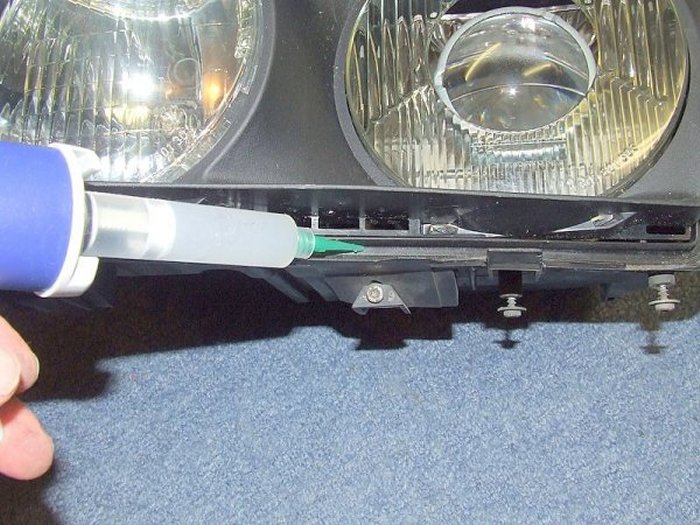
The lower part of the body underneath the indicator housing is connected to the
headlight assembly by an expanding clip. The clip is held expanded by a pin that
slides out of the very outer, lower corner of the headlight assembly. There is a
slot where you can find the body of the pin, this needs to be moved towards the
centre of the car. It may well be stiff:
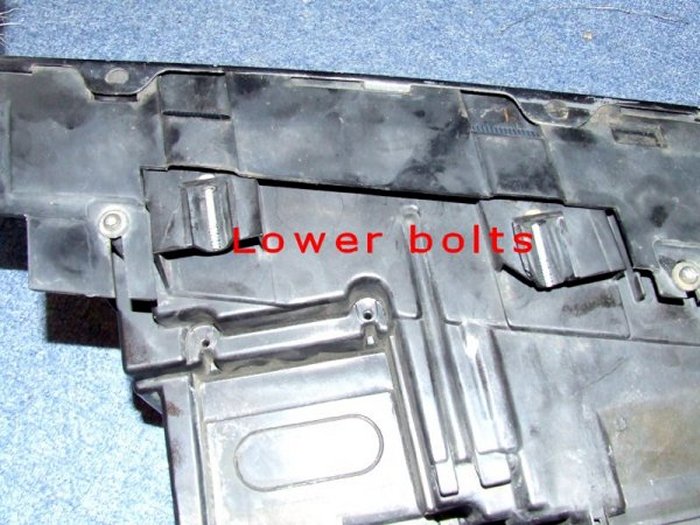
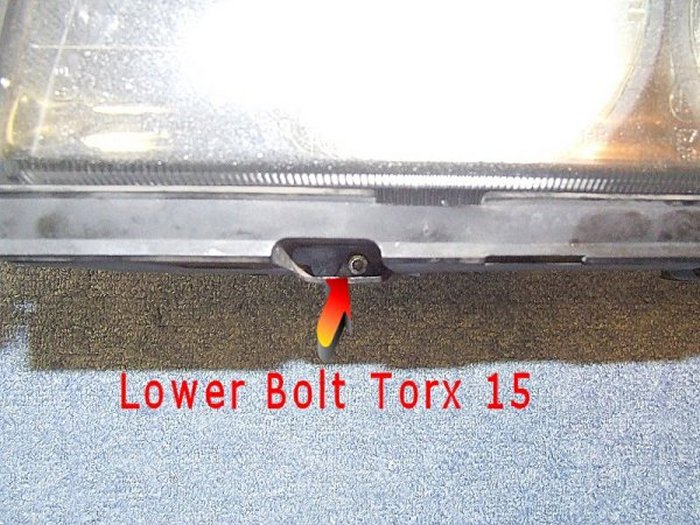
Unscrew the two lower captive Torx bolts (size 15):
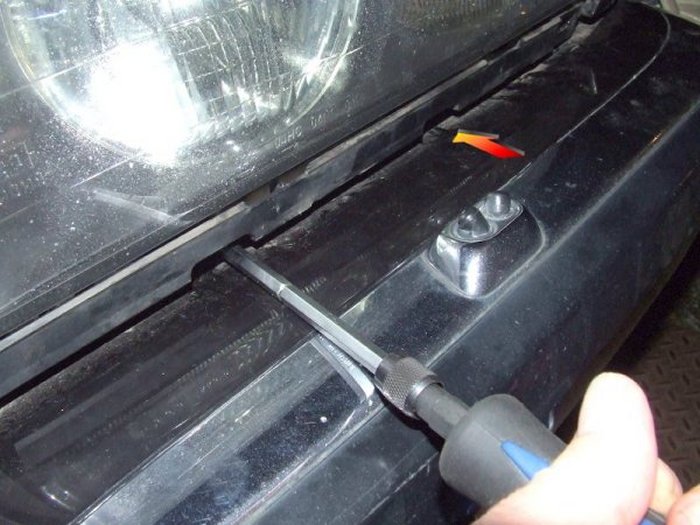
This where they live underneath the assembly:
And from the front:
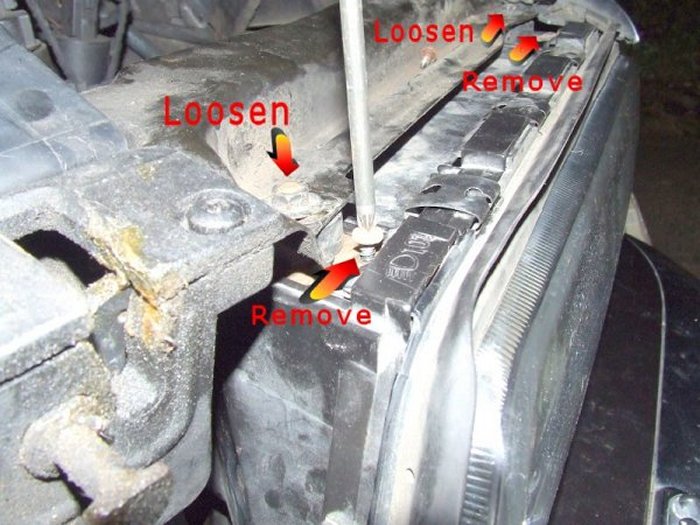
The headlight assembly is secured to the upper metalwork by a pair of shock
absorbers. These have integral studs with nuts that hold the absorbers to the
metalwork, these just need to be loosened a few turns. There are two
self-tapping screws that secure the absorber to the headlight, remove both of
these:
Disconnect the headlamp loom from the back of the headlight assembly (the outer
cover lifts up and back). The headlamp can now be lifted from the lower edge
outwards and slightly away from the indicator. The shock absorbers slide out
from the headlight assembly.
Headlight Disassembly
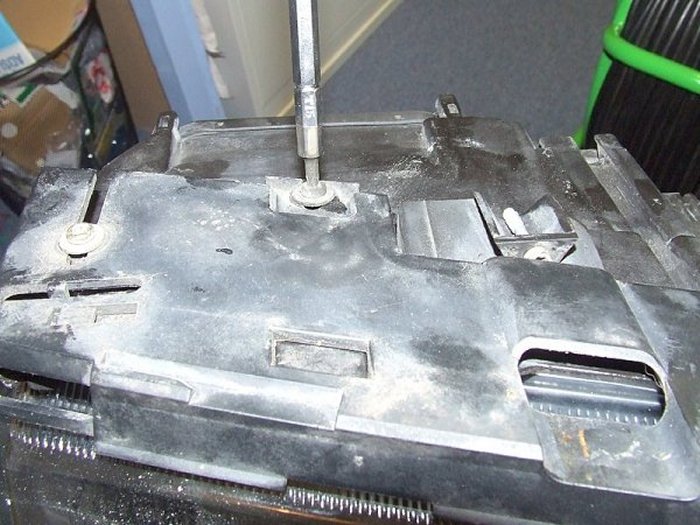
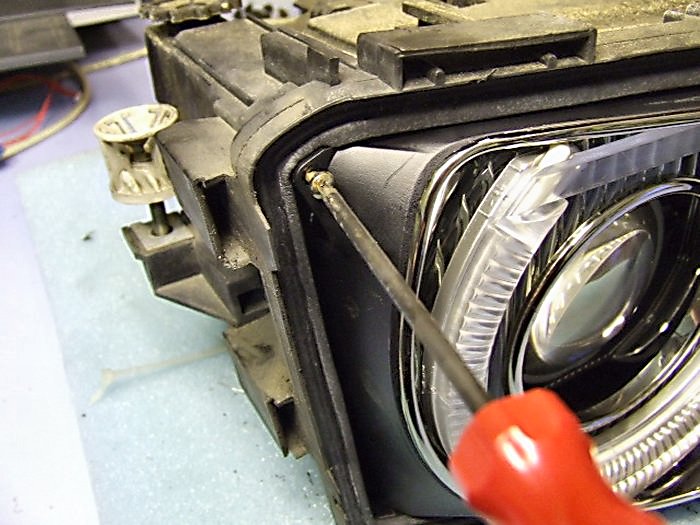
Start by removing the lower guard, please note that the lower guard has two
slots in which tangs should fit, if these are not in place then it is very
difficult to get to the lower Torx bolts. Remove three Torx bolts and slide the
guard forward:
The rubber weather-strip is held on by expanding fixings, pinch the tangs
together and push them out.
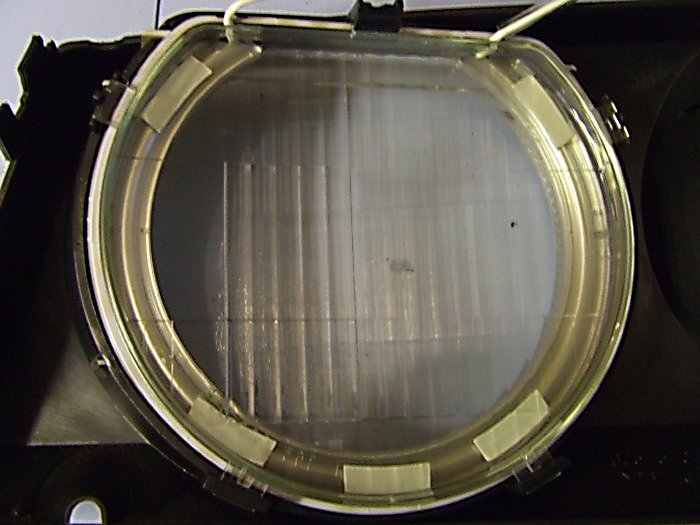
Use a screwdriver to remove the plastic headlight 'glass', make sure the clips
are lifted away from the body and not the glass otherwise it may crack.

Once all the clips are off, carefully pull the glass away from the body. Take
care with the gasket, this needs to be removed so it can be lubricated later.
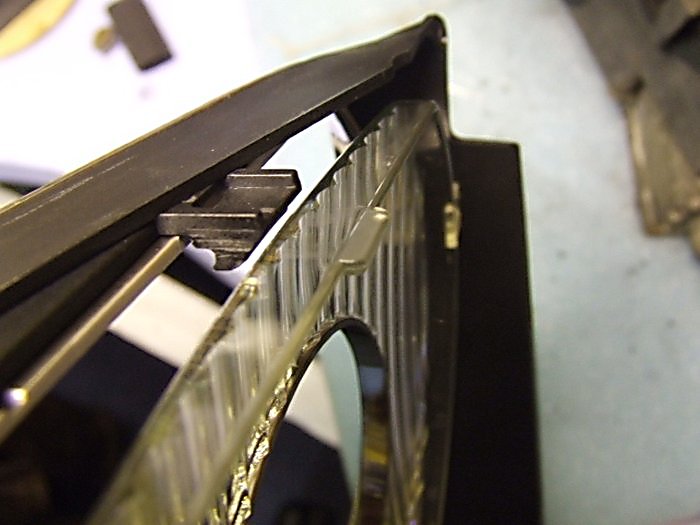
The inner plastic housing is held in by one screw:
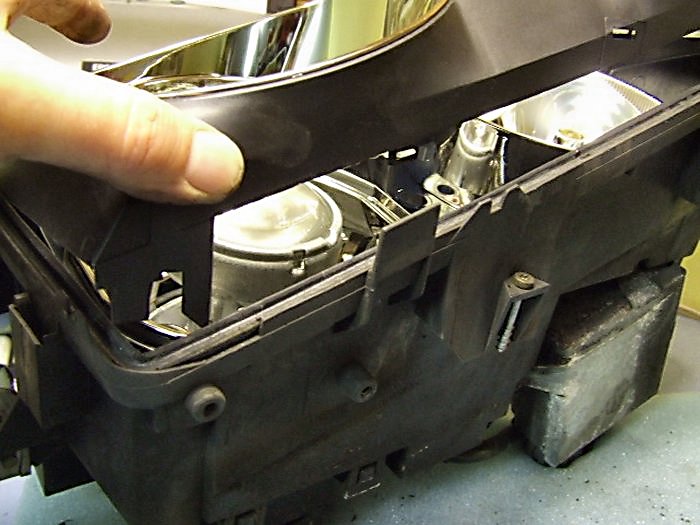
The inner housing is quite tight in the body, lever the edges away from the body
a bit at a time, it is located by a number of tangs:
Inverter Fitting
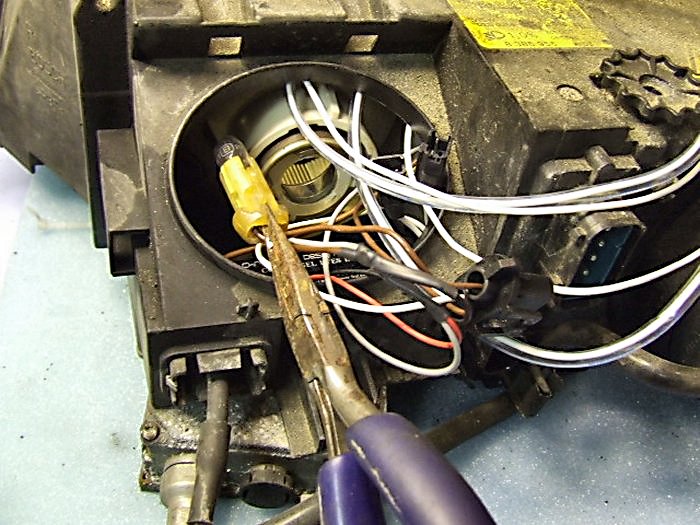
Remove the service cover from the high-beam unit. Remove the sidelight bulb
using long-nosed pliers (they must be difficult to get out with the lights still
in the car!):
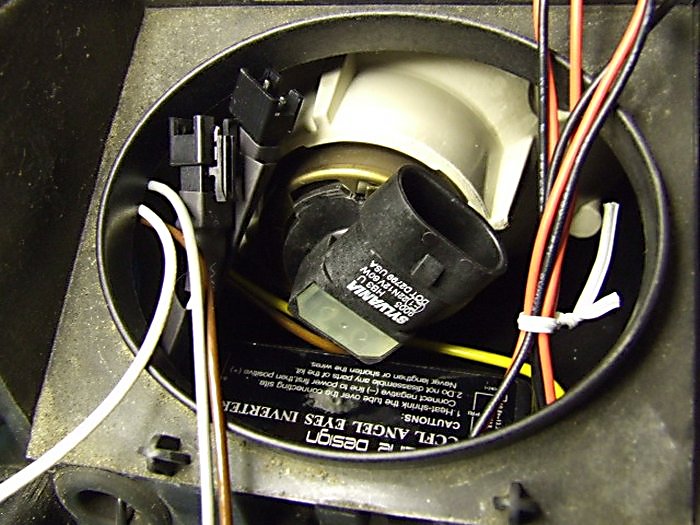
The high-beam bulb (HB3) rotates anti-clockwise to be removed, this means that
the inverter gets in the way of the bulb on one of the light units only. This
side is OK, the other side isn't. I have glued the inverter in place here:
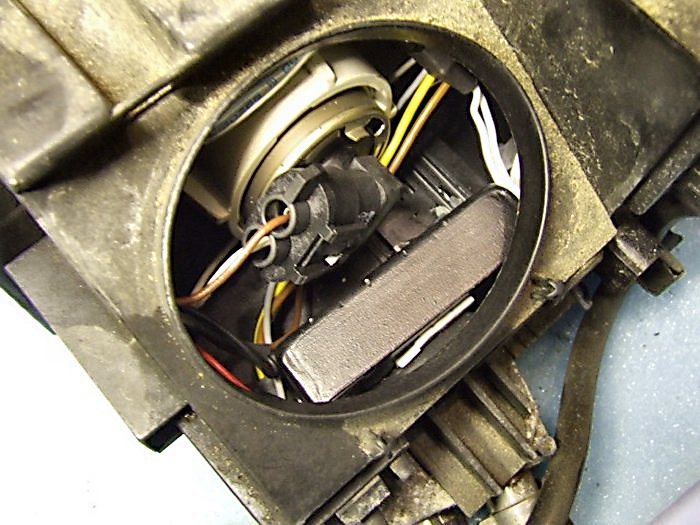
On the other side I have used a double-sided pad to fix the inverter in place so
that it can be removed if the high-beam bulb needs replacing at any time:
The wiring is the same as the non-facelift fitting. Follow these stages:
Remove the high-beam bulb and disconnect the in-line connector to the bulb
There are three wires that go to the sidelight bulb, two BROWN, one WHITE
DO NOT cut the BROWN wire that goes to the high-beam connector
Cut the two wires that go from the sidelight bulb to the main connector 2" away
from the bulb (BROWN and WHITE)
Strip back the insulation from the wire ends and tin them with solder
Cut the Inverter RED and BLACK wires to about 3" long, strip and tin the ends
Thread some 3.2mm heatshrink over the BROWN and WHITE sidelight wires
Temporarily tie-wrap the RED wire from the inverter and the WHITE wire from the
connector
Solder the two wires together (RED and WHITE) solder this pair to the sidelight
wire (WHITE)
Temporarily tie-wrap the BLACK wire from the inverter to the BROWN wire from the
connector
Solder the two wires together (BLACK and BROWN) solder this pair to the
sidelight wire (BROWN)
Remove the tie-wraps and position and heat the heatshrink into position
The wiring should look like this:
IMPORTANT NOTE: The sidelight bulb MUST be fitted on the later model cars. The Lamp Control Module (LKM) checks the sidelight bulb before it provides power to it. If the LKM finds that the bulb is broken (or missing) it will not provide any power to either the sidelight or the Angel Eyes. This worth remembering if one pair of Angel Eyes fails....check the sidelight bulb first, it is probably broken.
Refit the sidelight and tuck the 12V wires away:
Angel-Eye final Fitting
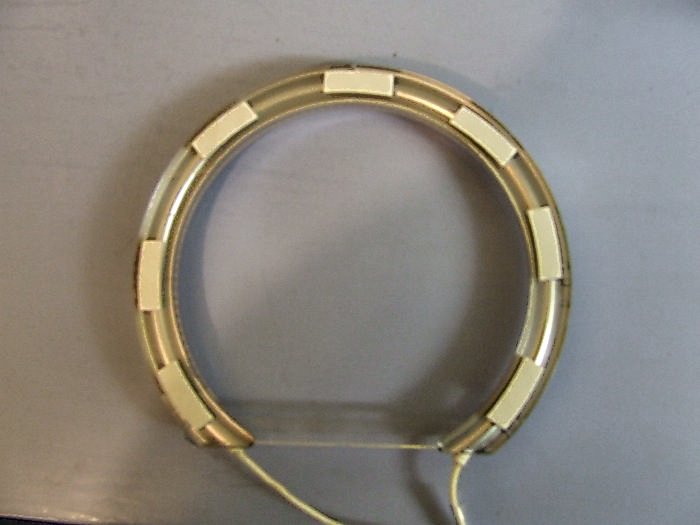
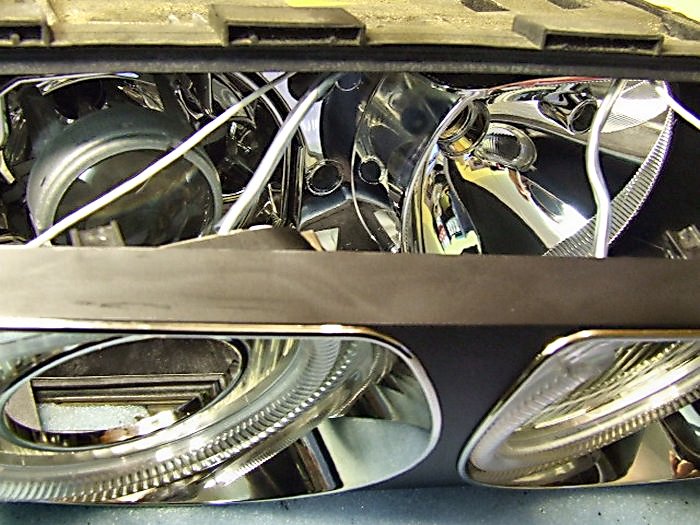
Run the high-voltage wires from the Angel Eyes towards the dipped-beam side of
the body, keeping the wires to that side of the centre fitting at the top of the
reflector assembly:
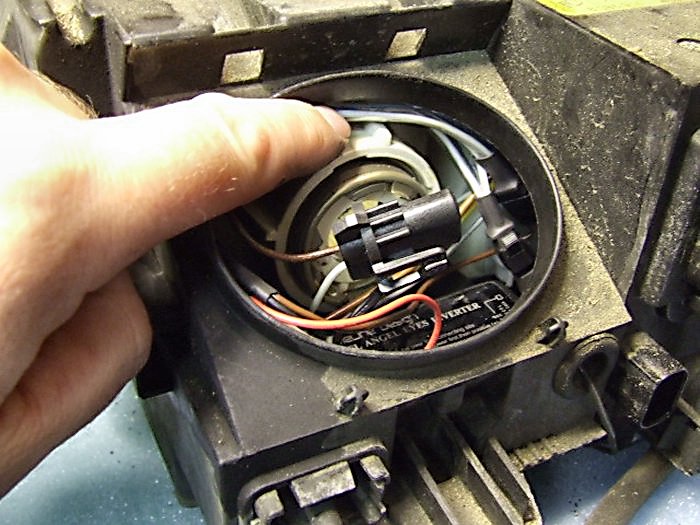
Push the front housing into the body while threading the wires through the
dipped-beam cover, it is quite a tight fit, keep the housing straight or it will
bind up. Screw the housing back in position:
Join the connectors to the inverter and tuck the wires away from the bulb:
Headlight Reassembly
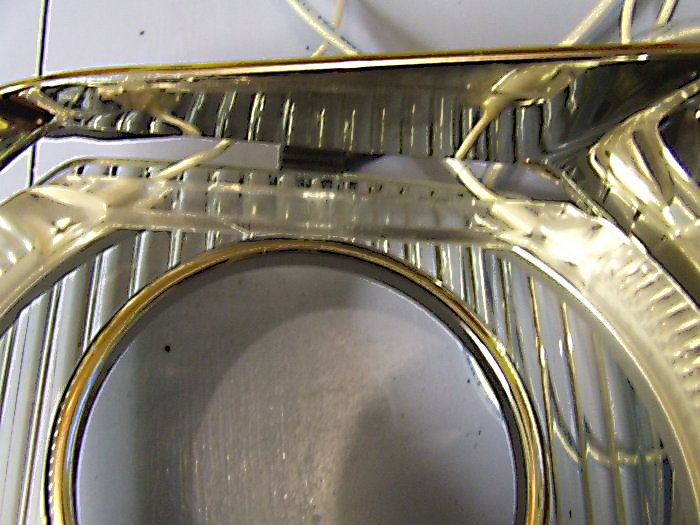
Grease the rubber gasket (Silicone grease) and poke it in the cavity (it will
only fit correctly one way round) and then grease the upper surface where it
meets the glass: (Old picture....Angel Eye's not shown!)
Push the weather-strip back on the headlight assembly (no need for molegrips on
facelift models)!
Fit the lower guard back on the headlight assembly making sure the two tangs fit
in the cavities:
All ready to fit back on the car.................
Headlight Refitting
The facelift headlight assemblies with Xenon's are a bit harder to fit back on
the car due to the Xenon inverter that is strapped underneath so a bit of
wiggling is required
Fitting the headlight back into the car is pretty easy....except for the lower
Torx bolts. The best way to do this is to get the Torx driver in one of the
bolts to start with. Push the headlight into position until you feel the Torx
bolt hit the fixing hole behind. Make sure the bolt is biting and tighten just
ONE TURN. Go to the other Torx bolt and tighten this fully (a certain amount of
wiggling is required). Then tighten the first bolt fully.
In the original post another method was recommended which was to remove the
bolts initially, tape the bolt to the Torx driver and then fit the bolts when
the headlight is fully pushed into position. I'll try that next time.
Hook the trim along the bottom edge and push the top back in place:
Refit the sidelight, use the guides and the clamp will line up again:
Refit the two connectors to the back of the light assemblies, switch on the
sidelights......and..........:
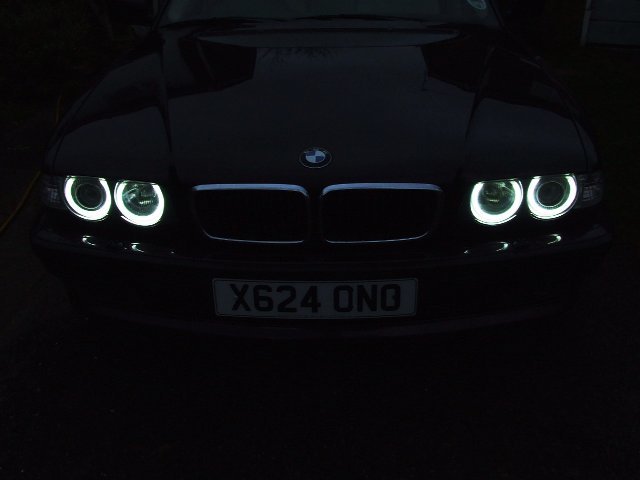
They are exceptionally bright, they match the Xenon's really well, shame about
the yellow mains really.
NOTE: When the E38 LKM checks the sidelights the Angel Eye's flash, if this is a
problem during an MOT just open the dipped beam cover and disconnect the wiring
to the Angel Eye's.
All done, time for a cup of tea.......

![]()
