Timm's E63 and E64 Fitting a WiFi Dash Cam
A method that allows remote control and file downloading
Today I am installing a Yi 2.7k Ultra Dash Cam - but I’m not going with the dangly-wires and a plug poked in the cigarette lighter socket, no
we are going advanced here with the additional features of:
•
The camera will stay live for 8 minutes after the car is locked
•
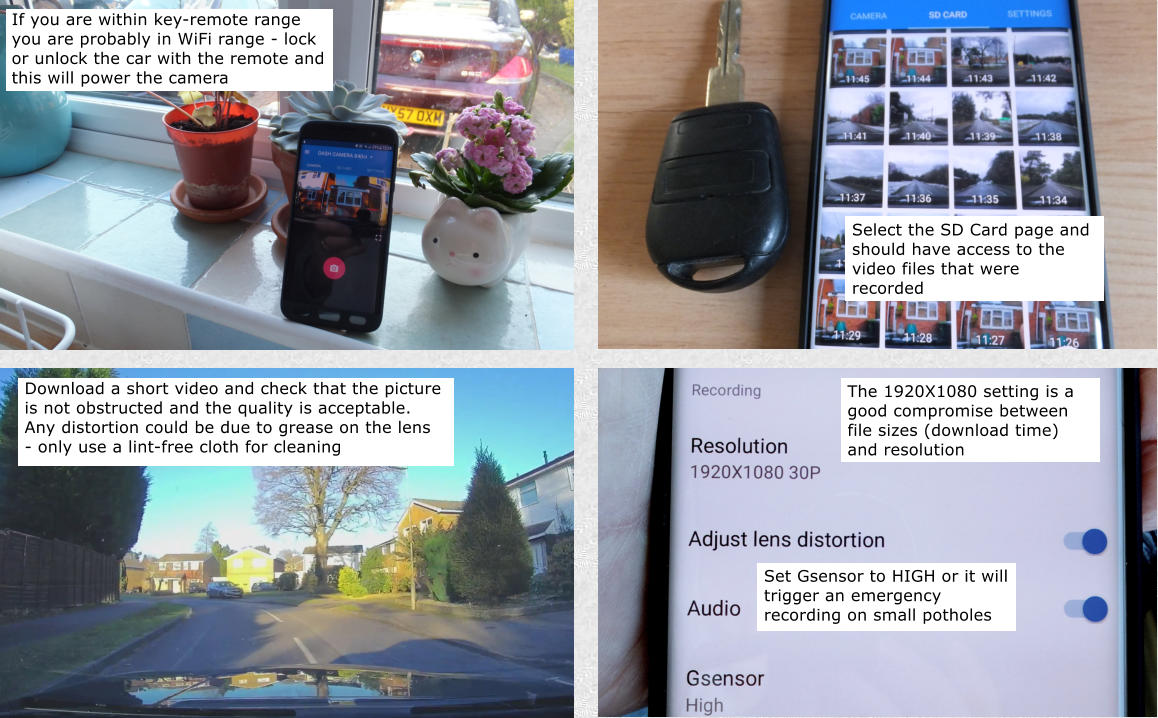
The video files can be remotely viewed and downloaded if within WiFi range
•
No trailing wires
•
No trim removal required
•
No need to plug into the cigarette lighter socket
•
Remote camera activation if within key remote range
•
Will not discharge the car batteries
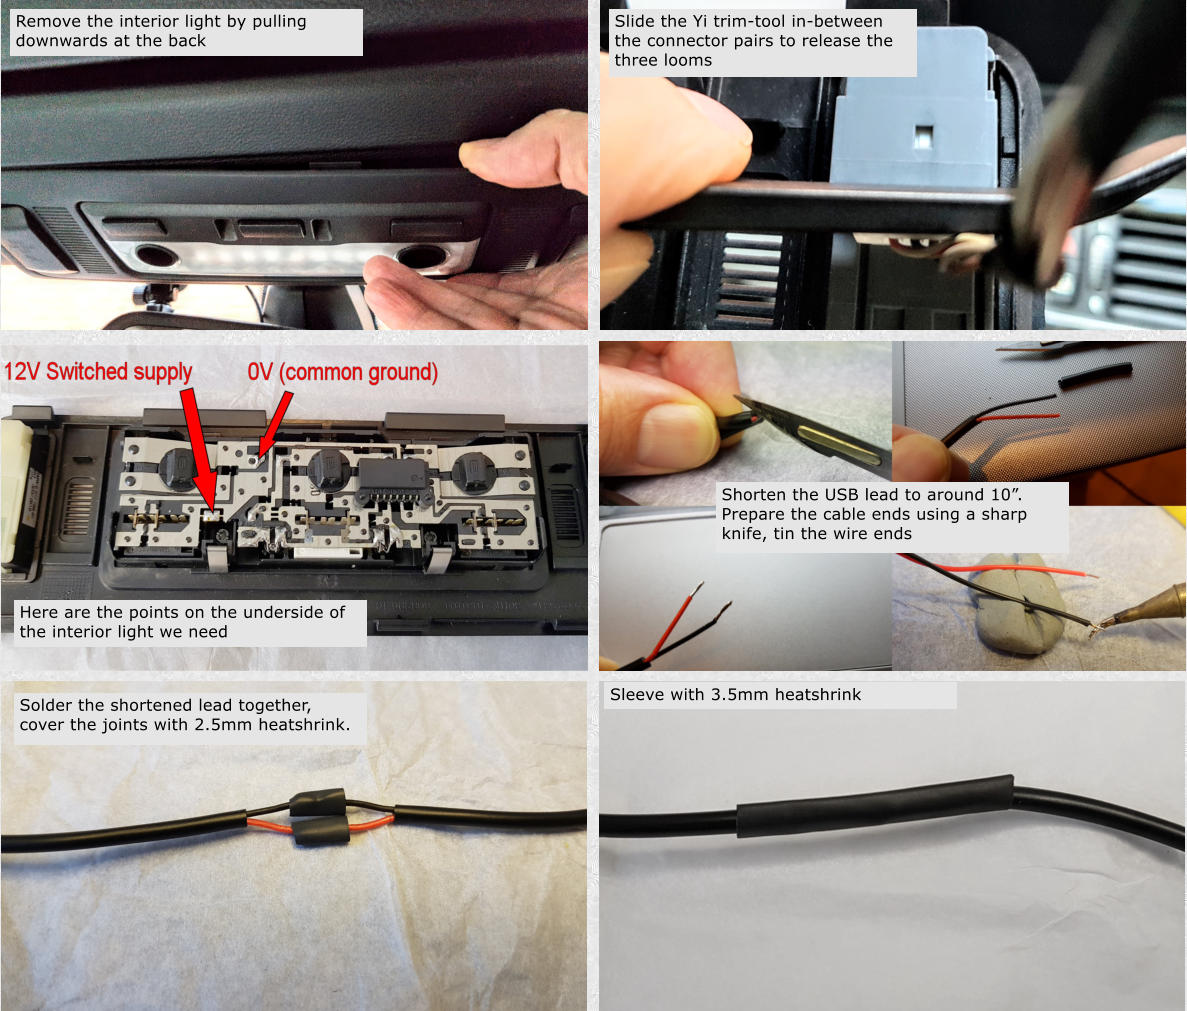
The 6-Series, like all BMW’s, has a timed 12V supply that is used for various systems, this becomes active when the car is unlocked and
remains live until the car has been switched off for 8 minutes (earlier models had a 16 minute timer). This is handy if you have a WiFi
camera connected to that supply as it means you can download video’s and stills from the comfort of your home (as long as you are within
WiFi range). A handy place to find this supply is within the interior light assembly - so we are going to connect to that. Below is a YouTube
video of the process and below that, the full routine:
That’s the USB lead shortened - now we need to prepare the 12V/5V converter:
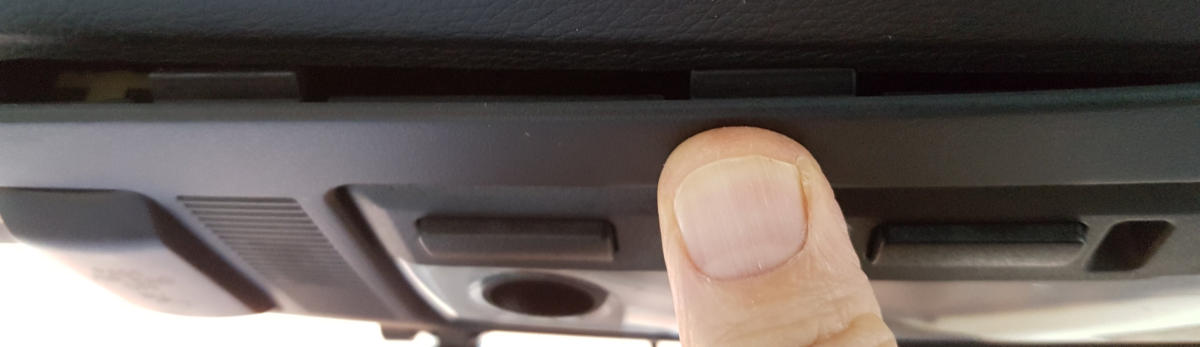
That’s all the preparation done, time to stick it back in the car. Fortunately, getting the USB lead to the camera position is helped by the fact
that the headliner can be pushed away from the windscreen enough to get the connector through.
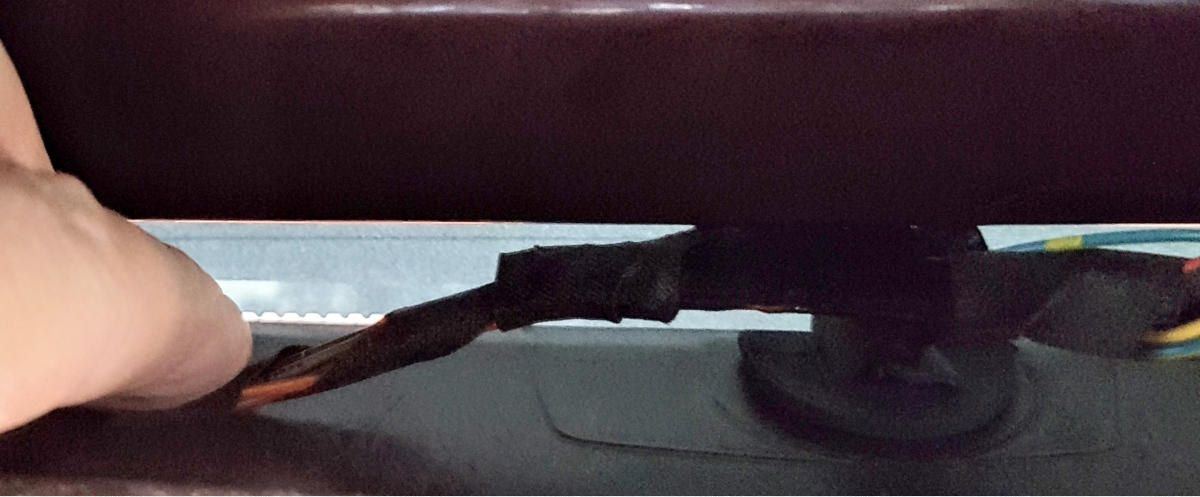
So, offer up the interior light and re-connect the three looms. The picture below is taken through the interior light aperture - I’m pushing
down on the headliner showing that enough of a gap can be made to get the USB connector through
With the USB lead poked above the headlining refit the interior light by slotting in the front and pushing the back and sides into place - it
makes some alarming cracking noises as it goes in but this is quite normal
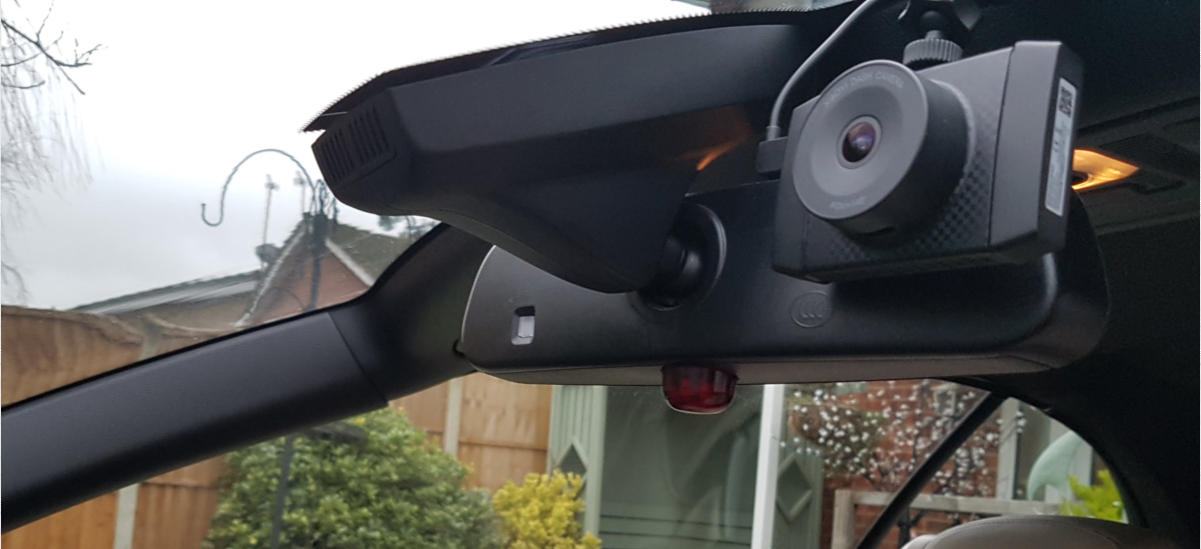
Temporarily fit the camera to the windscreen using the suction mount to make sure the picture is not obstructed and the position suits you


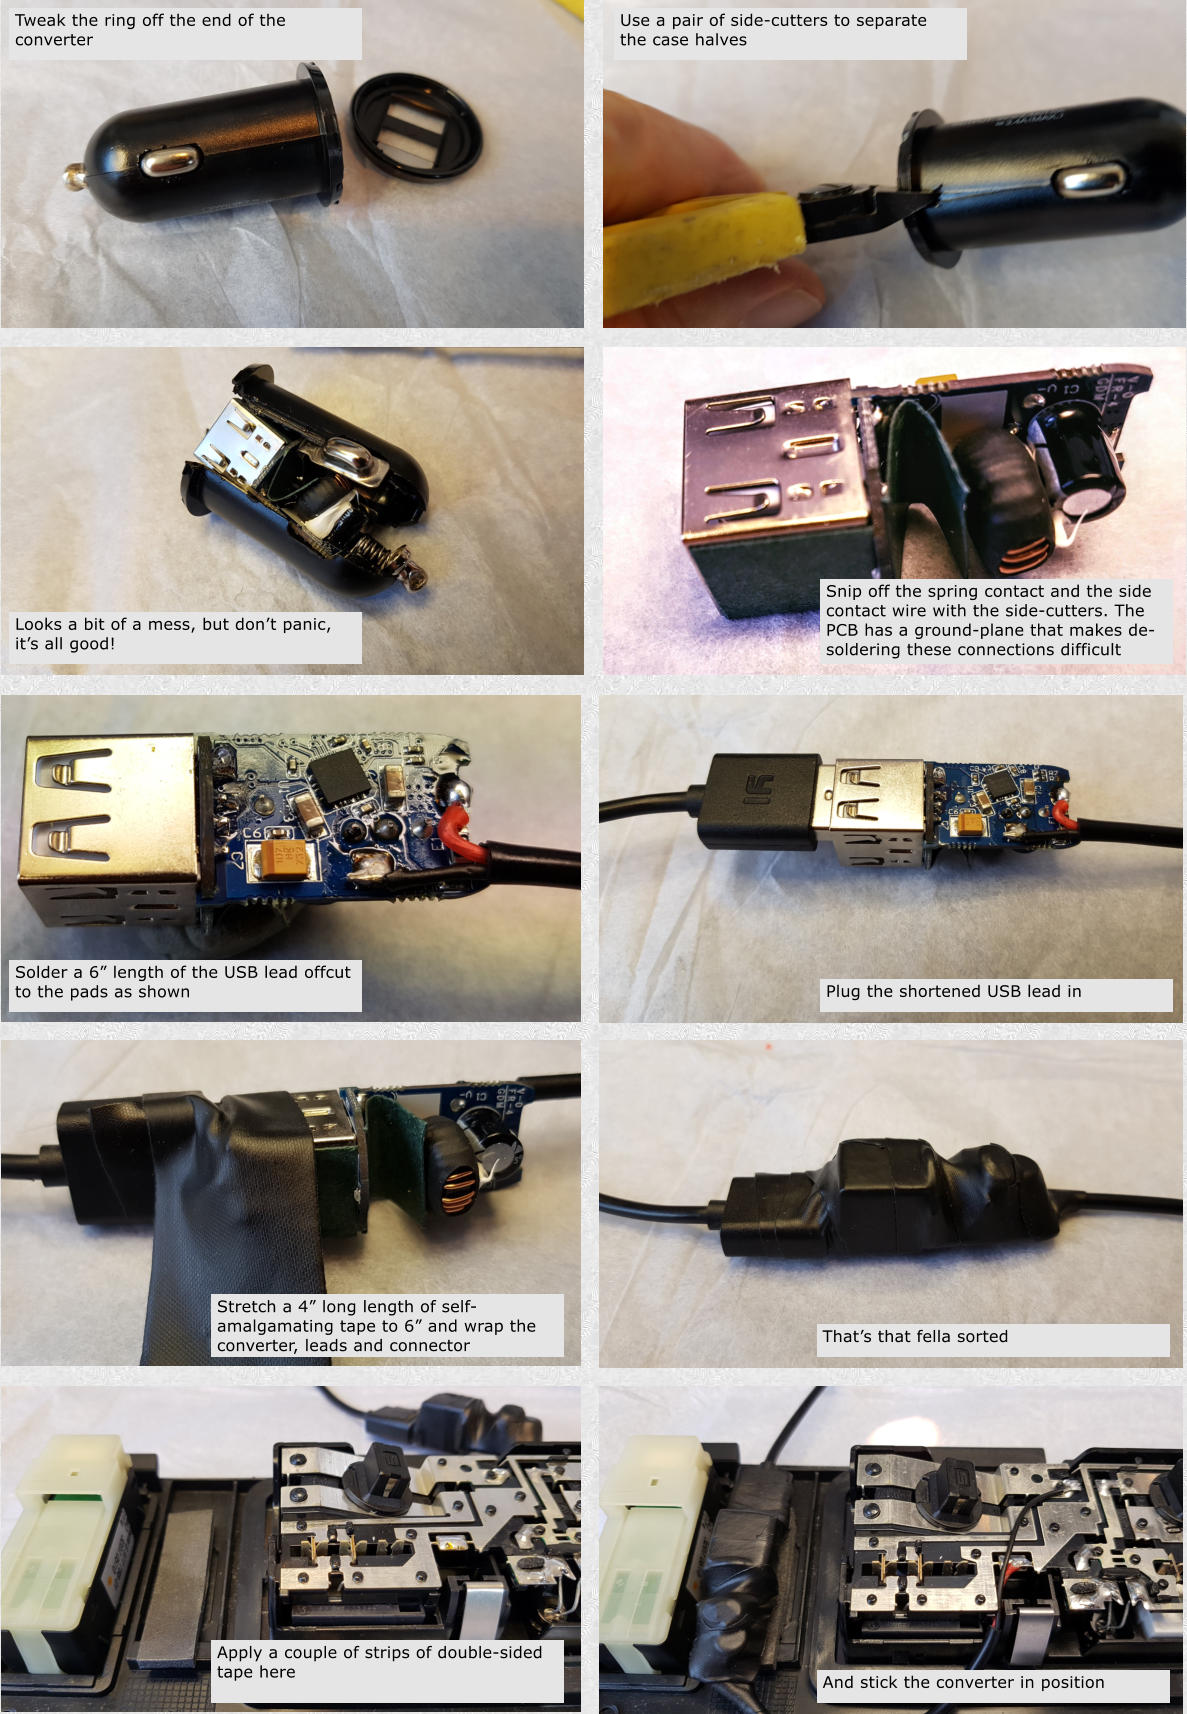
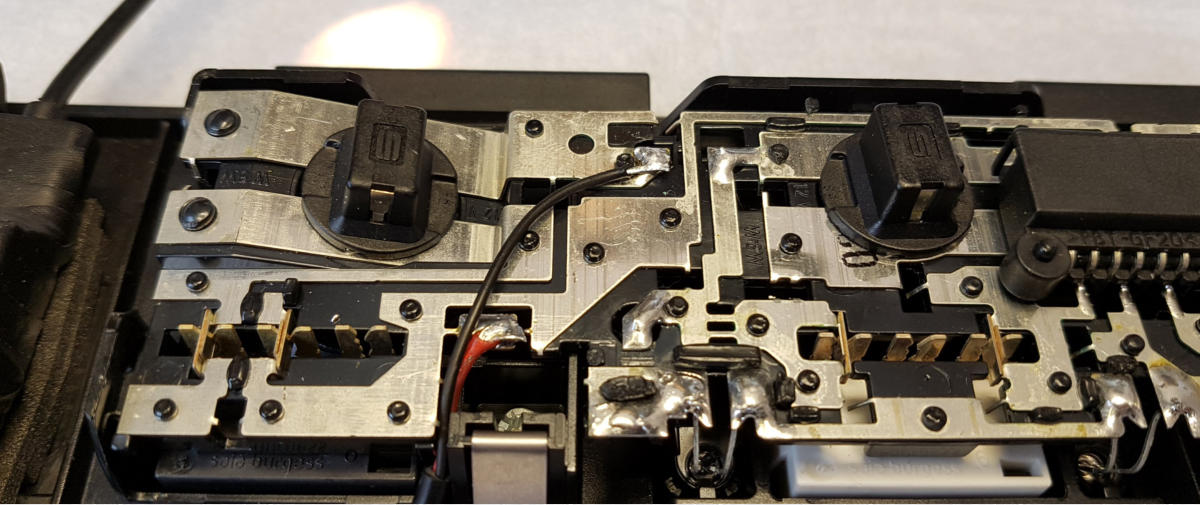
Wire the converter to the interior light as shown below:
And here’s how to do it:
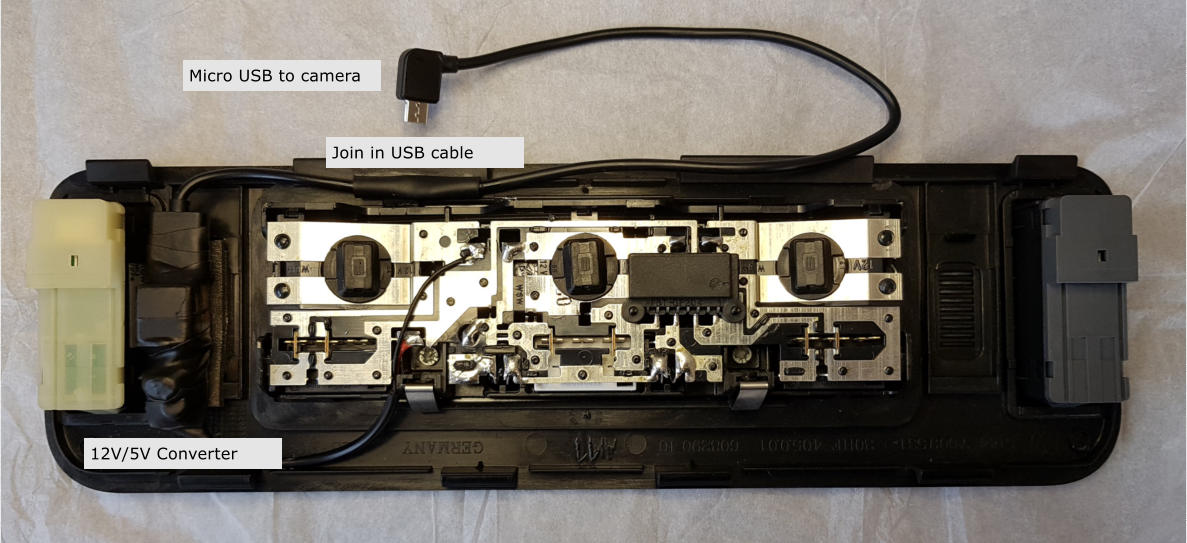
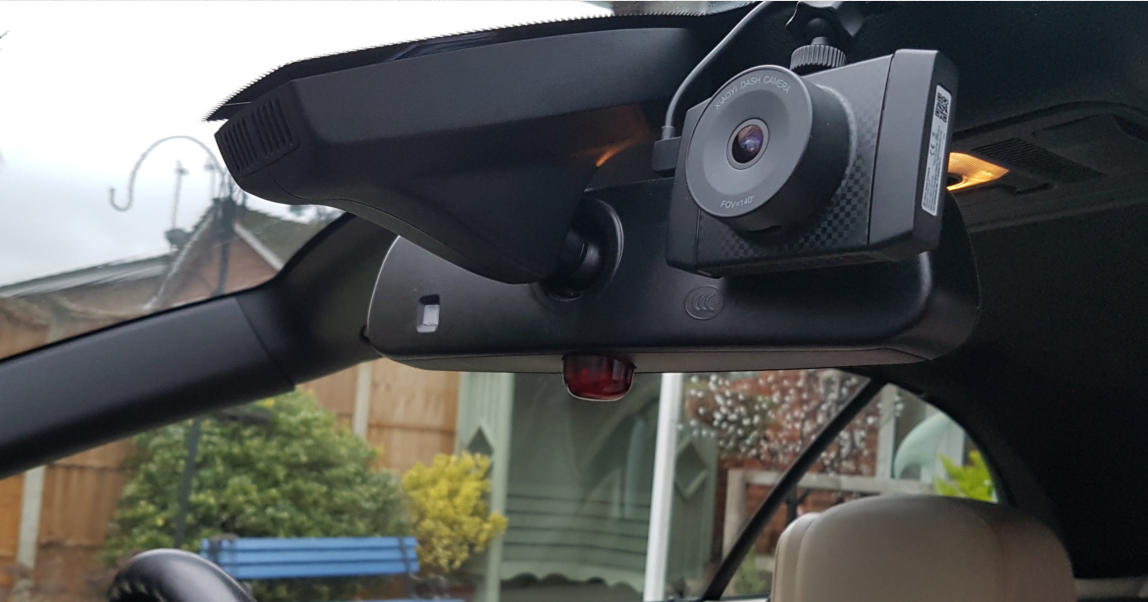
And here is what we are aiming to achieve, 12V/5V USB adaptor fitted to the interior light and neat, short wiring
That’s about it - it looks much more complicated here than it is to do in real life. My dash cam has already recorded some dodgy driving -
and - managed to record lightening during a thunderstorm with the camera being activated by the key remote!
The best review of this camera is by Techmoan here
Time for a cup of tea!
Remote file downloading and control
With the camera fitted and working

Go for a good blast to check everything works as it should (following is from my 840ci but all much the same on the E63/E64)
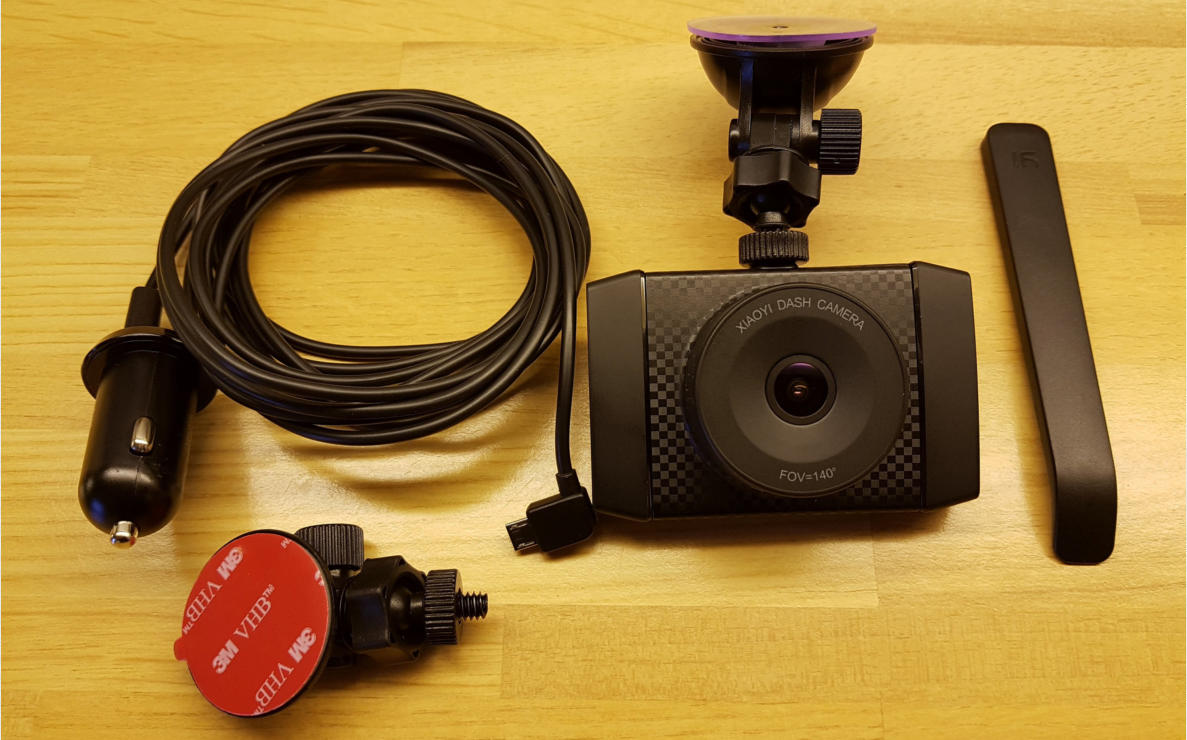
Here’s the full kit that is supplied with the Yi 2.7k Dashcam