Timm's E31 Boot (Trunk) Hinge Wiring Repair
LICENSE PLATE FAIL - REAR FOG LIGHT FAIL and other BULB FAILURE warnings
This is now a common problem on the E31, even on the latest model years. Common symptoms of this failure is if you put the car into reverse when your sidelights are on you get an OBC warning LICENSE PLATE FAIL - but when you trot to the back of the car they are working fine, in fact, all the rear lights seem to be working fine! However, if you leave the car in reverse and have a look at the rear lights one of the reversing lights will be out, and so will one of the license plate lights. The same problem also occurs when you use the rear fog lights:
There is a quick and temporary fix for this that can be found HERE
This problem can also cause other bulb failure warnings - and you may lose one of the tail lights on the boot light clusters and NOT get an error message. This is because (for no sensible reason) the rear side lights that are fitted to the boot light clusters are not connected to the Lamp Control Module - those lights can fail and you will get no warning of it.
All this strange behaviour is due to the failure of the wiring in the boot hinge. There are two looms, one at each boot hinge, and the wiring within this loom eventually fails from fatigue. To be pedantic, it is the insulation that initially fractures, and as the relevant wire bends it bends to an acute angle where the fracture is - and then falls apart.
I have just done this repair on my E31, and I feel I could have done it better, as usual I got stuck in stripping the loom outer cover - and then realised I could have just slit the cover for a neater job - but I'll explain what I will do different in future as we go through the repair.
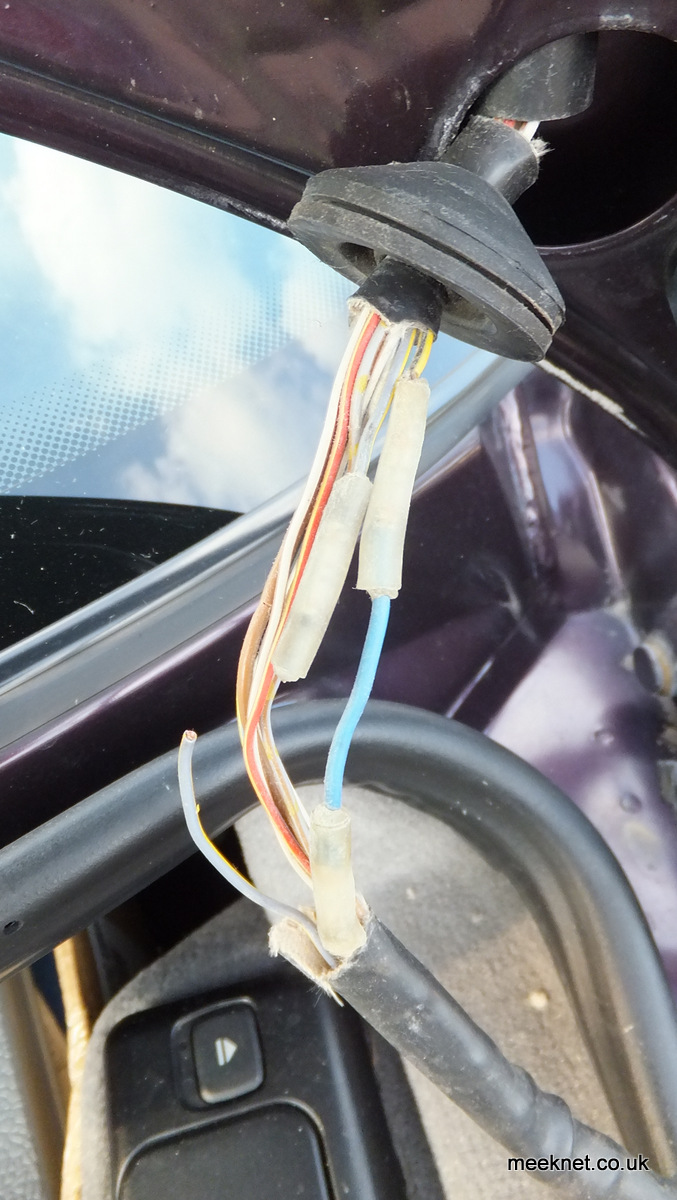
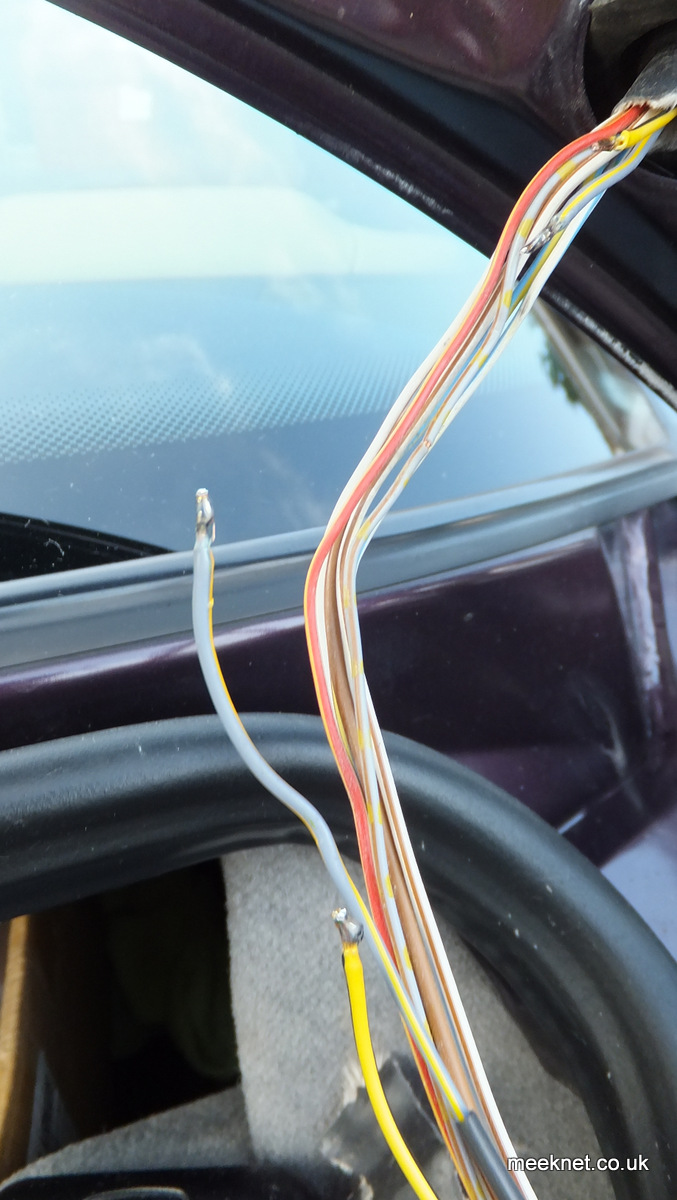
First of all, let's have a look at what happens within the loom and causes the problem:

There we go, in the left-hand hinge the BROWN wire and the GREY/VIOLET wires have failed (I haven't cut these apart, they look like this once the cover is stripped back). Also notice that near the top of the picture, the GREY/VIOLET wire insulation is fractured just above the break - any wires that have fractured insulation but have not broken will need to be repaired - they will break quite soon anyway.
The BROWN wire usually breaks first - this is because it has a greater diameter and resists bending more (until the insulation fractures). The BROWN wire is the ground or chassis connection - there is a BROWN wire at both hinges, both connect to the chassis near the boot fuse box via ground connection X494.
The boring explanation:
When the wiring is fully intact, the current that returns from the LEFT reversing light goes via the BROWN wire in the LEFT loom to chassis. When the LEFT BROWN wire fails, the current returns to chassis via the LEFT reversing light, through the BLUE/YELLOW wire in the LEFT hinge loom to the junction (X428), back through the BLUE/YELLOW wire in the RIGHT hinge loom, through the RIGHT reversing light and to chassis via the BROWN wire in the RIGHT hinge loom.
The reversing lights do not noticeably illuminate as they are 21W bulbs (they do glow a bit though). This is why, when you put the car into reverse you get the LICENSE PLATE FAIL OBC message, due to junction X428 going to 12V to illuminate the reversing lights and losing the license plate pseudo chassis connection - it makes sense, honestly!
End of boring explanation
Right, enough blurb, let's get on with it - but don't slavishly follow the pictures as I would do this differently now, especially as I know where the break is going to be!
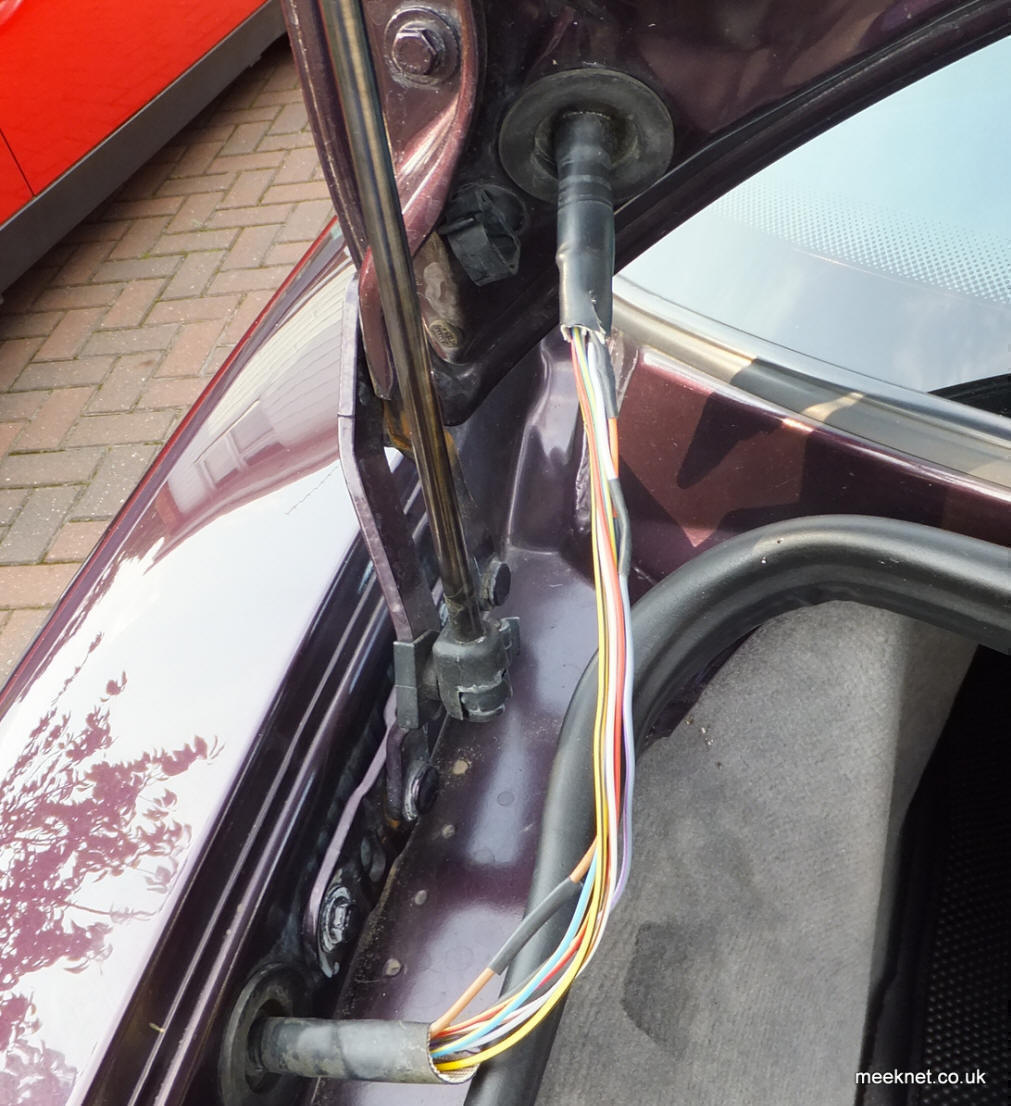
We'll start with the RIGHT hinge loom - and more importantly, the most likely place the the wires will fail. Have a look at the picture below, there are two loom clamps, one on the boot itself where the loom exits, and one on the hinge (Note: this is after repair, the loom cover was originally smooth:
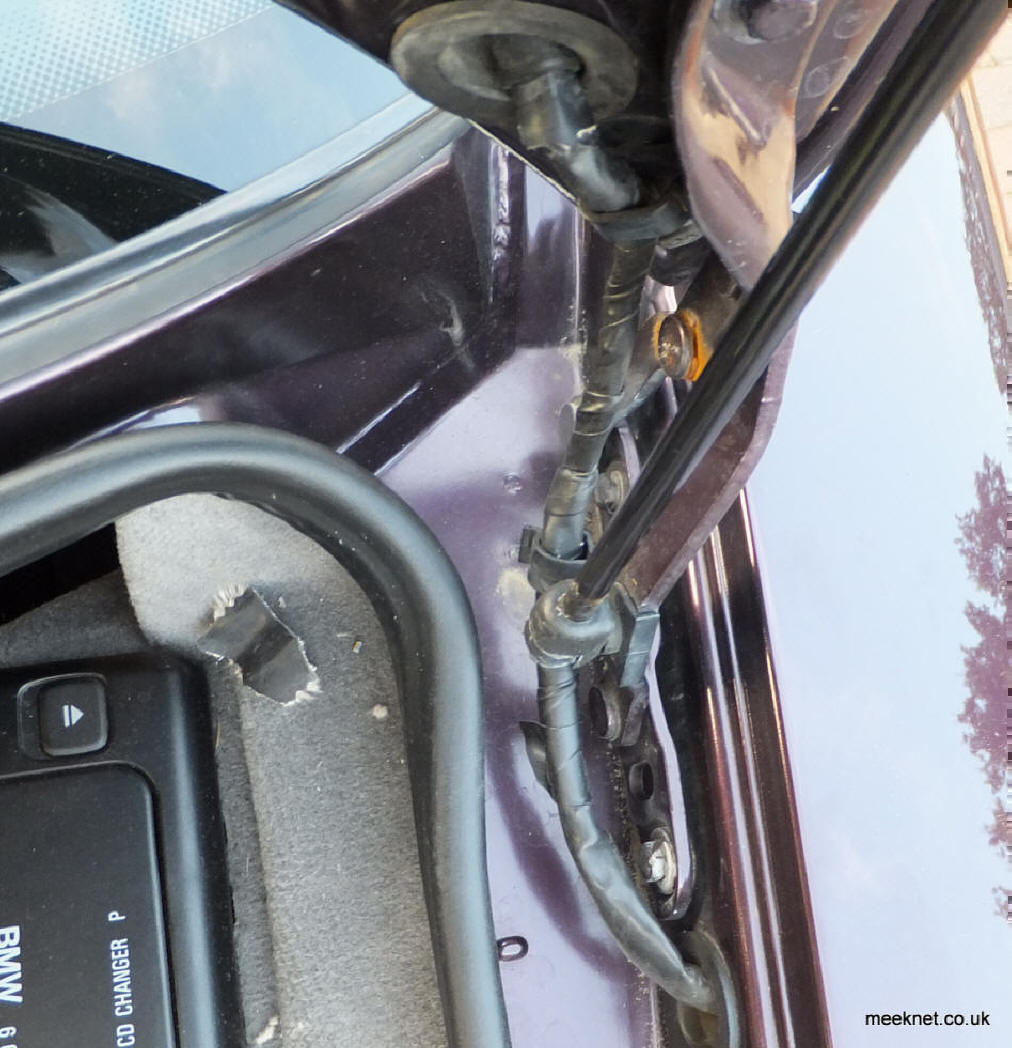
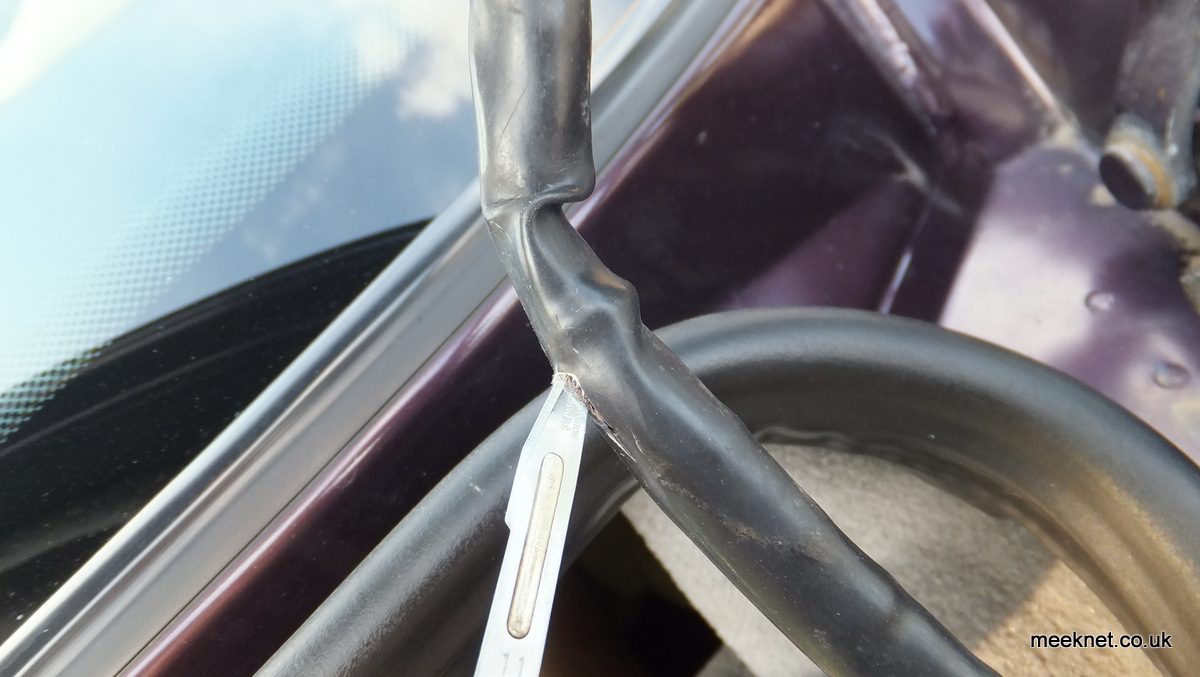
It is between these two clamps where the wiring is most likely to break. So, to start with, pop the loom from the two clamps and then use a super-sharp scalpel to slit the cover, do not tear it back like I did later!
Well, this is what I found in the right loom - a previous repair using Lucar bullet connectors:
The wires damaged are a GREY/YELLOW (inner right sidelight) and YELLOW/BLACK (rear right foglight - not fitted on US models and not checked by the Lamp Control Module).
I poked the grommet that goes through the boot as far into the boot as possible to get better access to where the breaks are - I also stripped back the cover. It would be better just to slit the cover along its length as we can re-use the cover later. It is just a case of cutting out the section of wire that runs between the two loom clamps and replacing it, but, stagger multiple joints so that the loom does not have a section that bends differently to the rest of the loom.
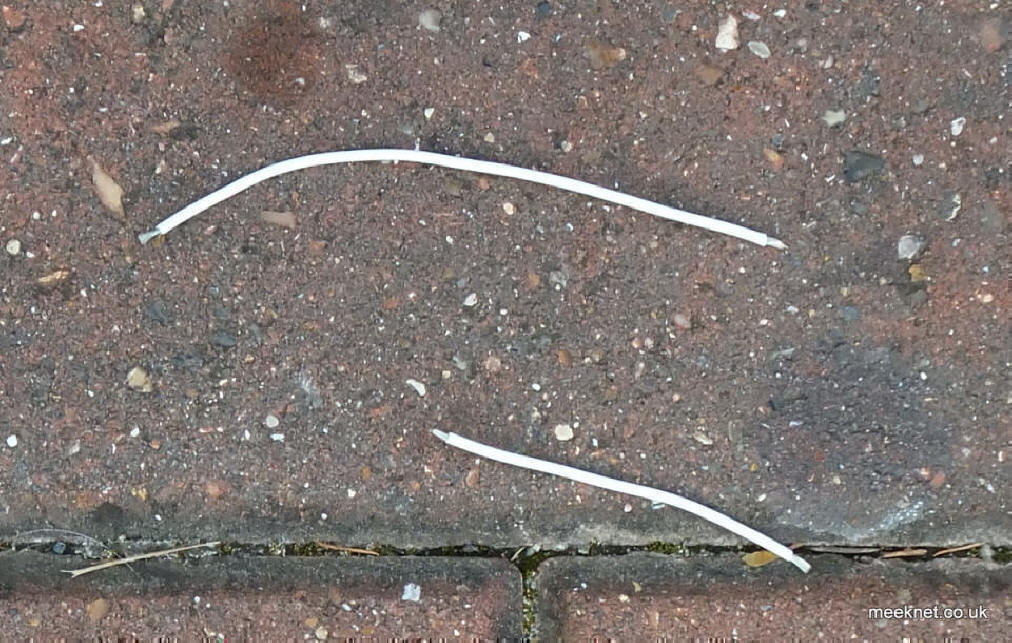
To get the right length of replacement wire, cut out the dodgy section of wire (at least 100mm/4"), and then use the broken wire sections as a length guide for the replacement. Strip back 5mm of insulation on each end and tin the wire with solder:
I have used a butane-powered soldering iron for this, and that was my second mistake - apart from taking 40 minutes to get the ******* thing to light, it gets much too hot for this kind of work. It would have been a lot more sensible to drag out the mains-powered and temperature controlled bench soldering iron and then the joints would have looked a whole lot better. Anyway, enough excuses, I then cut a couple of lengths of 16/.02 wire to the correct lengths:
Tinned both of those and slipped two lengths of 3mm heatshrink on the lower end of the original wires. I then soldered the four joints, slipped the heatshrink up over the joints and used a hot-air gun to shrink the heatshrink into place (you can use the edge of the soldering iron to do this if a hot-air gun is not available):

I then pulled what was left of the loom cover back in place and used self-amalgamating-tape to re-cover the loom and stuck it back in the clamps. If you have never used self-amalgamating-tape before, this tape is not sticky - it welds itself together when stretched into a homogonous tube if done properly, is fully waterproof and won't come off again unless cut. Here's the blurb from the datasheet:
Strip back the interleaving and stretch the tape to reduce its
width by between one third and one half. Keep the tape under tension
and wrap, overlapping successive layers by 50%, until the desired build-up of
insulation is achieved. Finish the wrapping by holding
the tape under thumb and snap by stretching. The high degree of stretch as
describe above will prevent the inclusion of voids and
ensure rapid amalgamation :
As previously said, it would be better just to slit the cover and pull out the wires - I could then have put the self-amalgamating-tape over the cover for a neater loom. I did the left loom first and cut even more of the cover off - one difference here is that I repaired one of the BROWN wires - and these need larger gauge wire - I used 32/.02 wire.
The parts used and equipment is shown below:
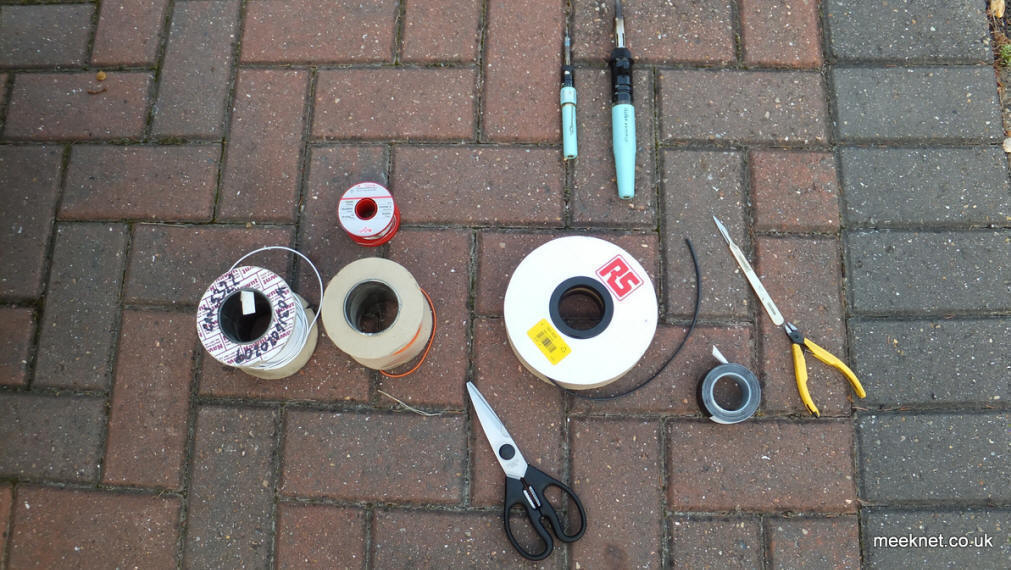
All done, time for a cup of tea
![]()
