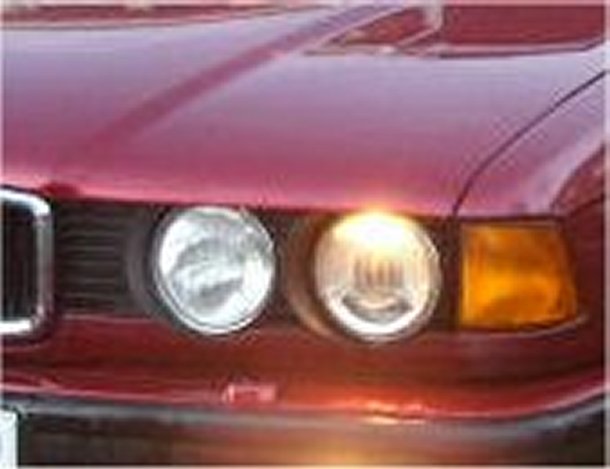
TIMM'S BMW E32
HEADLIGHT REMOVAL AND
REPAIRS
Here is a routine for increasing the
brightness of the dipped-beams on the E32. These slowly get dimmer as dirt
builds-up on the reflectors, also, the front glasses get pitted and diffuse the
light. Below is all you will need to remove, clean, get the glass off etc:
To start pull the bonnet forward but do not lift the rear end up, all the work
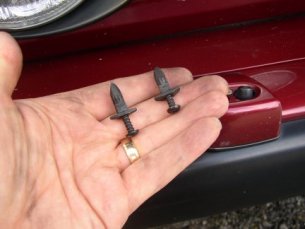
can be done from the front of the car. Remove the screws from the upper two
clips.....
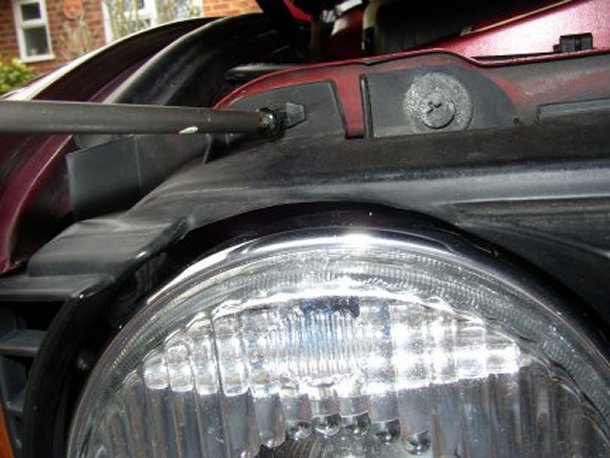
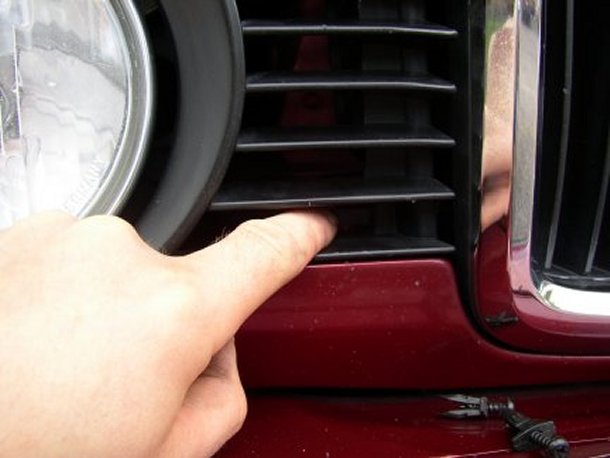
The plastic grille is held by a push-to-lock clip (I'm pointing to it), give it
a sharp pull and it will disengage.......

The grille sort of wiggles out, the outer edge has a pair of clips that hook
around the metalwork so mind those when your giving it a good tug....it's a bit
fiddly but is comes out simply enough.
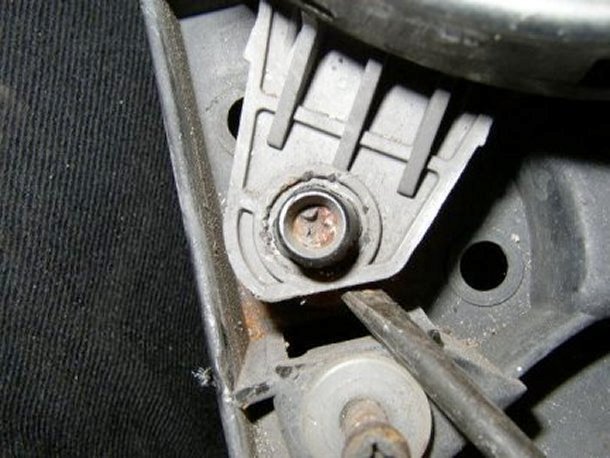
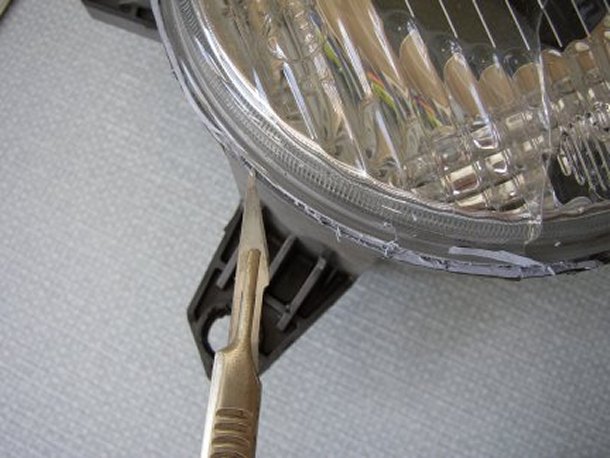
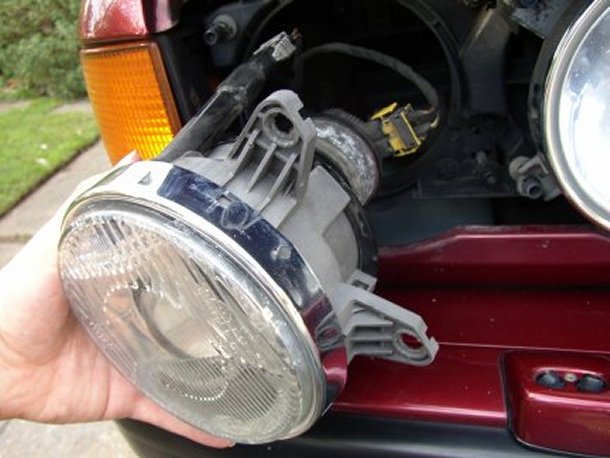
Now for the tricky bit....getting the clips out that secure the dipped beam
assembly to the headlamp chassis.
The best way to do this is to use the correct tool which compresses the tangs
all at the same time (I'm going to turn one of these up on a lathe soon honest).
Given the lacking in adequate tooling there are a few tips when getting these
things out.....
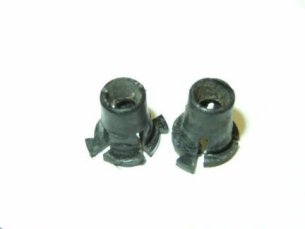
They are probably very old and will break, order some new ones from BMW.
To reduce the likelihood of breaking them, heat them up with a heat-gun (or the
missus hairdryer when she's not looking).
To help ease them out add a bit of lubricant (not WD40 which will immediately
evaporate).
My method was to provide a bit of bias on the clip by wedging a screwdriver
behind the flange (this stops the individual tangs popping back out while you
twang the next one). Then I used a flat-bladed screwdriver to push each tang
inwards until they were all pushed in.
First a bit of bias applied.....
Then poke them tangs one at a time.....
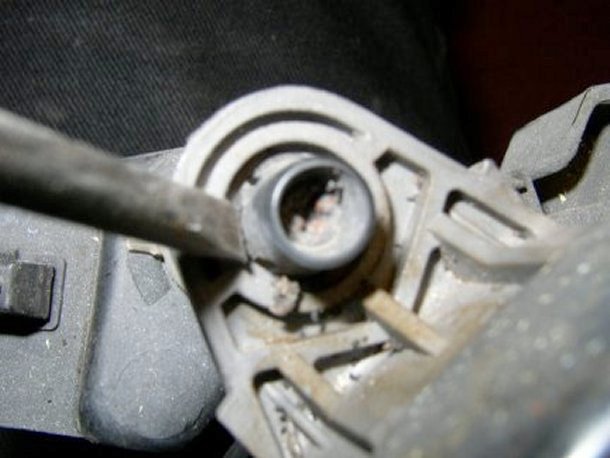
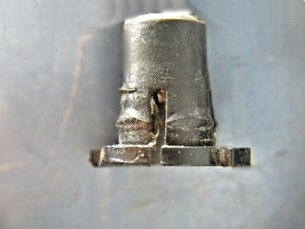
All tangs in....just about to pop out from the lamp casing.
One warning....on the luxury motor-operated dipped beam (like I have
fitted...obviously) the lower clip is connected to the actuator from the motor.
Don't apply too much bias to this or bend it too much, you don't want to break
it.....
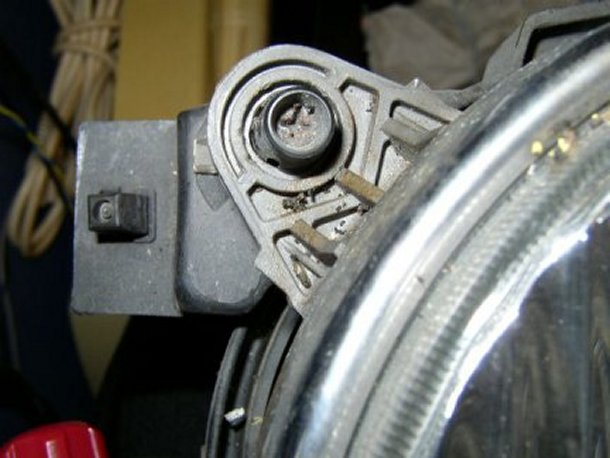
Here's a close-up of the clips, they are slightly conical and have four tangs
around the outer lower edge. From the close-up it can be seen that the clips
take a beating and it's probably best to replace them.....I can't say that I
did, it just makes it easier to pop the lights out next time!.....
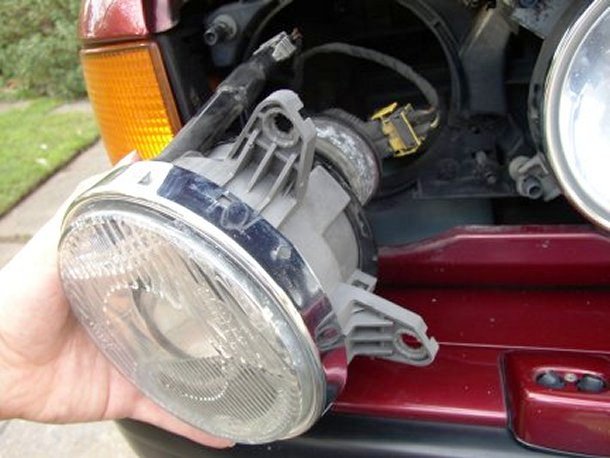
Right...after all three clips are removed (sounds easy when you say it quickly)
the assembly will pull forward and you can disconnect the looms from the H1 bulb
and the sidelight.....
Next, remove the sidelight tube (1/4 turn anti-clockwise and then pull away from
casing) and put it aside. The assembly can be separated at the centre by
removing the three screws. These are captive screws and need to be undone until
they become loose and then pulled up to mate with the next section of threading
and then completely removed by unscrewing further.....

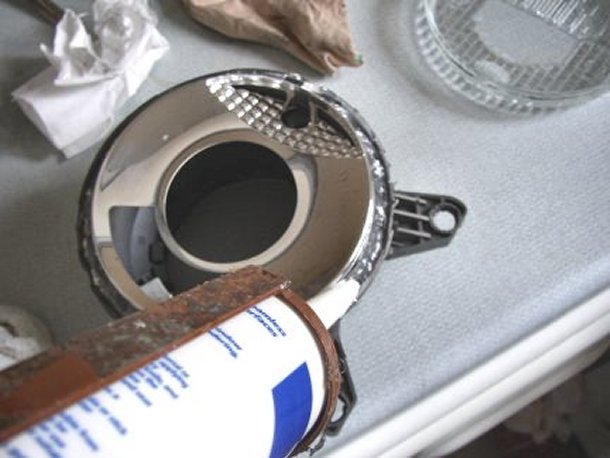
My problem now was that I had a cracked lens and no replacement for it. However,
the actual glass fronts are the same left and right, so I had a go at removing
the glass from a donor lamp (of the passenger side dipped-beam variety).
If you are mad enough to try this give it a go, if you are just cleaning the
reflectors then miss out the next few sections.....
Firstly remove as much sealant as you can from around the glass with something
sharp.....
Next, boil up a full kettle of water.....stick the front part of the assembly in
the kitchen sink (I mainly operate with domestic appliances) with the glass
facing down and pour in the kettle of boiling water.....
(Excuse the picture...the lens steamed up [rather obviously])...
EDIT: I have heard reports that the sealant used on some headlamps does not
soften after the boiling water treatment. An alternative has been tried
(although I have not done this myself) which is to cook the front assembly in
the oven for a while. I would recommend not heating the assembly past 120
Degrees C due to the plastic parts.....
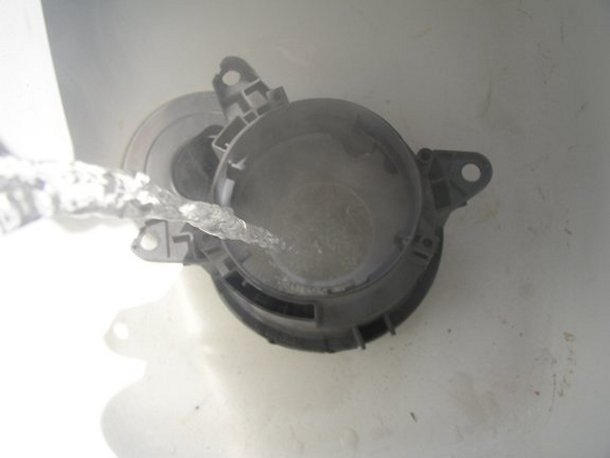
Get the kettle filled up with hot water and get it boiling again....you might
need it. Leave for around a minute and then give the glass a good tweak. The
donor lamp glass popped right out with no fuss....in one piece.....easy!!
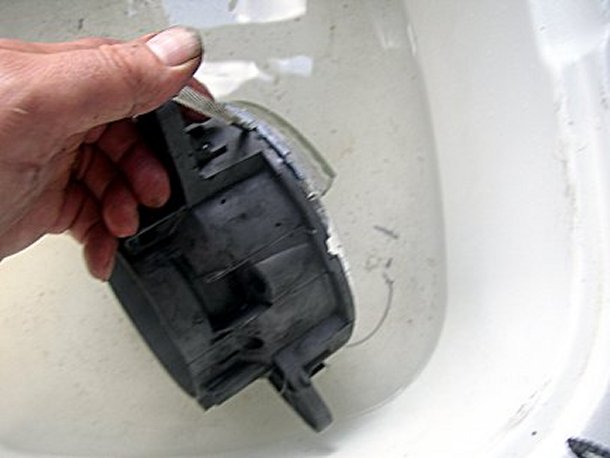
My original lamp was a lot harder and I needed two kettles full of water. The
sealant goes soft and can be stretched enough to get a screwdriver underneath
for further tweaking pleasure.....
P.S. It's difficult to take a picture AND lever the glass off at the same time,
this is not recommended, refrain from taking pictures during this phase of glass
removal.
P.P.S. The sink is getting pretty k'nackered by this point, keep the missus away
by warnings of impending glass failure......
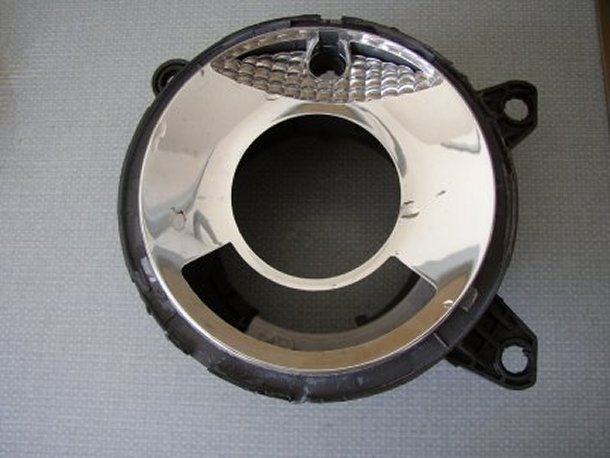
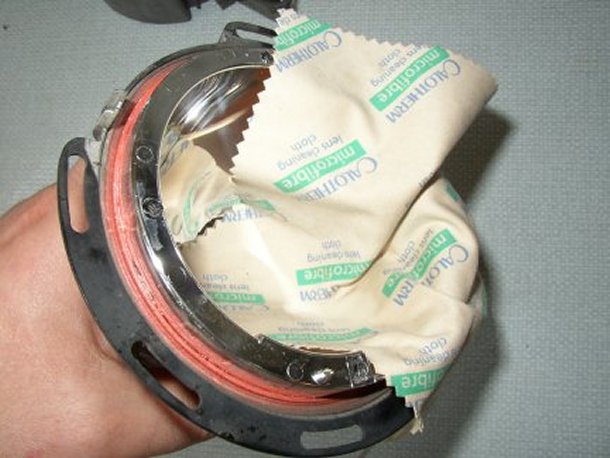
Once the glass is off and the sink has been returned to it's former glory scrape
the rest of the sealant from the front of the lamp assembly. At this point
(which is an unusual occurrence), you can clean the 'smiley face'.
Be warned that the material is probably vacuum-deposited metal-on-plastic just
like the inner reflector and if you rub too hard it comes off. Use an
optical-grade cloth (like that used on glasses) and very gently wipe the
surface. A little detergent can be used but the 'smiley face' is usually
reasonably free of ground-in dirt and just needs a wipe.....
Clean the both surfaces of the donor glass. If the face of the glass is pitted
you can use a cloth disk on a drill with a bit of polish or toothpaste. This
gets rid of any unevenness and makes the lens much more effective.
Apply a good bead of clear silicone sealant around the glass seat....
Then stuff the glass back on making sure it fully seats. The glass has tangs
around the edge so that it only goes on one way. If the sealant doesn't squish
out all around the edge then apply some more sealant so that there is a
continuous bead around the glass.
Fit the chrome ring back on the assembly, this helps keep pressure on the
glass....

Stick the front assembly in the oven (80C, electric ovens only) to drive out the
moisture while you work on the next bit.
Remove the projector chassis (4 screws).....

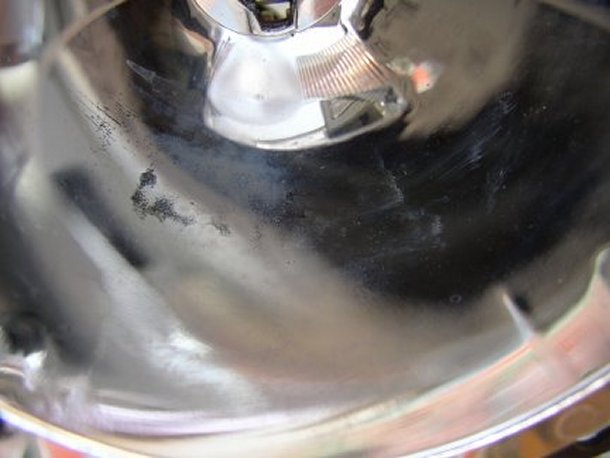
Now it is time to clean the internal reflector, take great care, this is much
more delicate than the 'smiley face' due to the damage from the hot bulb. Use an
optical cloth again and be very careful.....
This post has been edited by Timm: Apr 18 2005, 11:50 PM
This is the sort of damage that will happen if you scrub too hard.....
Give the projector lens a good clean while you're at it, it gets a bit cloudy
after a while. Refit the projector lens housing (it only fits one way around).
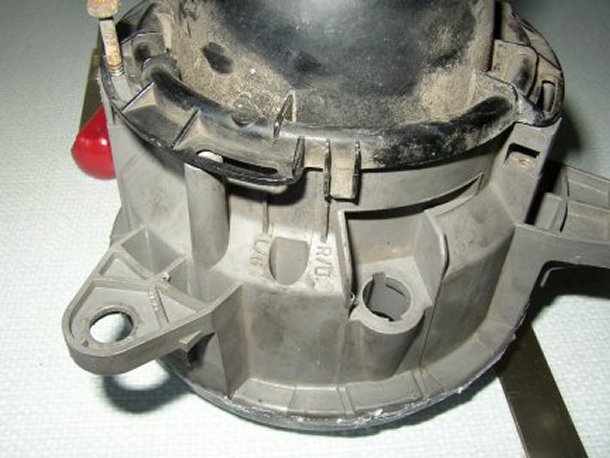
Now align the front and rear assemblies using the dial-guide on the side of the
rear assembly (see picture). It either fits as shown here, or can be lifted and
rotated to the other marker (it doesn't slide, it must be lifted and then
turned).
The markings on the front assembly are misleading (well they certainly fooled
me), I thought that the 'R/D' meant Right hand Drive....wrong. What I reckon is:
For the DRIVERS side this assembly should be set to 'L'
For the PASSENGER side this assembly should be set to 'R'
I obviously fitted it the wrong way around and blinded everyone coming the other
way (I was glad I used the old clips then!).
Screw the two halves back together and give the whole assembly another half-hour
in the oven to drive out any remaining moisture (you don't want condensation on
the inside of the glass)......
Before the assembly has cooled back down fit the bulb and rear cover (make sure
the red gasket is still in place).
Fit the clips to the ends of the adjusting screws on the headlight chassis.
Refit the sidelight tube
Refit the looms and poke the lamp assembly over the clips making sure each one
snaps into position (don't push the lower ones too hard...they are connected to
the motor actuator). It is acceptable to use WD40 to help at this point as it
soon evaporates......
Refit the grille from the bottom and align it with the lower push-to-lock
clip.... Give it a good poke....
The two upper fixing refit with the longer edge horizontal (I got this wrong the
first time and although they do up they don't secure the grille)....

Close the bonnet....all done...time for a cup of tea......

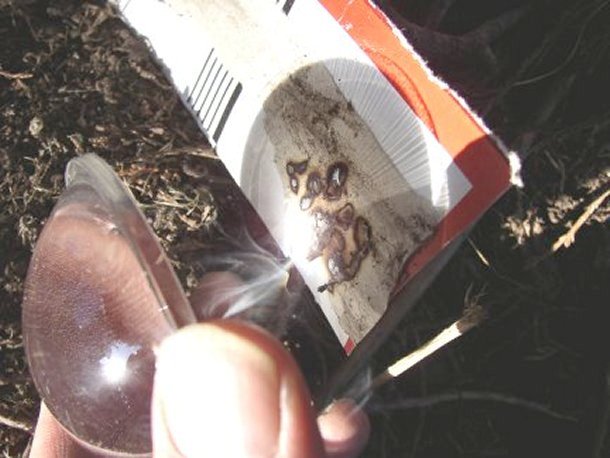
Well except for the question you've all been thinking.....
Just how powerful is that projector lens?
Can it fry ants?
Answer.....very...yes
The sun's going down but I still have enough power to frizzle through card like
an 007 laser......
![]()
