
Timm's BMW E31 8-Series Euro Pop-Up Headlight Adjuster Repair
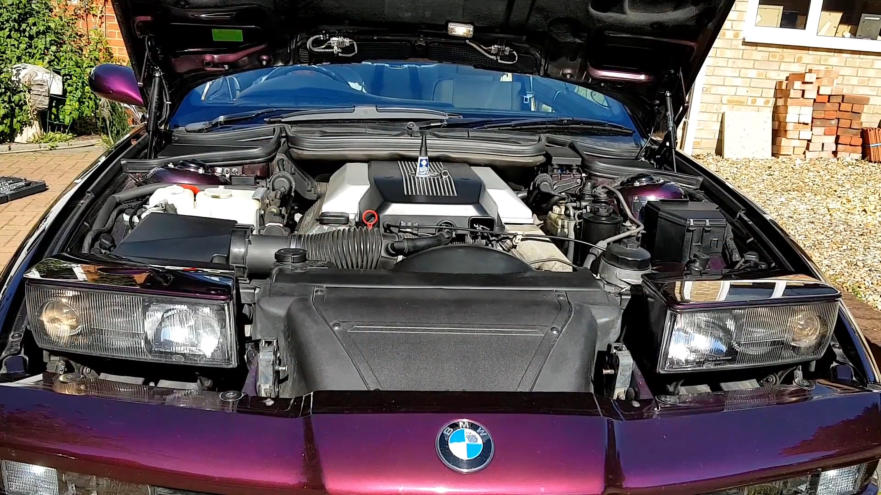
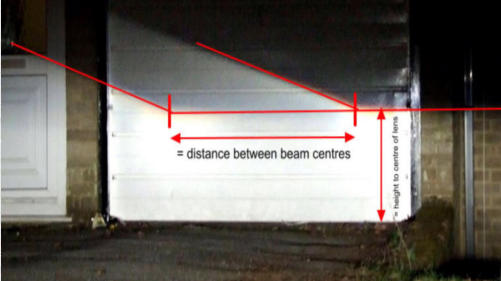
The evenings are closing in and my right-hand headlight is a slug-spotter


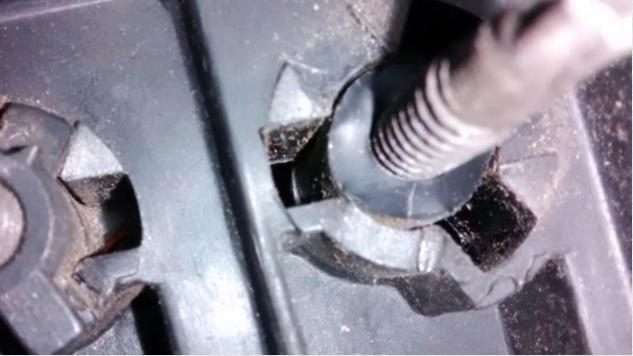
As usual with the Euro headlights, one of the adjuster bobbins has disintegrated and allowed the internal parts of the headlight to droop
down and illuminate a distance of around 10 yards from the front of the car - the picture above shows the usual problem, the castellated
parts of the bobbin have fallen off and the threaded rod and retracted inside the assembly.
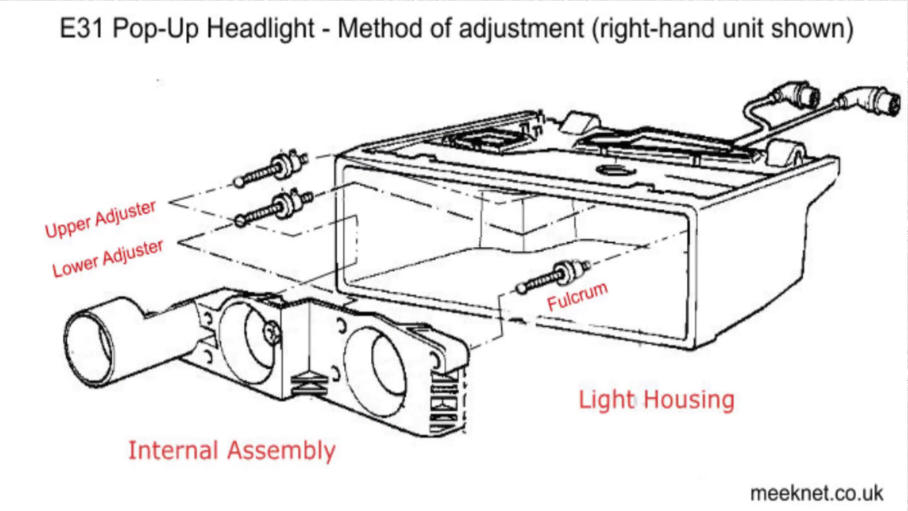
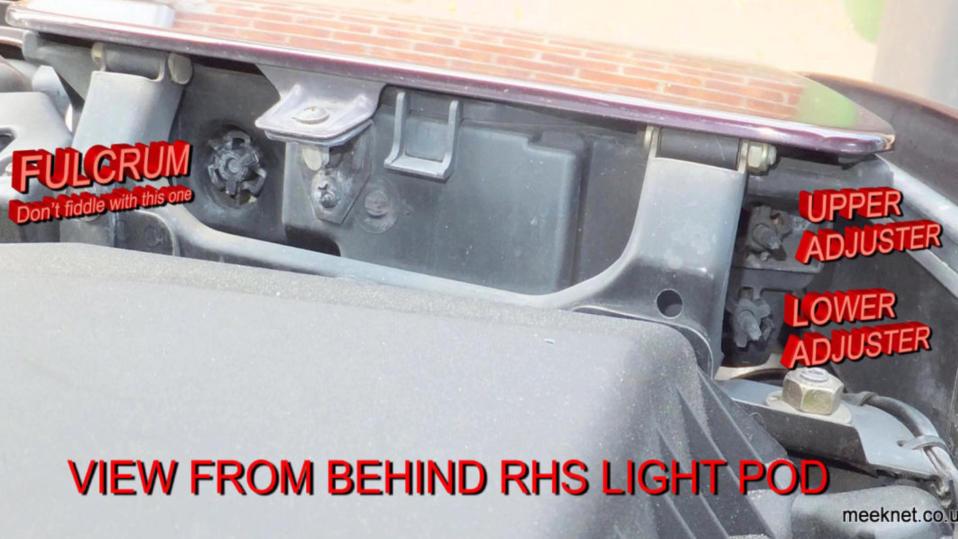
Here’s how the internal assembly is supported within the light housing - there are three rods (shown above) that are pressed
into the internal assembly with a intermediate plastic cup forming ball-joints. The three rods have bobbins fitted at the rear end
that are inserted into the housing and then rotated to lock into place. The two outer rods are threaded - and rotating the rods
using a Torx drive from behind the assembly is the method of adjusting the headlight aim. The third rod is knurled and the
bobbin in permanently attached and is used as a fulcrum point.
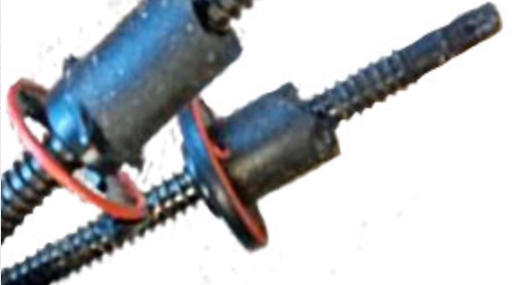
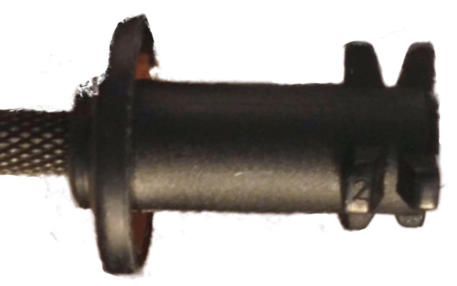
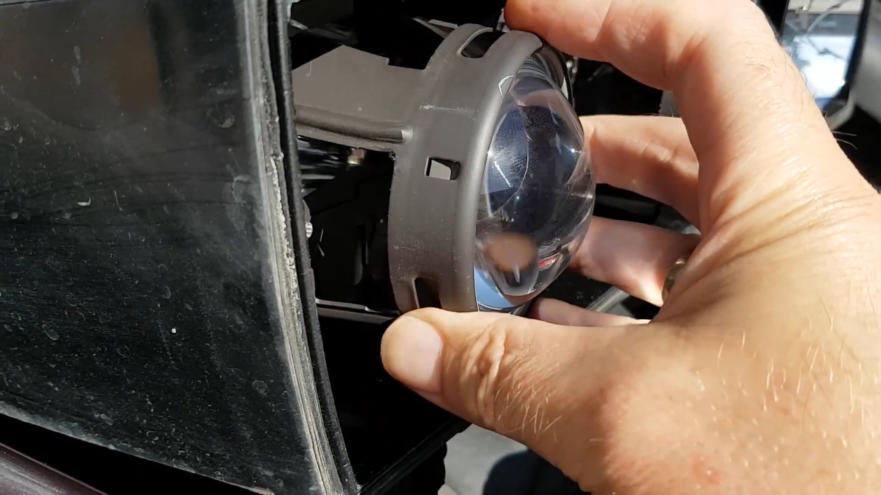
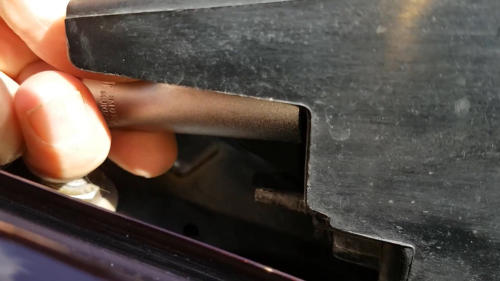
The picture to left above shows a couple of failed bobbins on the threaded adjustment rods - and the picture on the right is a
bobbin in good condition, this is a fulcrum bobbin as the rod is knurled rather than threaded.
The picture above shows the castellated ends of the bobbins poking through the housing. The method of initially fitting
these can be seen above - all three rods, ball-joints and bobbins are attached to the internal assembly and then the
bobbins are passed through the housing and rotated until they lock into place.
So, you could get three new bobbins, or you could get the kits that are available from after-market sources that replace
the bobbins with machined parts along with new adjuster rods with a thread to match the new machined fixing devices.
The problem with this is that the internal assembly has to be completely removed and all adjustments lost - along with the
fun required to refit the ball-joints and the possibility of cracking 20 year-old wiring doesn’t seem like fun.
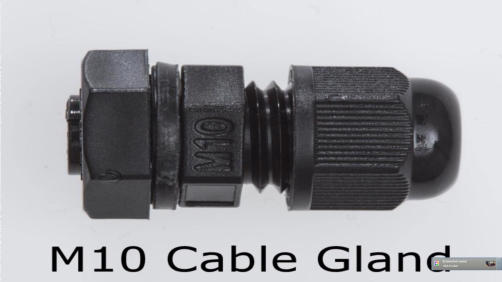
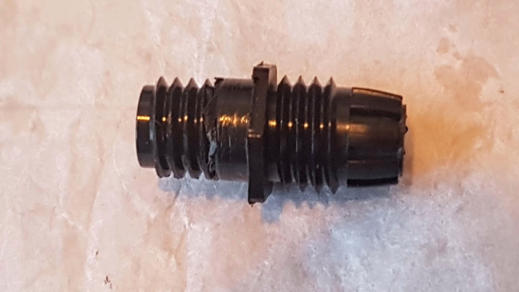
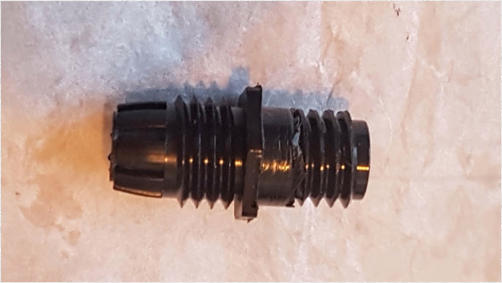
What we need is a plan to just use something that grips the threaded rod that can be inserted from behind the housing so that
we don’t have to completely disassemble the headlight. And the device for the job is a cable gland - these can be bought from
Ebay for a couple of quid - the size to use is M10 as this fits both the aperture and the threaded rod.
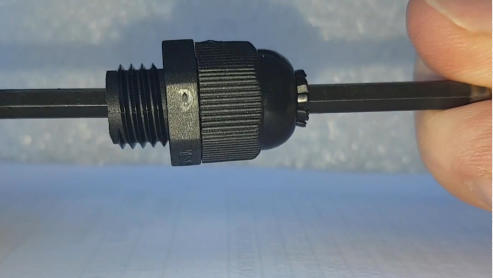
The cable gland can be fitted into the housing over the adjustment rod and once the domed nut shown on the right is tightened
the cable gland will lock the internal assembly firmly into the correct position - sounds easy, and it is!
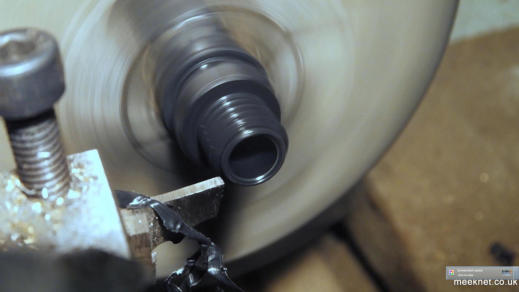
When I first did this around a year ago on the other headlight I stuck the cable gland in the lathe and turned off half the captive
nut - this allows the cable gland to be inserted further into the housing - and more importantly - allows the threaded part of the
rod to be secured rather than the plain part of it. This isn’t strictly necessary and it holds the rod perfectly well with the captive
nut at the original dimensions.
Right, enough talking - let’s get on with it.

Key in the ignition - switch to position II and turn the headlights on-andoff five times in a row, the last time you switch the
lights off they will stay popped up - switch the ignition off and remove the key.
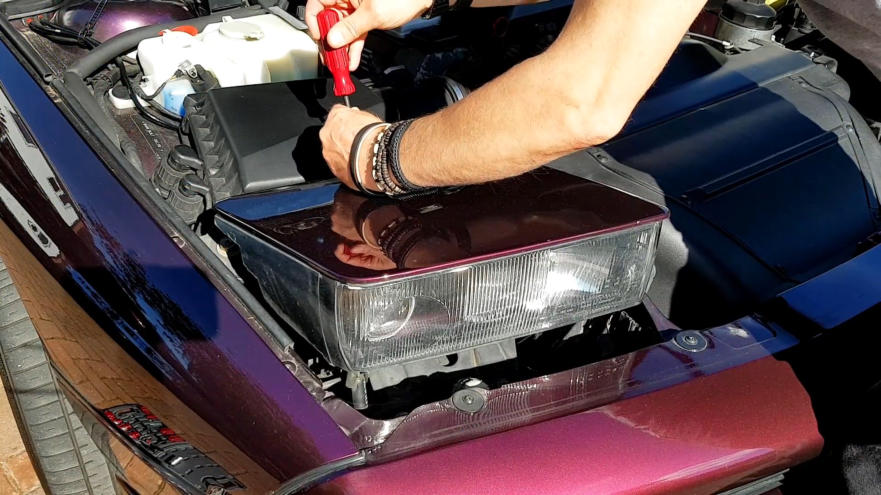
Undo the single pozi-drive screw and push the cover forwards to remove
Remove the six clips starting with the lower ones - use a flat-bladed screwdriver and poke it in the side of the clip
and then rotate anti-clockwise and the clip will pop off. From experience (although it makes no sense) it is best to
put the clips back where they came from as they are easier to refit.
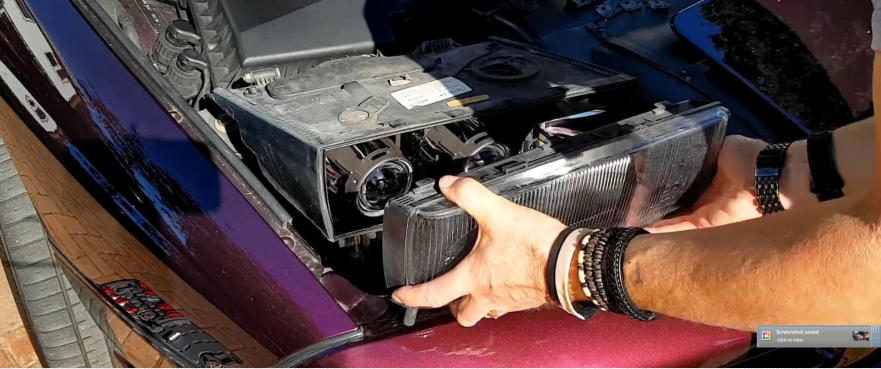
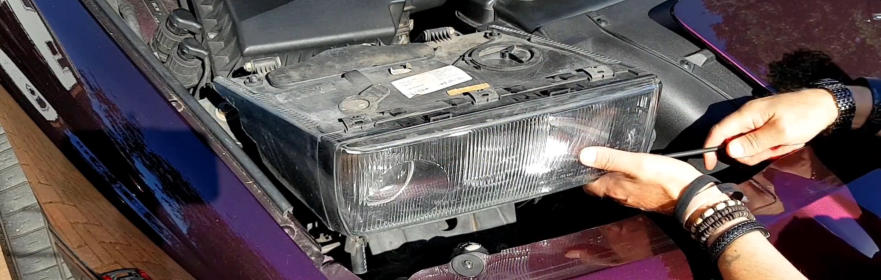
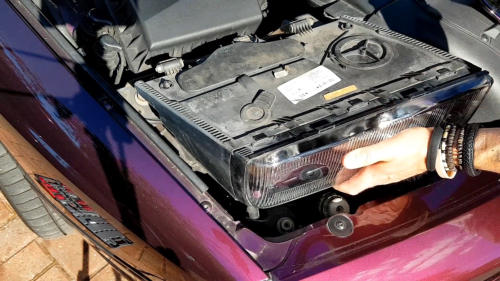
Remove the headlight glass - stick it in the sink and give it a good clean inside and out
With a failed adjustment bobbin you will find that the internal assembly can be moved easily up and down - mine did.
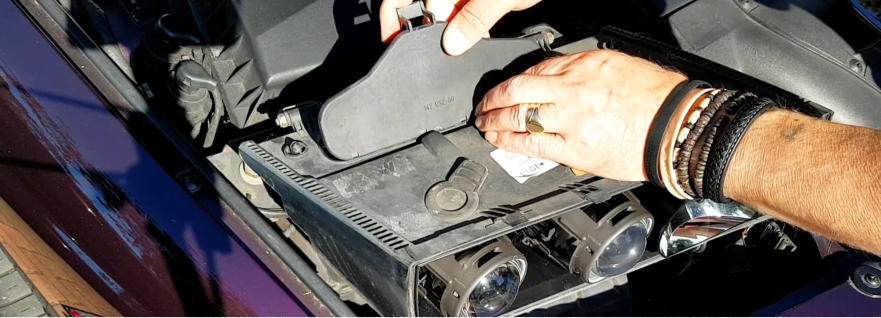
Remove the rear cover - this gives access to the adjustment rods - remove the remains of the broken adjuster
bobbin. This is usually pretty easily as they completely disintegrate - but sometimes the barrel stays on the
adjustment rod so just push it towards the front of the light out of the way.
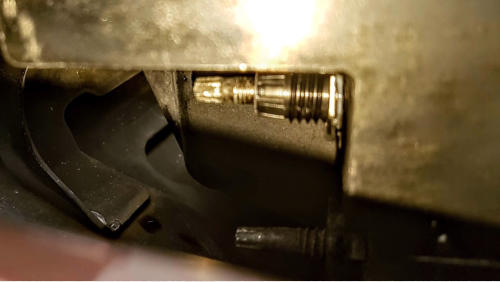
We are now going to glue the cable gland in the place of the broken bobbin - so use Araldite Rapid and wipe it around
the threads on the right of the gland as shown on the left - and then push it into the housing - and then leave it like that
for around an hour which is long enough for the Araldite to cure.
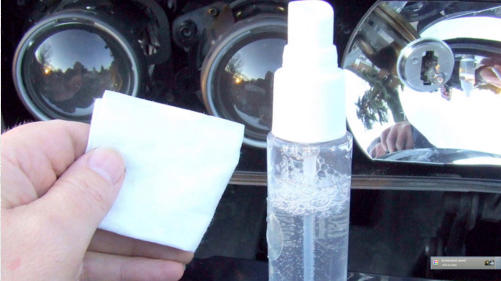
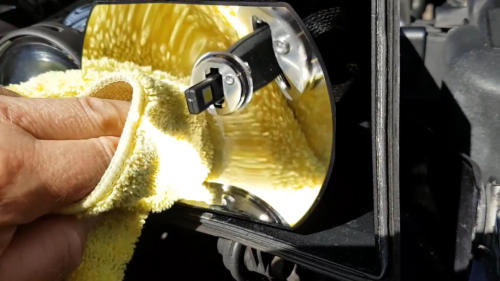
Use the curing time to give the reflector and lenses a good clean as covered here
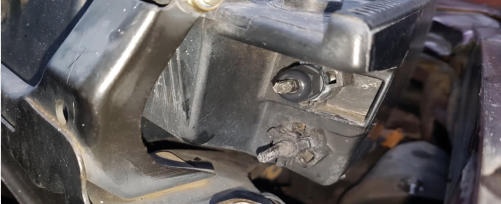

Loosely fit the compression nut and then adjust the beam height by moving the internal assembly from the front to be the
same as the other light - as long as you haven’t fiddled with the other adjusters this is all you need to do.
Once you have the height set correctly tighten the compression nut with a 10mm socket - don’t over-tighten!

Apply some silicone grease to the headlight seal and then refit the glass and then the top cover
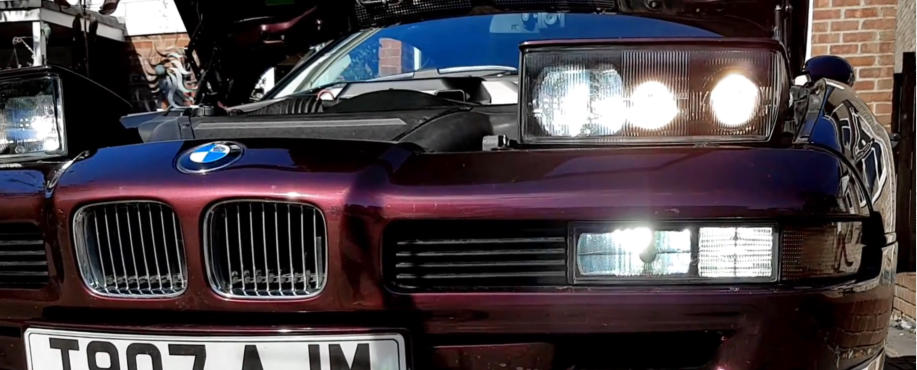
And that’s about it - as I said earlier I did this fix on my left-hand light a year ago and it has been fine. It’s certainly a lot
easier than completely removing the internal assembly and fitting an after-market solution or buying the rods and bobbins
from BMW (if they are still produced).
This fix can be done without removing the headlight glass if you are happy pushing and pulling on the adjuster rod to adjust
the beam throw after fitting the cable-gland - and that’s how I did the first light. But, it was time to clean up the lights
anyway. I did a video for this which is shown below:


SEARCH MEEKNET