TIMM'S BMW E38
HEADLIGHT REFURBISHMENT AND ADJUSTMENT
This procedure is for the pre-facelift headlight assemblies, the same routine
can be used for the post-facelift. This procedure can be used to get better
performance from the lights, after a while the reflectors dull and the front
glass will get pitted. The procedure can also be used to solve any problem
within the headlight assembly.
Remove the headlight from the car:
http://www.meeknet.co.uk/e38/Headlights/Index.htm
My car had one main beam that pointed at the ground rather than at anything
useful, adjustment of the headlamp assembly moves both main and dipped beams at
the same time....so something was wrong internally....so....time to take it
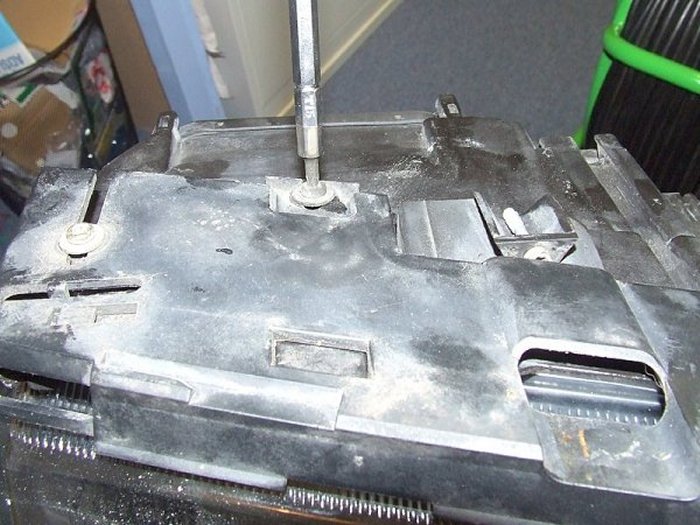
apart. Start by removing the lower guard, please note that the lower guard has
two slots in which tangs should fit, if these are not in place then it is very
difficult to get to the lower Torx bolts. Remove three Torx bolts and slide the
guard forward:
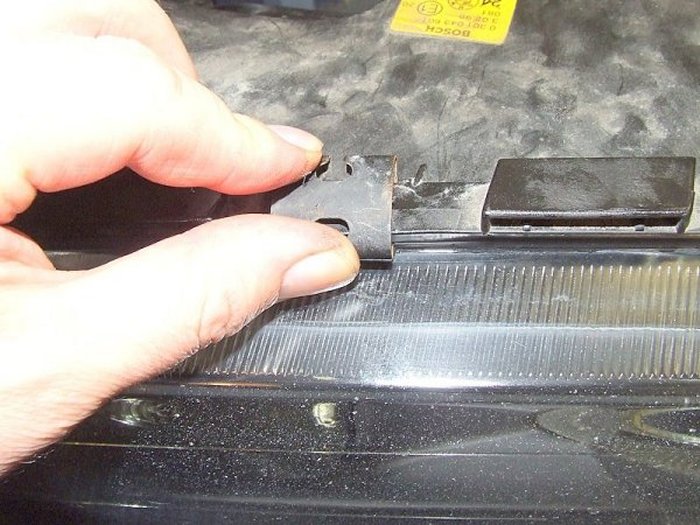
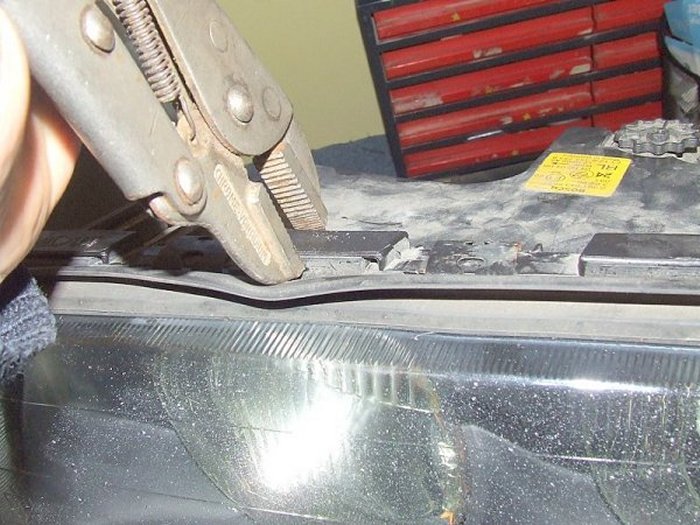
The headlight has a rubber section which is held onto the headlamp assembly by a
number of clips. Use a pair of Mole-Grips to push these out:
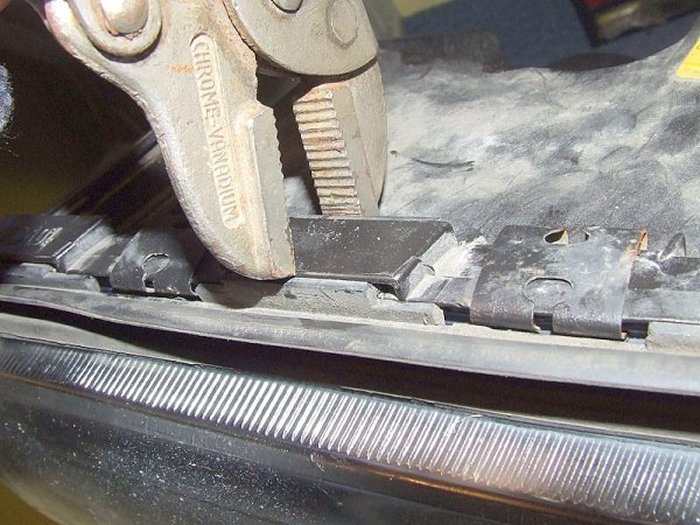
Once all the clips are pressed through remove the rubber section.
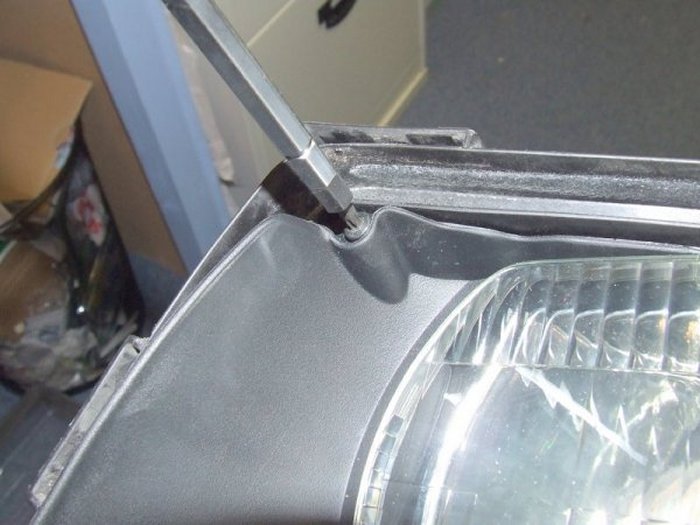
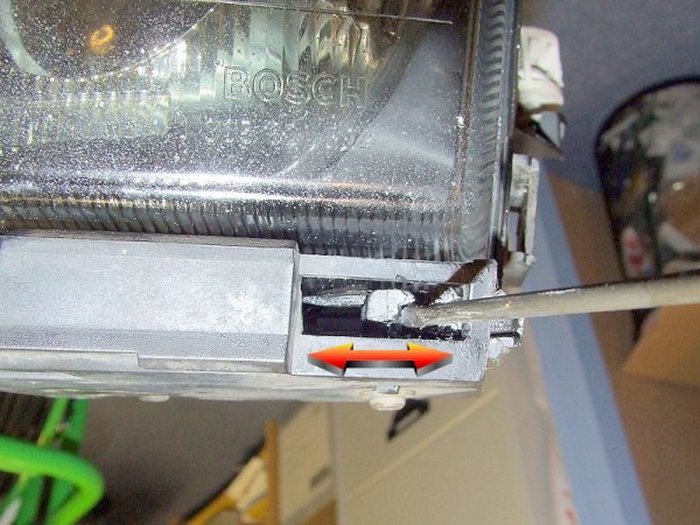
The headlamp front glass is held in place with a number of spring-clips. Don a
pair of safety glasses and poke a flat-bladed screwdriver in the furthest-away
hole in each clip. Pull the screwdriver down and towards you, this opens the
clip and they will twang off:

The glass can now be removed, stick it in the kitchen sink for a good clean
unless you are (sensibly) replacing it.
The inner cover (complete with lamp glasses) can be removed by removing three
Torx bolts:
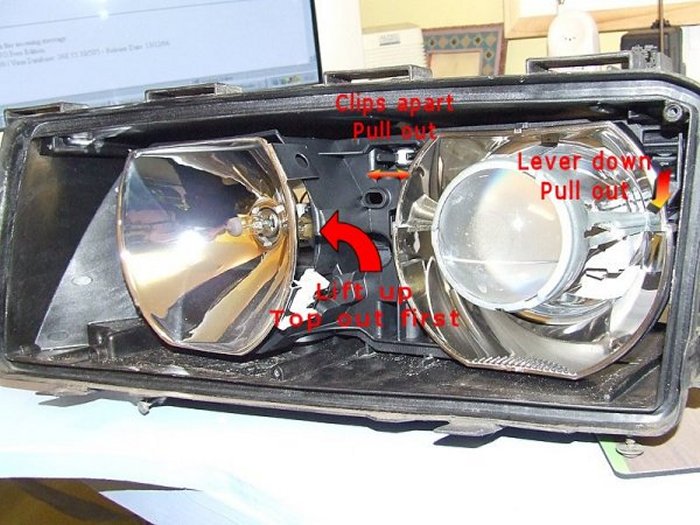
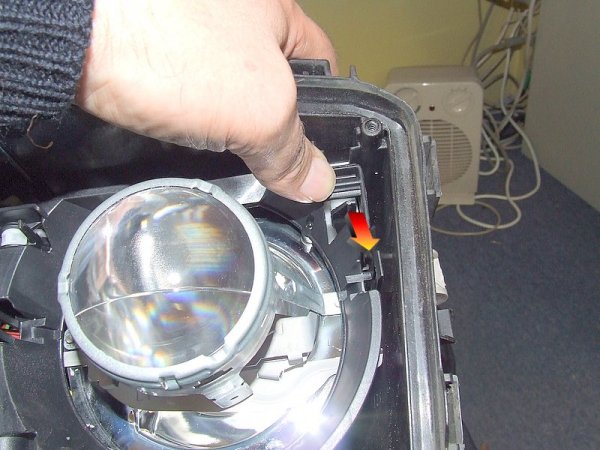
This is the inner assembly, the section that holds both lamp assemblies can be
removed so that access can be made to the servo. There is a clip on the outer
top corner, this pulls down and by holding onto the projector carriage the edge
can be pulled forward. There is an upper-centre clip with two tangs, spread
these and pull on the carriage again and this will pop out. The lamp assembly
can be removed by lifting the top edge up and outwards. Disconnect the looms to
the two bulbs and remove the sidelight before you do this:
Here for future reference is the sidelight bulb from behind:
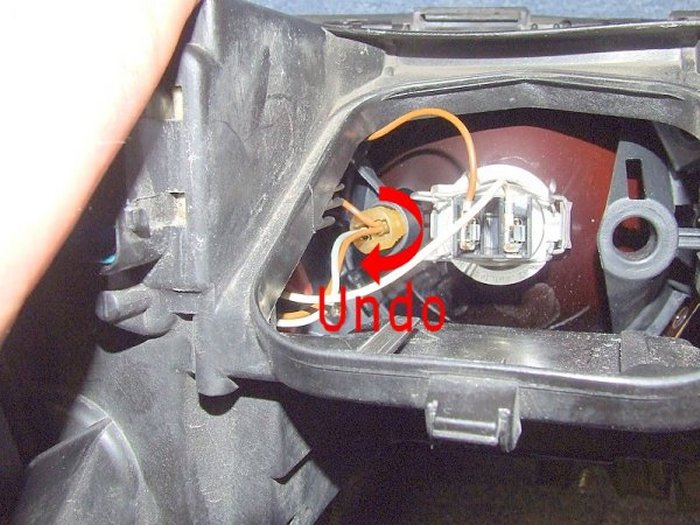
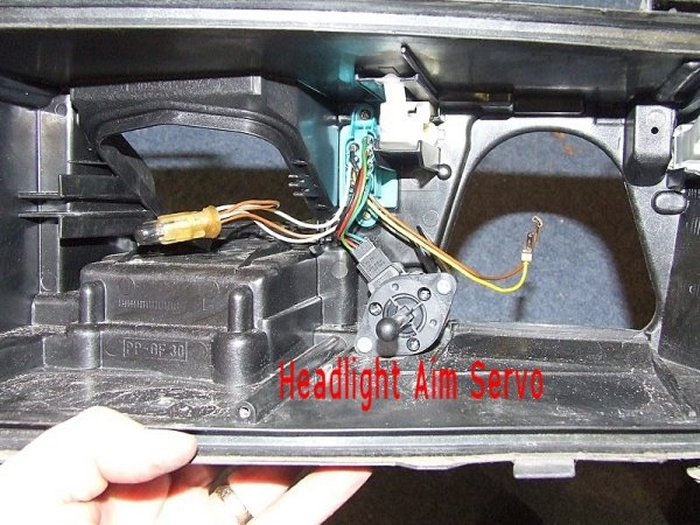
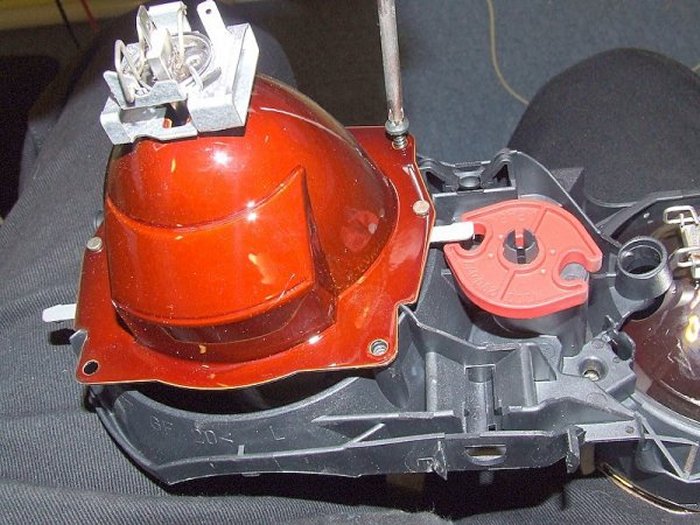
Once the lamp assembly is out you can see the servo for the beam height:
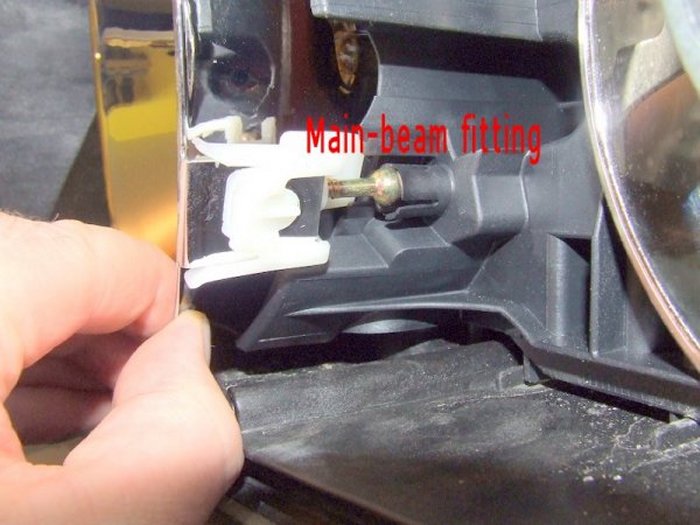
Right....once I got to this point the reason for the dodgy main-beam aim was
apparent. The main-beam assembly is held in place by two adjustable shafts with
ball-ends, these fit into cups on the plastic back-plate, one of these had
popped out of the housing, probably when someone poked the main-beam bulb in too
hard. I popped the ball-end back in:
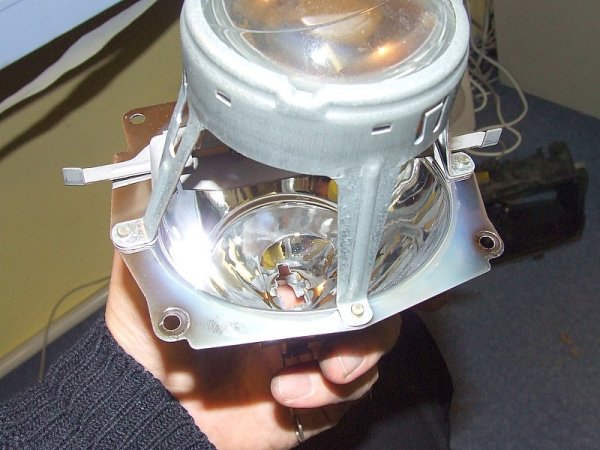
While we're at it, the reflectors can be cleaned, these discolour after a while.
The reflectors have a vacuum deposited mettalised layer, this comes off easily
so take things gently. Use Silver polish to gently clean the surface. This
worked well, no silvering came off and the results were good as new. To do this
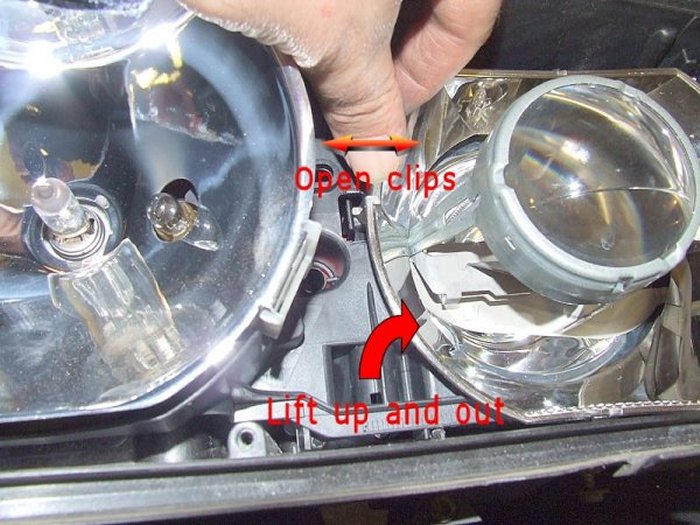
on the projector lamps they have to come apart first. Remove the front
reflector, there are clips on each side:

Remove three Pozi-Drive screws from the rear of the projector:
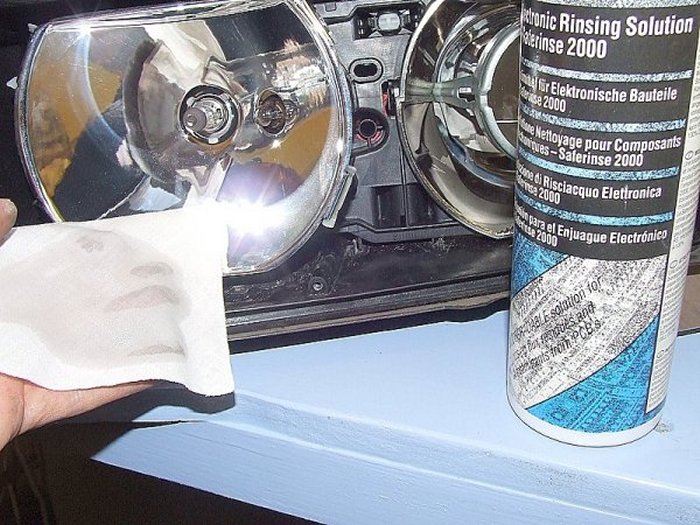
Be very careful when cleaning the reflectors, it does make a big difference
though:
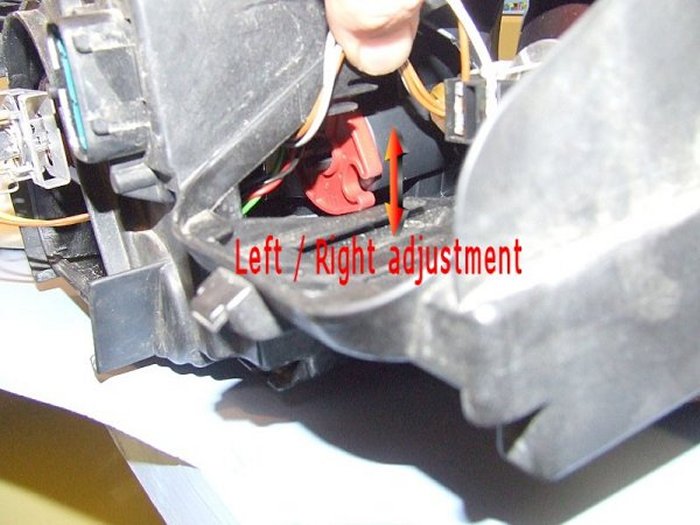
While we're fiddling, this is the view through the main-beam rear-cover, this
rotating red bit sets whether the dipped beam is dipped to the left or the right
(for continental driving...even easier than the E32):
Right, that's about as far as we need to go, not much else unbolts or pulls
apart, so after cleaning stick it all back together. Rebuild the projector
assembly and refit this back in the inner assembly. The inner lamp assembly
needs to be lifted over the servo ball and then clipped back into the fixings at
the corner and the centre:
Fit the reflector ring in place, make sure all the reflective surfaces are
perfectly clean and fit the inner guard back in place.
Grease the rubber gasket (Silicone grease) and poke it in the cavity (it will
only fit correctly one way round) and then grease the upper surface where it
meets the glass:
Don the safety glasses and refit the spring clips, put one end over the GLASS
before pushing the other end over the plastic, this way the glass will not
break:
Fit the rubber guard back on using a pair of Mole-grips:
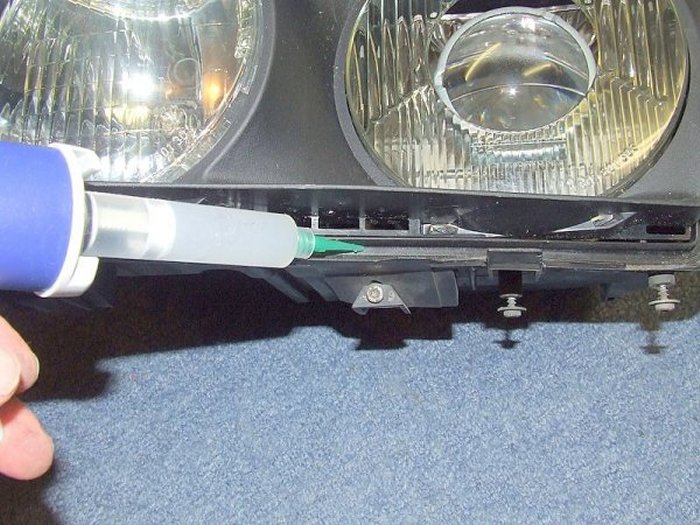
Apply some Silicone grease to the pin assembly and work it back and forth a bit
to loosen it up:
Fit the lower guard back on the headlight assembly making sure the two tangs fit
in the cavities:
All ready to fit back on the car.................
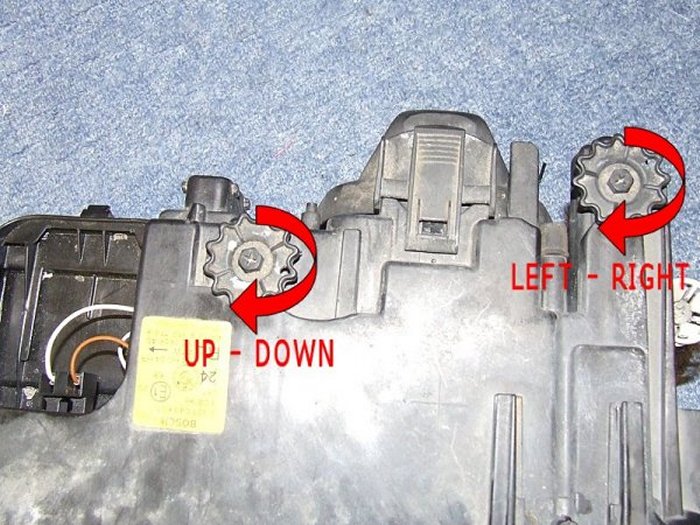
Once back in the car the throw might need adjusting.....here are the two
adjusters:
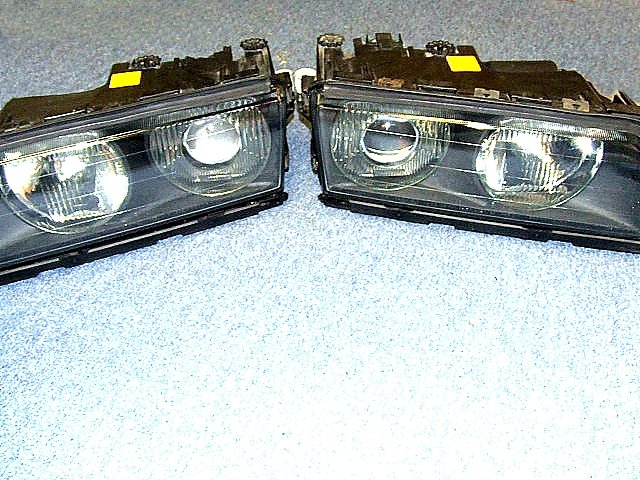
Since I did that repair I've hooked both of them back out again, the front glass
was just too pitted. So, EuroCarParts and a few quid lighter I have a pair of
glasses.
The lights are now excellent, it is amazing how much difference new glass and a
bit of polishing makes:
All done - Time for A Cup of Tea
![]()
