TIMM'S BMW E38
PARK DISTANCE CONTROL
(PDC) REPAIR
If you have PDC fitted but all it does is
give a long 'beeeeeeeeeeep' when reverse is selected then you most likely have a
PDC sensor that has fizzled out. I heard a long while ago that you can hear them
click when they are working, so, ignition ON (don't start the engine) and press
the 'PDC' button. As long as it is reasonably quiet day you can hear the sensors
clicking by sticking your ear right up to each sensor.
Some sensors are slightly louder than others but it is reasonably easy to tell
which ones are working and which ones aren't.
OK, so I have one dud at the front and one dud at the rear. I must say that I
didn't fancy this one but it was a LOT easier than expected. This is how the
rear trim comes off:
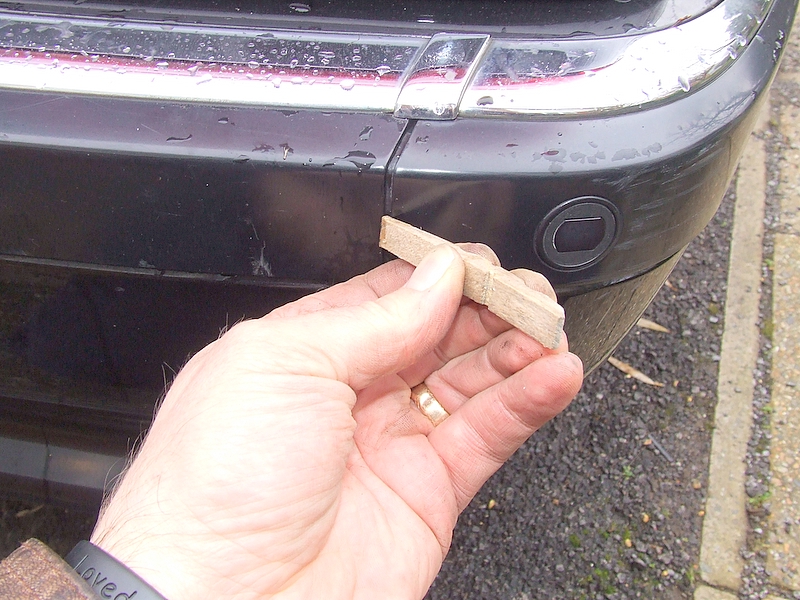
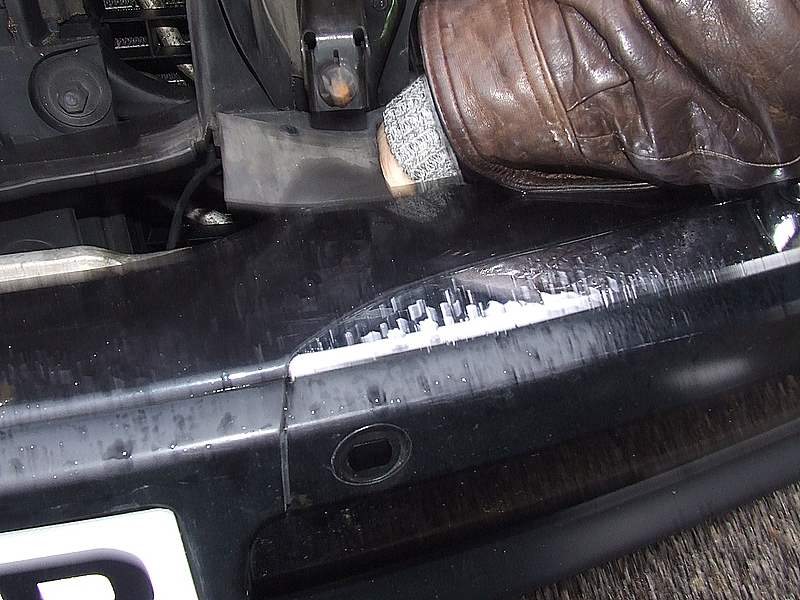
The TIS calls for a 'Hardwood wedge', well, half of Gypsy Roses' clothes peg
seemed to do the trick. I just wedged it in there and the black rubbery trim
along with the chrome top-strip came out nicely. There are around 8 clips top
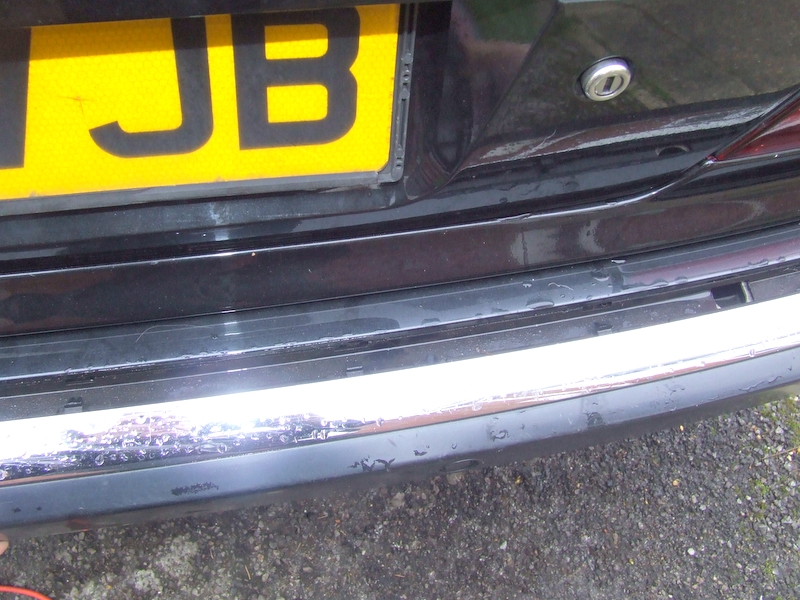
and bottom, they just pull out, here's the trim half off:
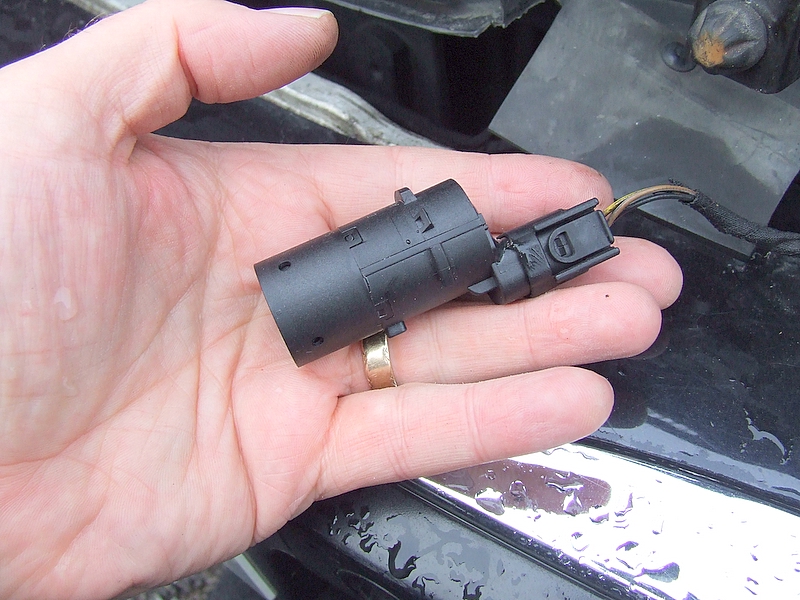
Before we go any further, this is what a PDC sensor looks like:
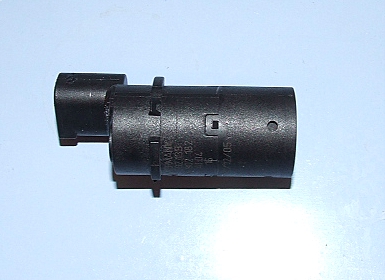
They are Part # 66-21-6-902-182 from BMW and usually around £48, as usual Ebay
came up with a couple of new ones for a lot less!
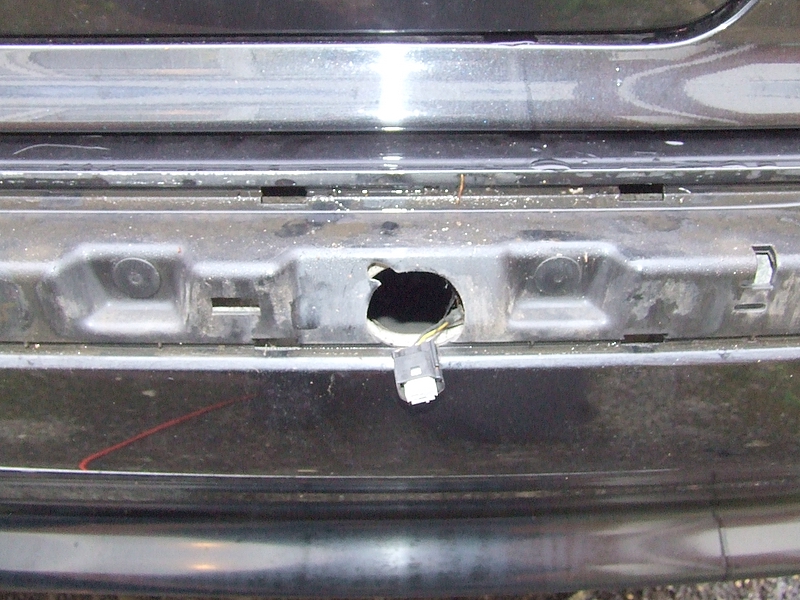
I thought these things just poked into the rubbery trim but of course, being a
BMW they actually have a plastic carrier built into the trim:
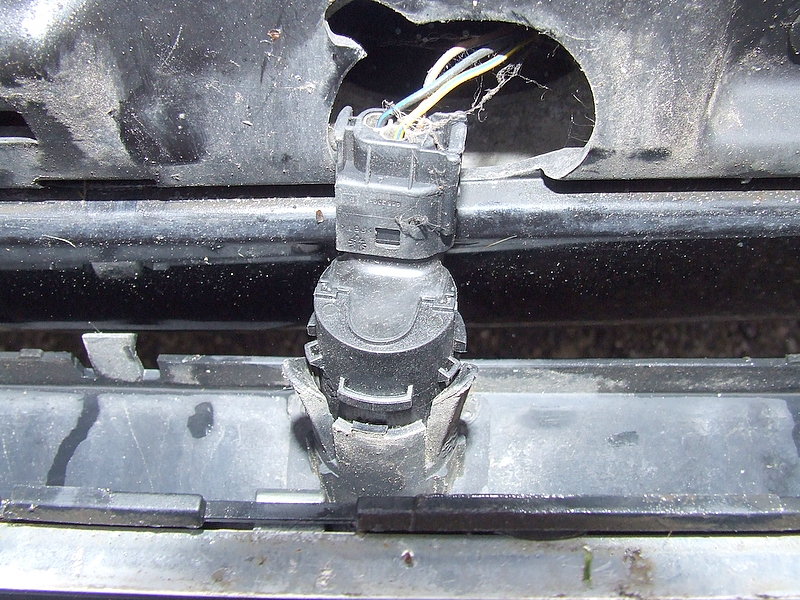
As you can see, this one is half out of the carrier and you can see that the
lugs on the side of the PDC clip into securing tabs on the side of the carrier.
You just open up these tabs a bit and push it out from the front of the sensor
(they get a bit gummed in so a good poke is required). Once it is out you can
release the PDC sensor from the loom, there is a catch on one side of the
connector:
Fit the loom to the new sensor, make sure the little clip is engaged on the
connector and just poke it back in the carrier until it goes 'click' and is
flush with the trim.
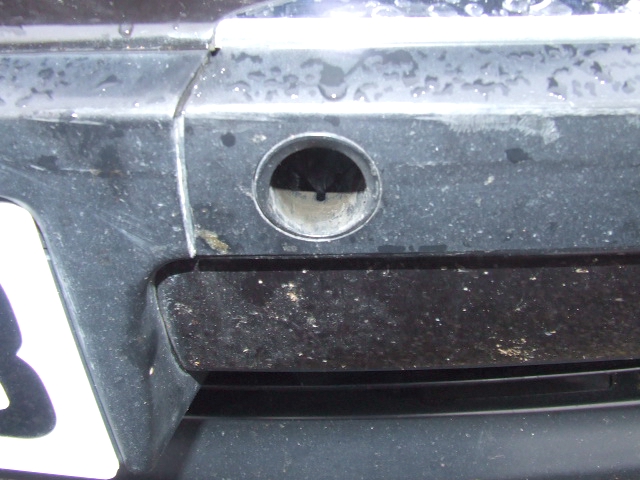
The trim just pushes back on, make sure you go along the bottom of the trim a
push quite hard where each clip is, they will snap into position securely. Here
is a picture of what is under the trim, you can see the slots where the clips go
in:
The rear sensors are quite easy to do and only take a few minutes. The front
ones are a bit harder but still reasonably straight-forward.
First, remove the headlight on the corner where the faulty sensor is:
Headlight Removal
Having done this three times now I can get the headlight off in less than 5 mins!
This gives good access to the back of the PDC sensors. If you have an
exceptionally fat arm then you can remove the headlight carrier which is held on
by two bolts. One thing to be careful of is that the carrier looks like it
initially sets the headlight mounting position........I would have guessed that
the headlight carrier is fitted to the headlight in Production, the headlight
fitted to the upper mounts and then the carrier bolted down, all done before the
front bumper is fitted. So, mark the positions of the fixing before removal so
it goes back in the same place.
Fortunately I have skinny arms:
It is reasonably easy to winkle the PDC sensors out from here once you know how
they unclip, here is the carrier still in place, this must be glued to the trim
in Production and does not come off:
The PDC sensor on the corner trims can be reached from here as well, just ensure
that you keep the sensor on the loom until you replace it, it is a lot easier
connecting the loom while the sensor is out!
All done, time for a cup of tea............

![]()
