Timm's BMW E63 and E64 N62 Engine
Crankcase Ventilation Valves Replacement
Also known as CCV or PCV - Causes Rough Idle, Smoke and Poor MPG
The symptoms of a failed PCV is often mistaken for worn valve stem seals
It is much more likely to be the PCV’s than the valve stem seals and much cheaper!
See 2018 update at end for further clearing of PCV assembly
Here we go again, PCV (Pressure Control Valve) problems have been around since the introduction of the M60 V8 in 1992, and here we are in
2015 with the N62TUB48 - and I have PCV problems! Thank goodness they are a darn sight easier to change on the N62 than they were on the
M60/M62/M62TUB. If you want to know a bit about what these things are for - more can be found
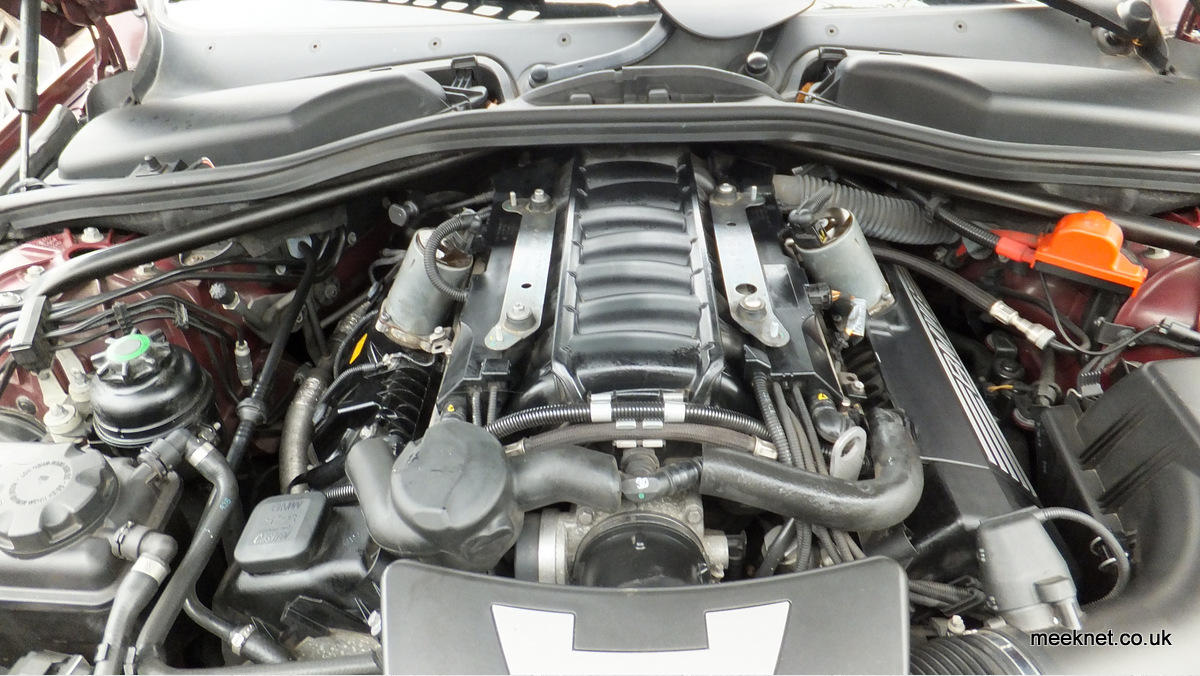
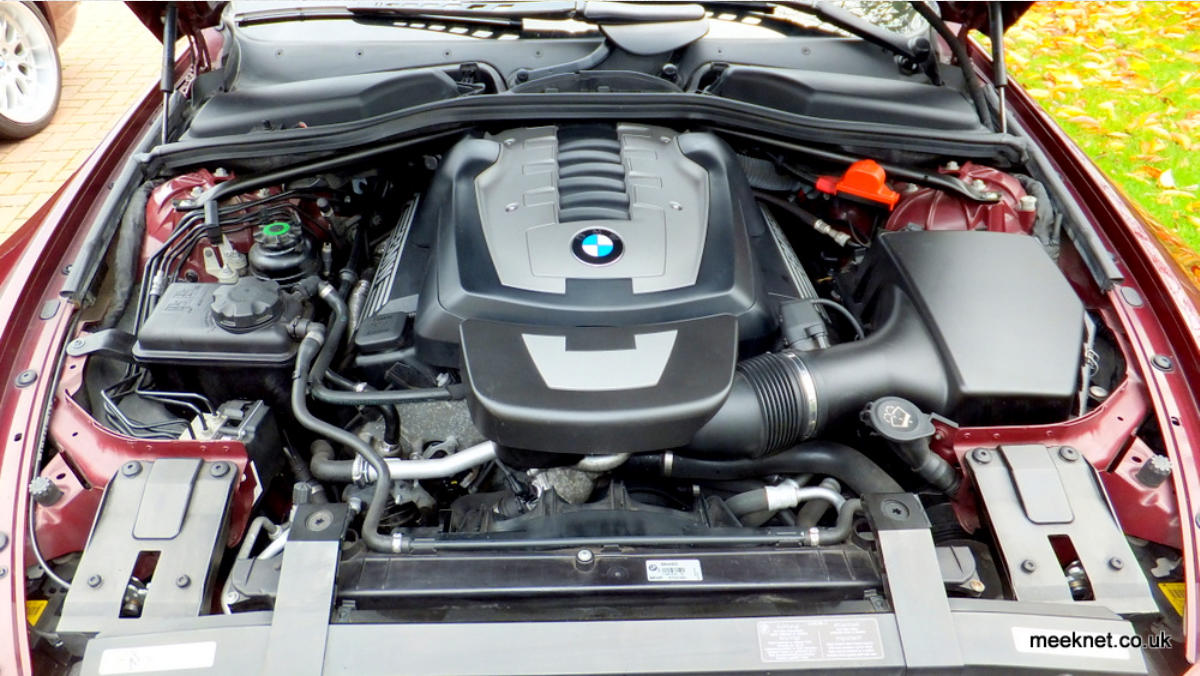
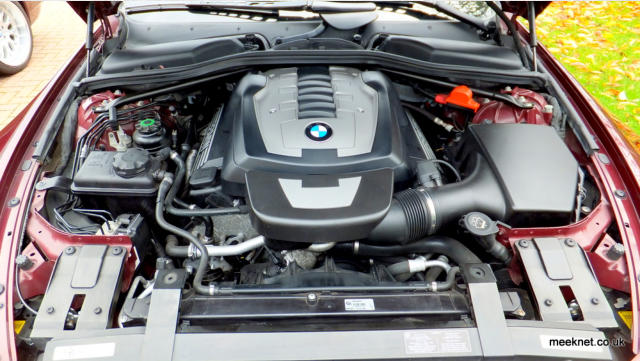
So, no messing about, engine covers off - four 10mm conical nuts with captive washers and lift the cover away:

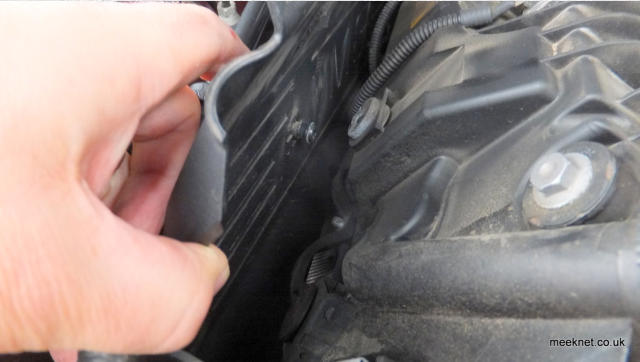
The cylinder bank covers have plastic bosses which are simply pressed into rubber bushes - you just give the cover a good pull in the right
places:

I was expecting to find the PCV on top of the cylinder bank cover (as is shown in RealOEM) - but this was moved in 2005 because of problems
with the valve retaining moisture which froze and then blocked the crankcase gasses. This was covered in SIB 11 01 07
.
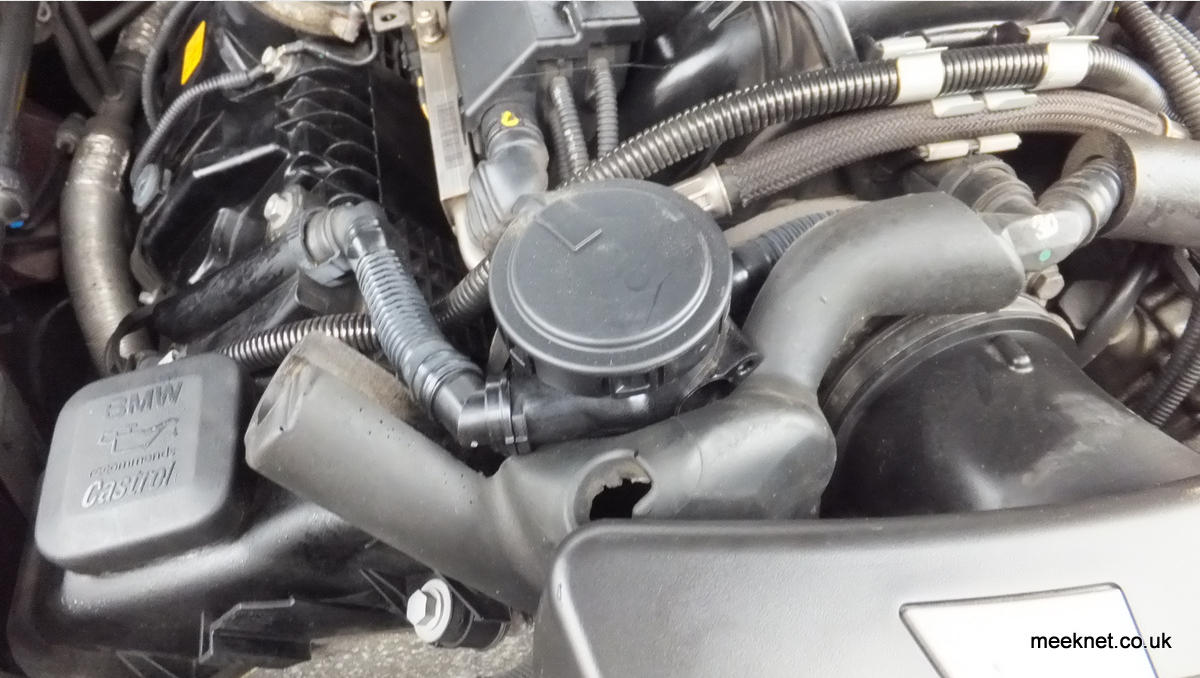
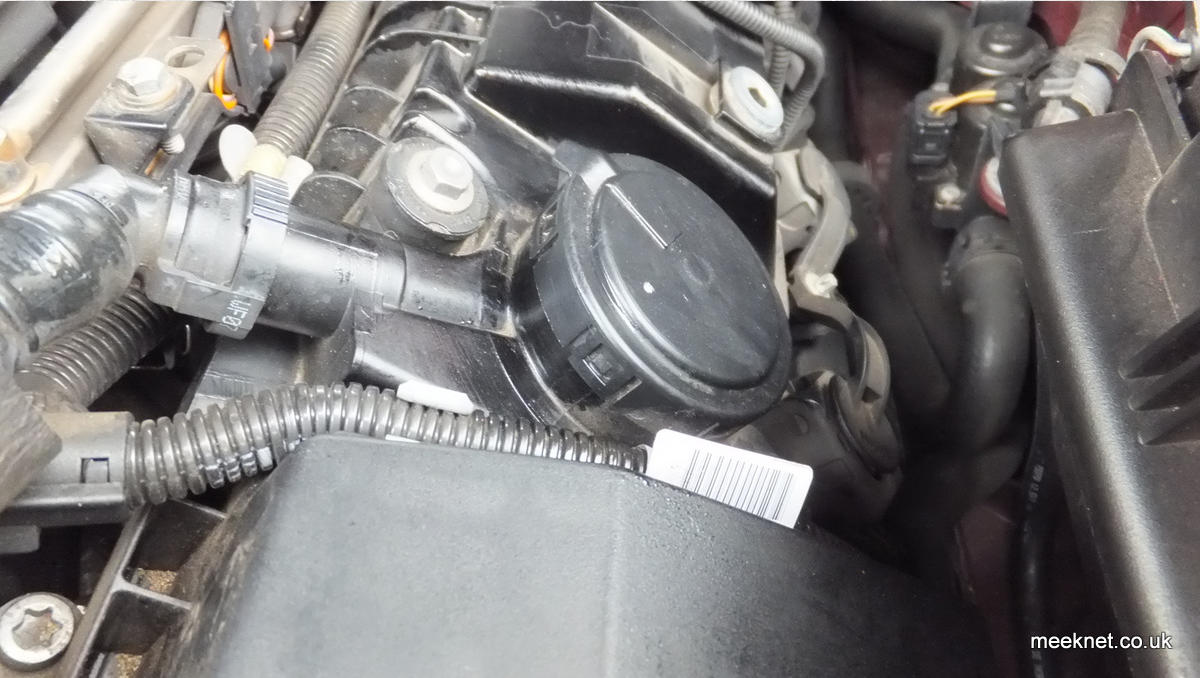
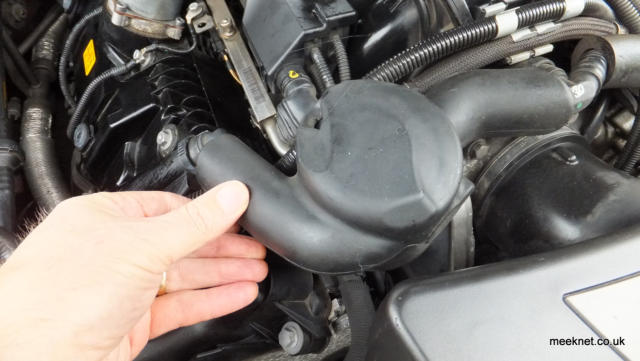
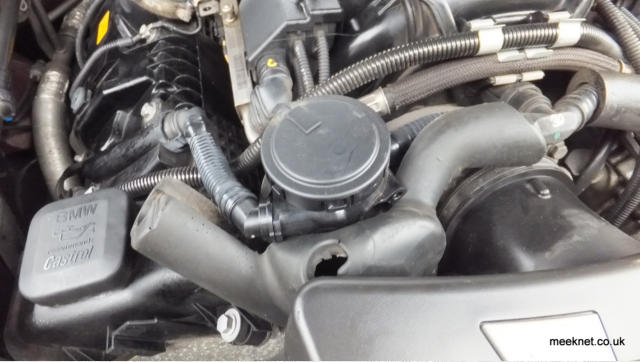
The PCV valve has been replaced with a self-contained unit which is now insulated under a foam cover here:
Peel off the insulation to get to the valve:

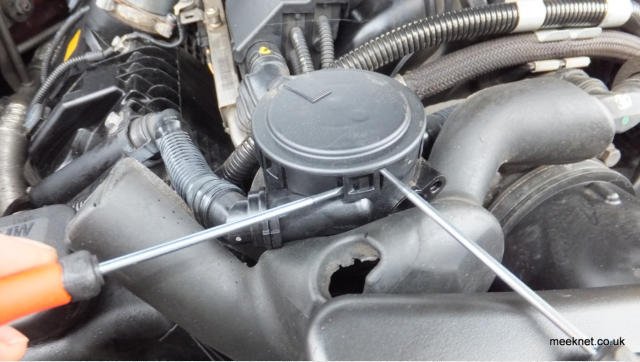
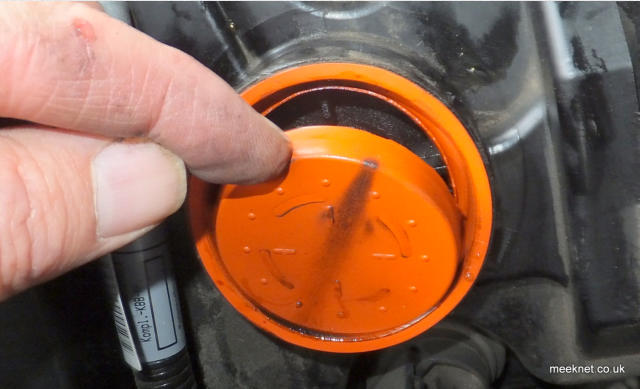
The cover is held on with a number of clasps - as long as you don't damage the body, just tweak off each one and apply upwards pressure:
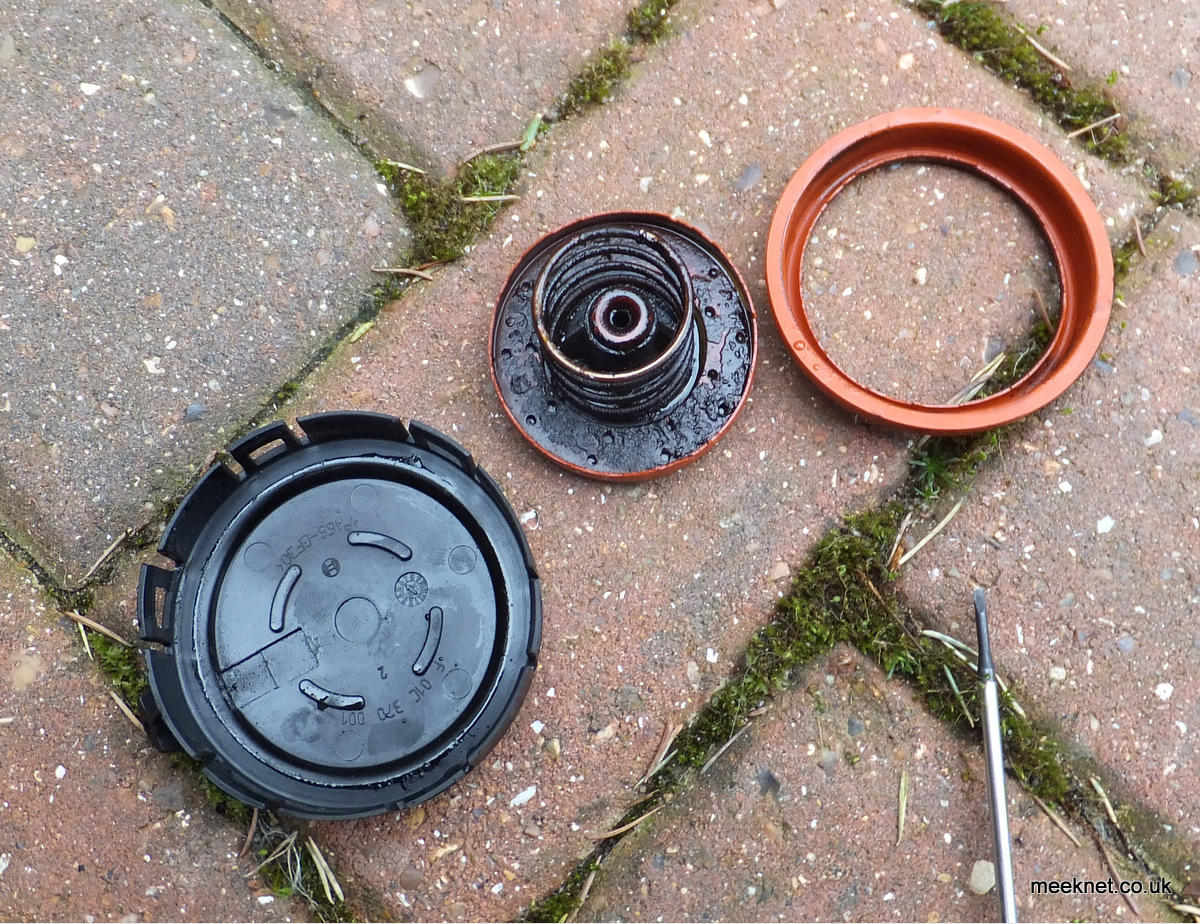
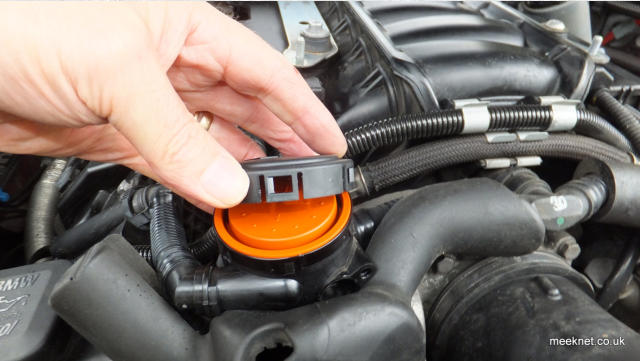
A bit of tweaking and off comes the lid - looks OK so far:

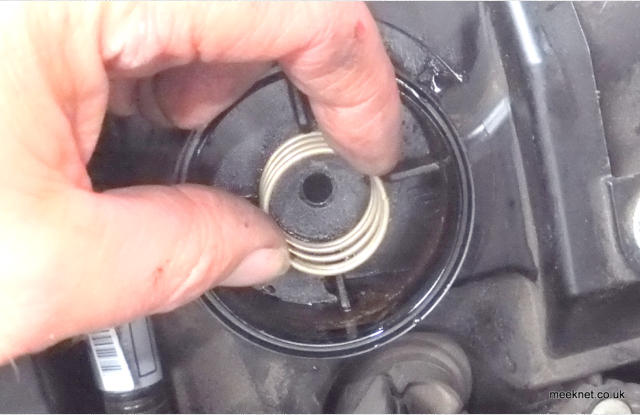
But not so good when the diaphragm is lifted up and out:
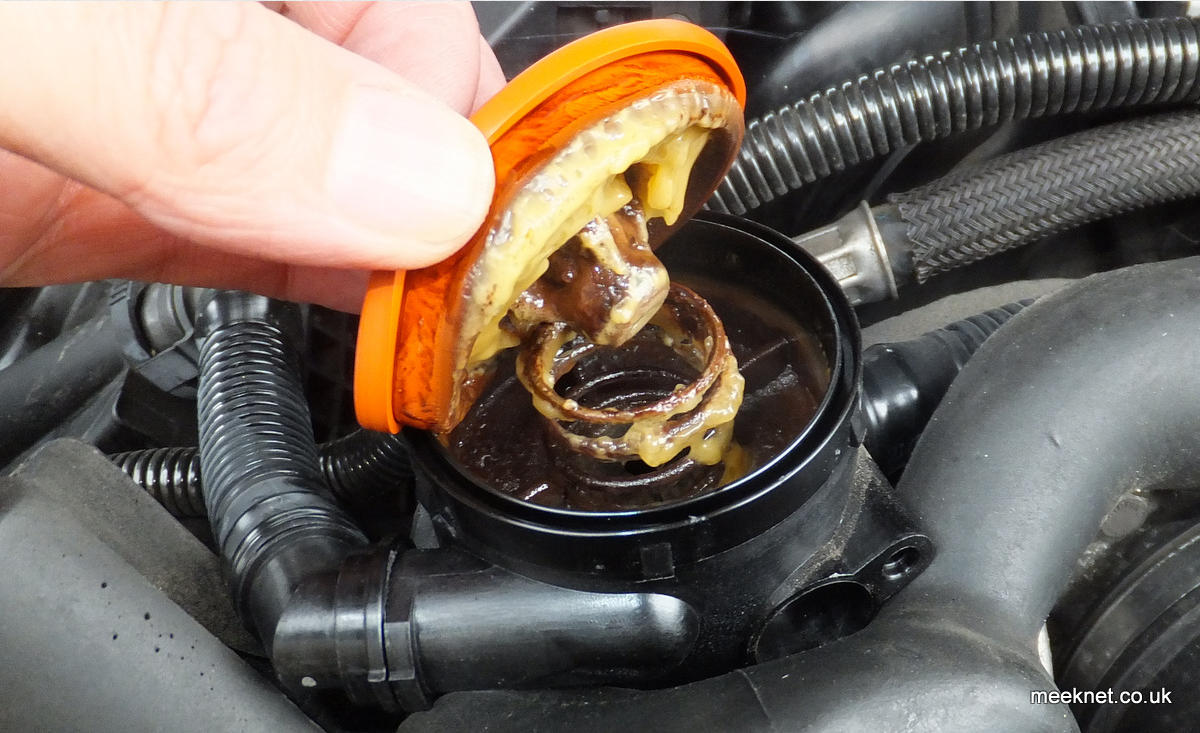
A bit gummed up and oily! Nothing to worry about though - get the diaphragm and the spring out and clean up the body with a microfibre
cloth. Then fit the new spring and then the new diaphragm:
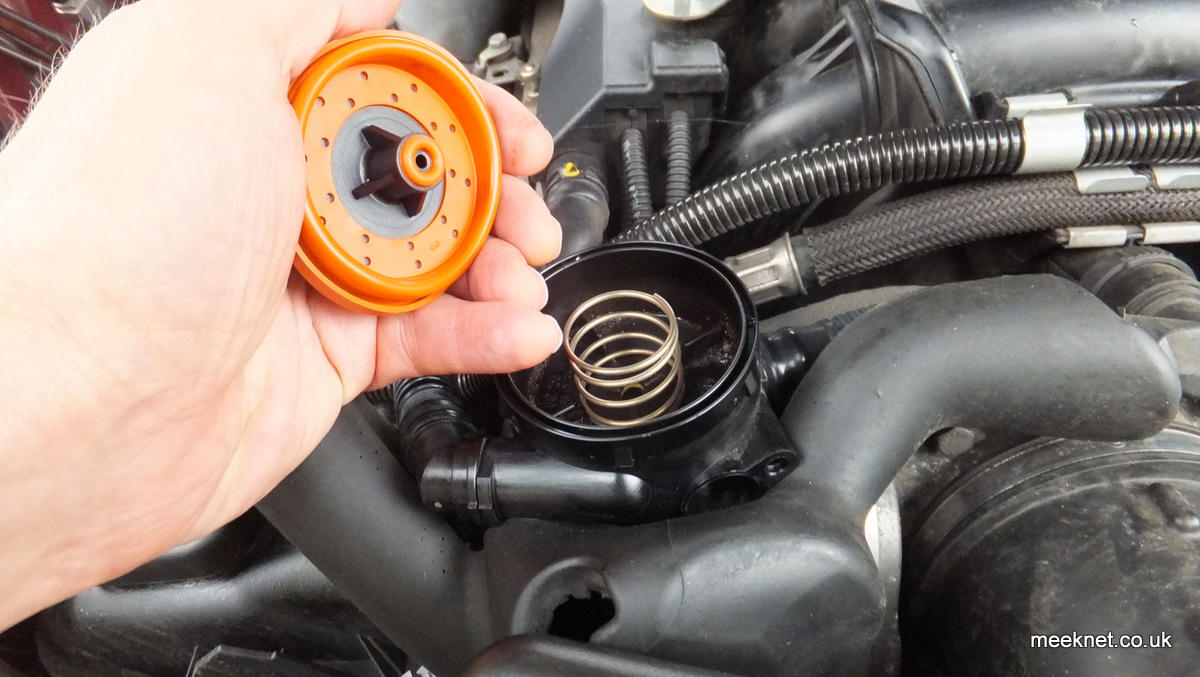
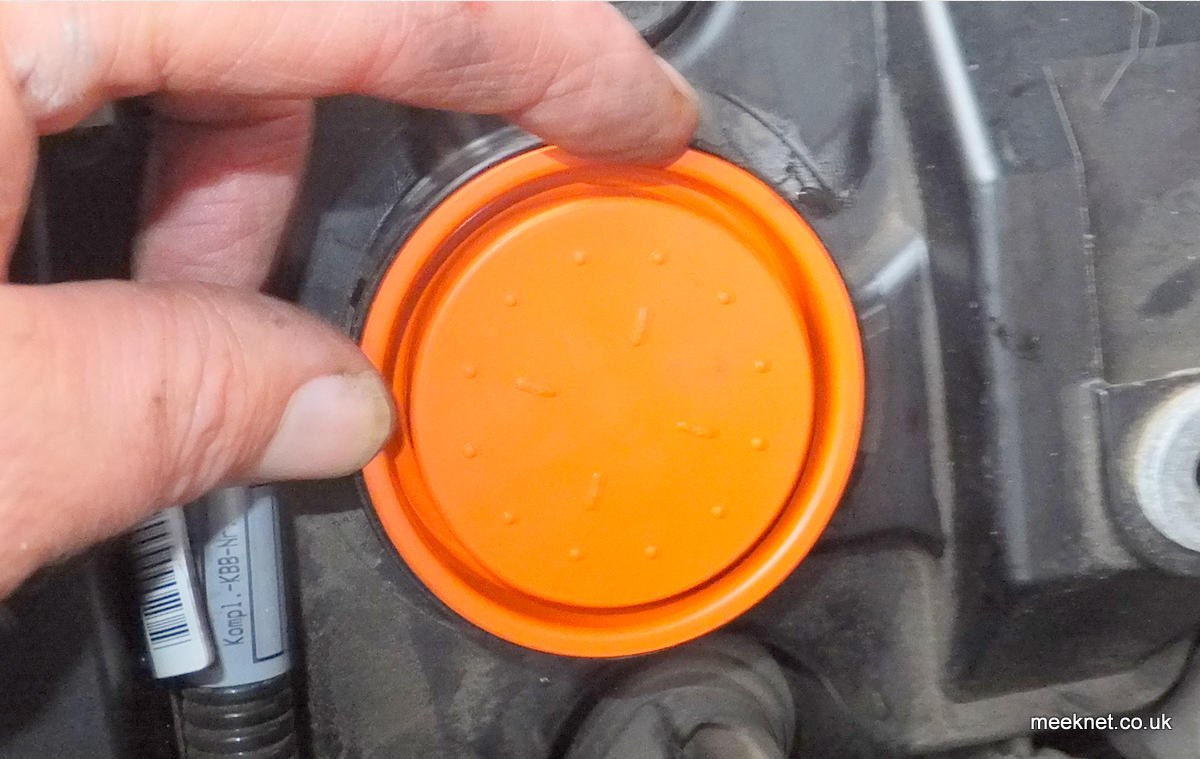
Check the orientation of the new cap against these pictures and fit it in place - it is best to apply pressure on the cap by squashing between
your thumb and fingers under the PCV body. Be absolutely certain that each clasp clicks into place and that it is securely fitted:
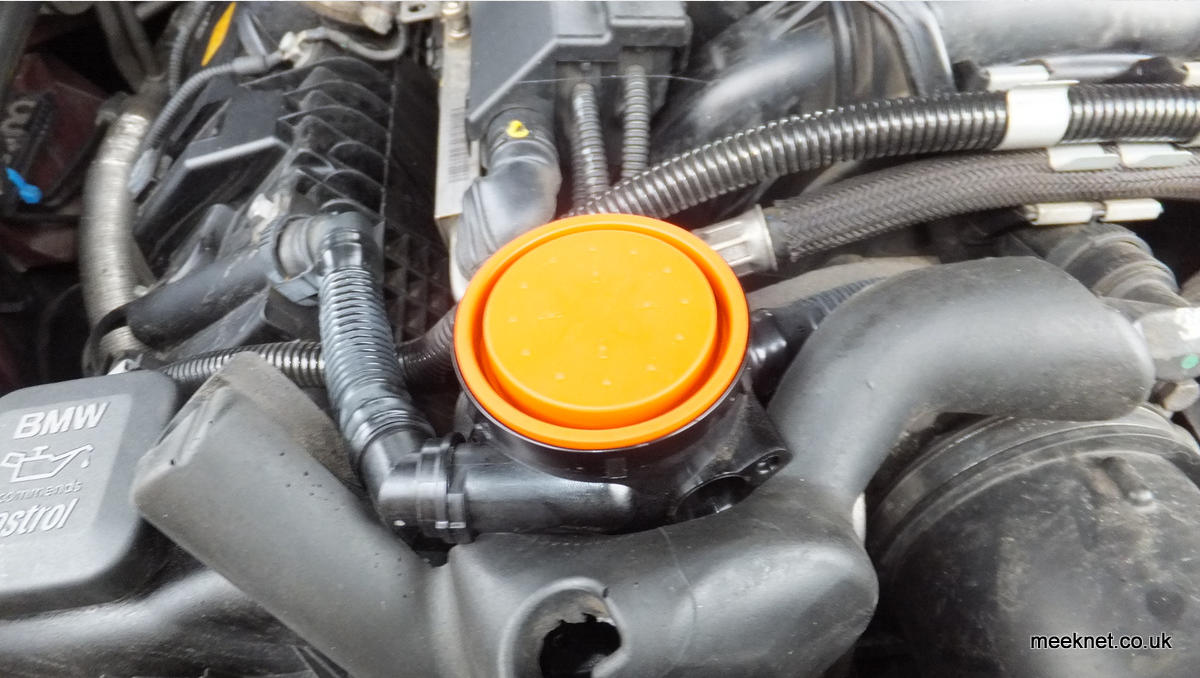
Fit the insulating foam back over the PCV and Bank 1 is done!

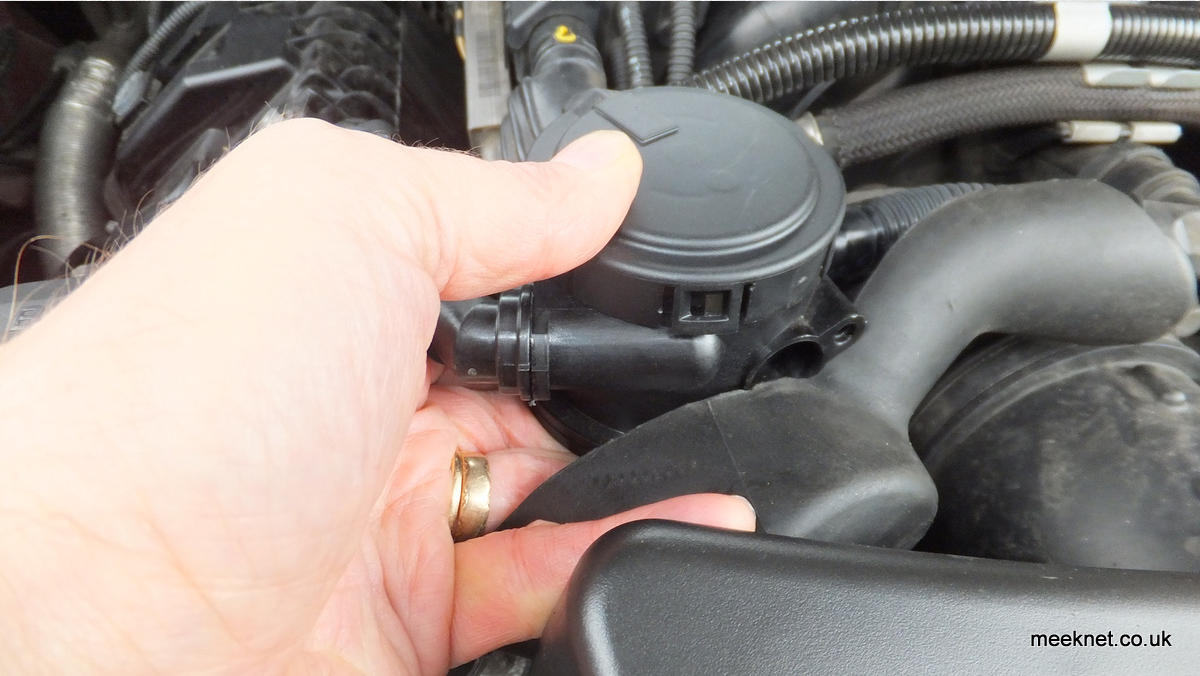
Remove the cover over Bank 2, it's a lot harder to get out (and back in again) compared to Bank 1 but it does come out reasonably easy.
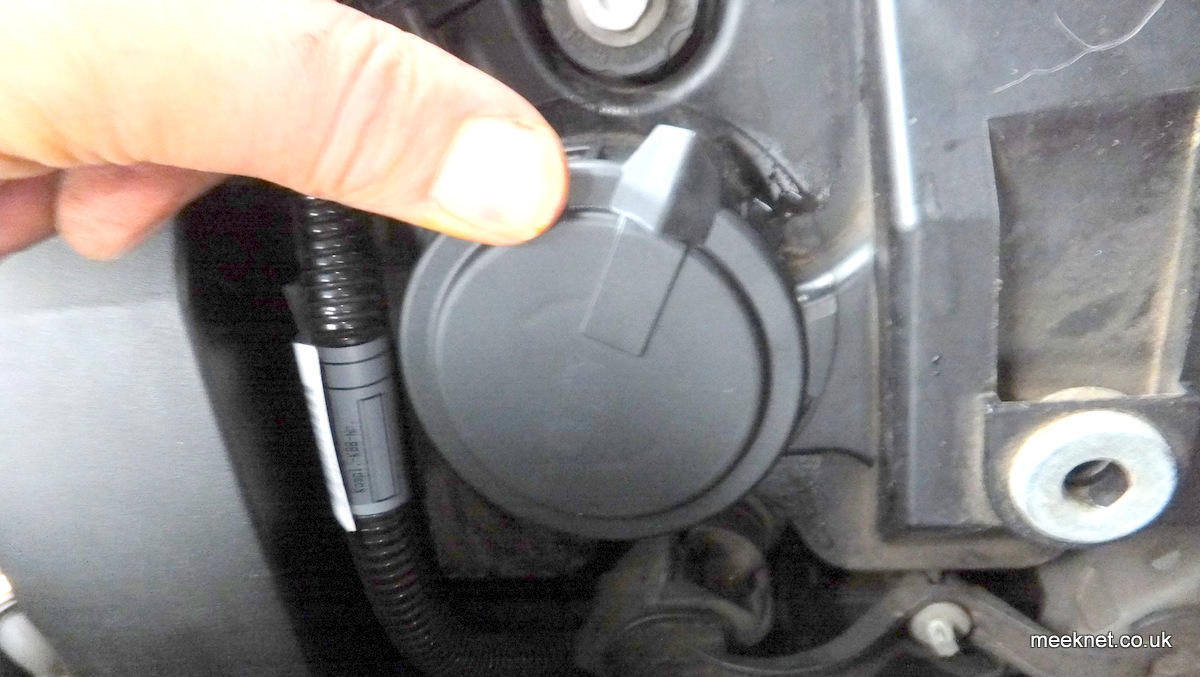
Under the cover you will find the second PCV valve in the place I expected the other one to be:
The body of the PCV is the cylinder head cover - so make sure you don't damage the locking tabs on this one! I've got a split diaphragm!

Now that's not going to help the air/fuel mixture as non-metered air can reach the inlet manifold - there is also a streak of oil where the
blow-by gasses have - well, blown by!
So, same routine, diaphragm and spring out, clean up the housing, new spring and diaphragm in:

And give it a good squashing back on - again making making absolutely sure each clasp clicks into position:
When re-fitting the cylinder head plastic covers, lightly grease the bosses as this makes it a darn sight easier to fit the bosses into the rubber
bushes - which can be difficult if both are dry.
Update 2017 - Removing and Clearing Bank 1 PCV assembly
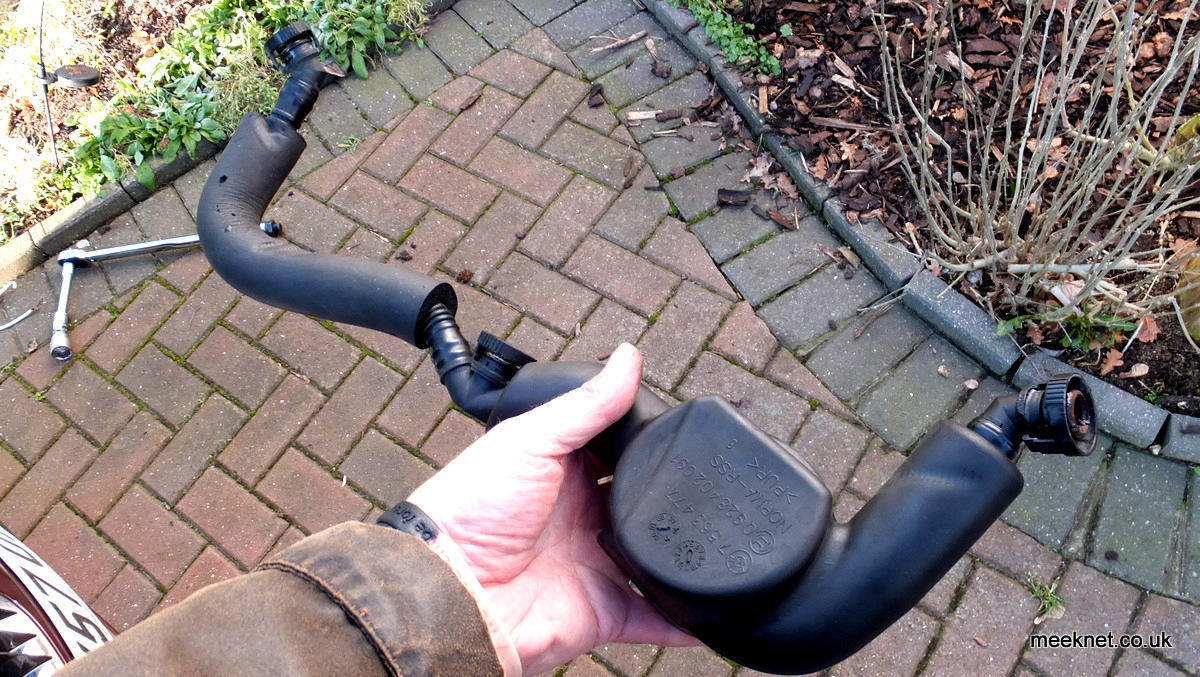
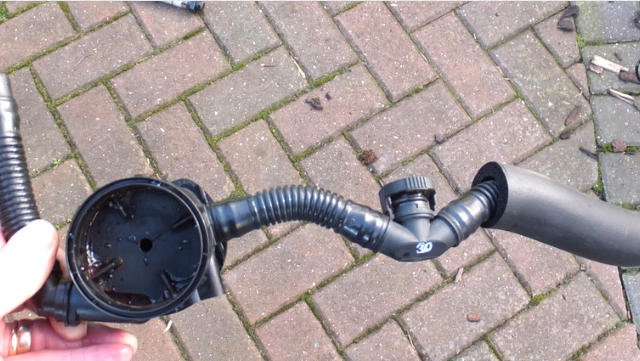
It’s about a year later and I’m going to clear out the pipework this time as it appears to be getting blocked up a bit. So, this time I am going to
remove the complete assembly and piping as pictured below:
All done, time for a cup of tea
Parts and tools used in the article


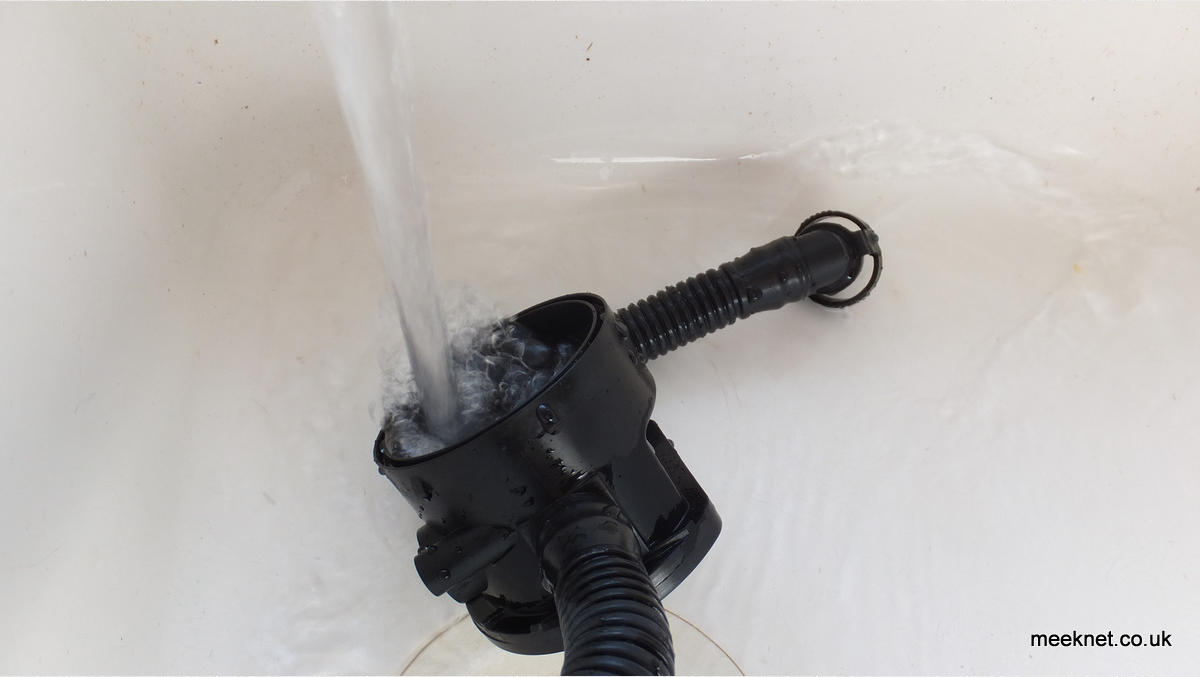
As before I have removed the insulation, lid, diaphragm, spring and quite a bit of gunge. A good way to clear out the pipe (it is only the one
on the left that gets gunged-up and blocked) is to poke out as much as you can with a length of 5A flexible 3-core cable and then off to the
kitchen sink, washing-up liquid, very hot water and just wash it out.

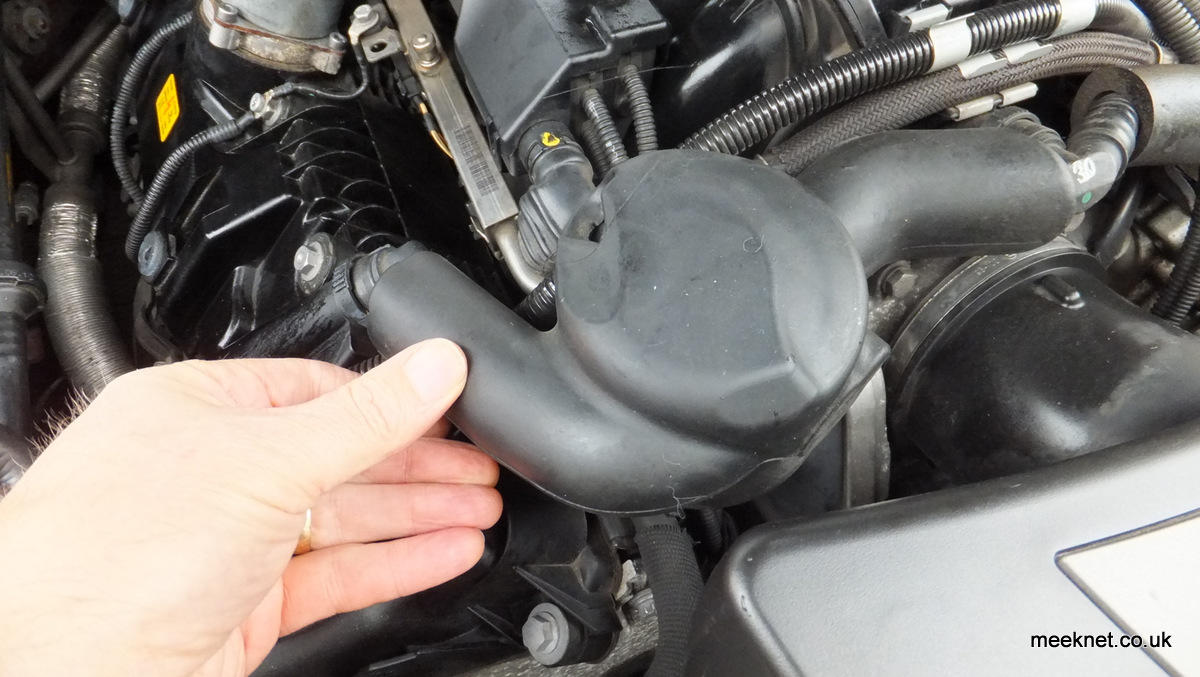
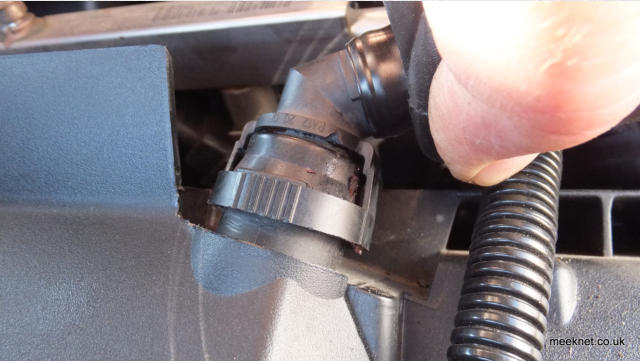
Removing this assembly was really easy when the car was new - unfortunately the years of engine heat has made the plastic pipe
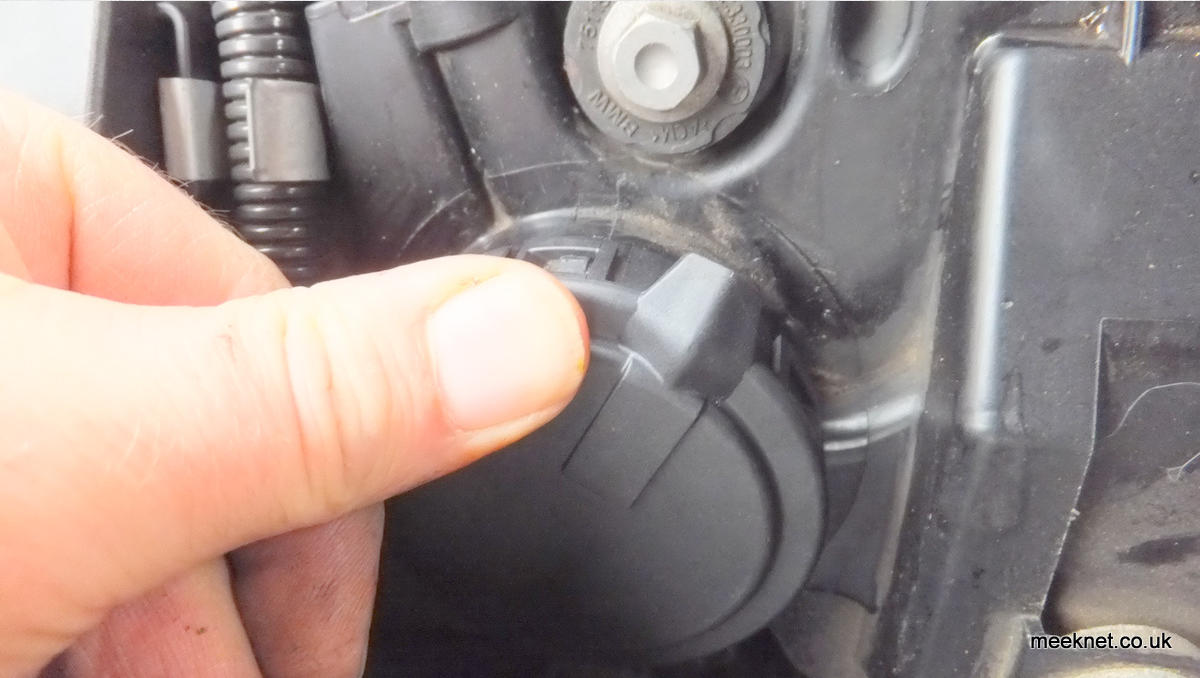
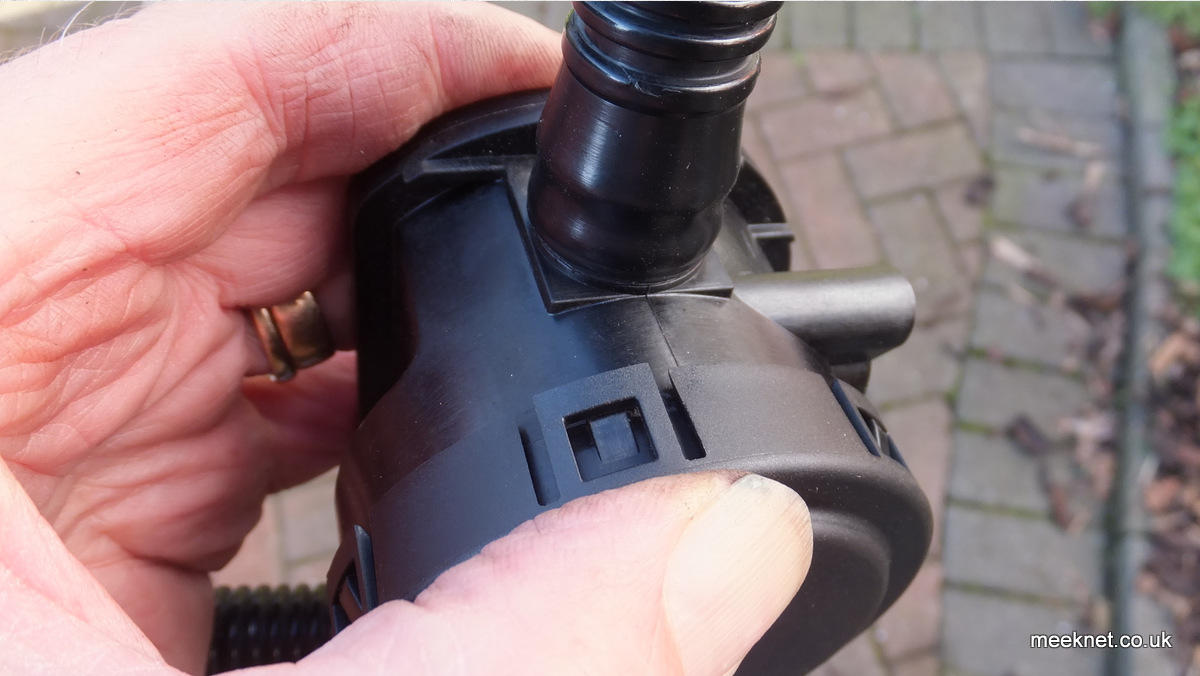
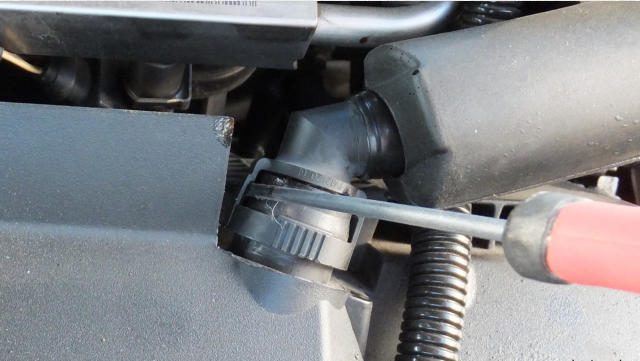
connectors less pliant that they used to be. Below is one of the connectors - these are all that holds the assembly in place, no other fixings.
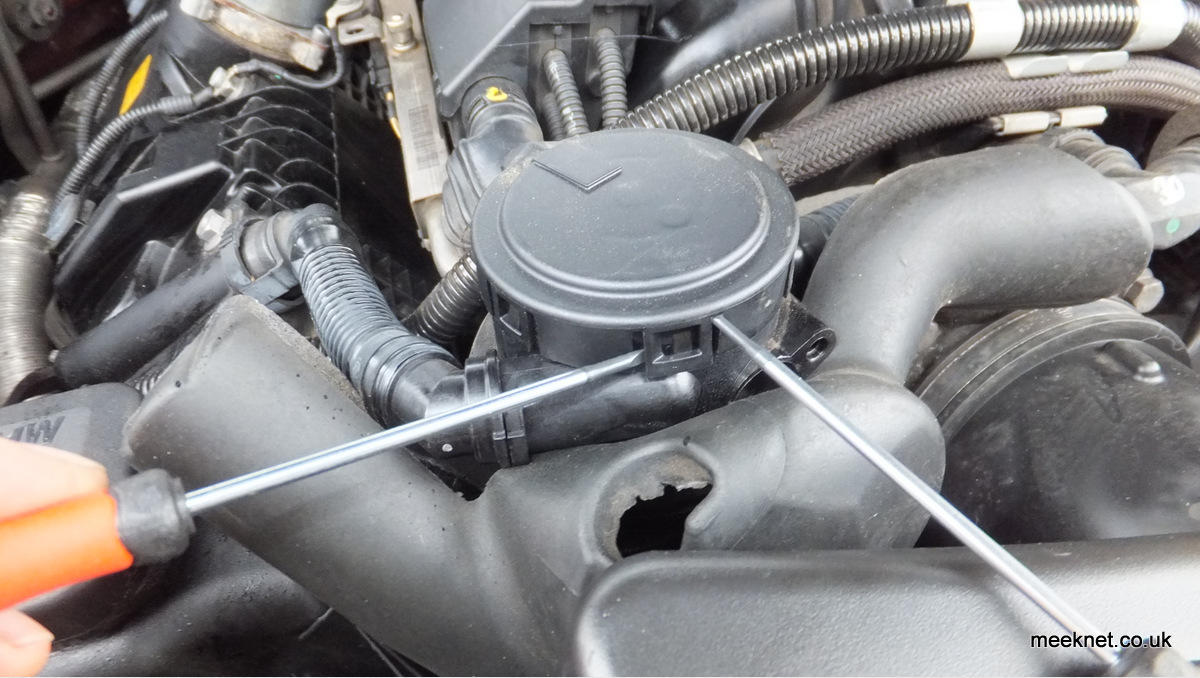
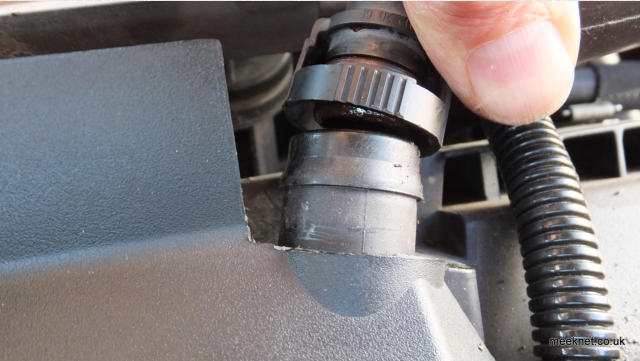
The pipes are held on with these fixings, the skirt of the connector has serrated areas as shown below and 180 degrees around on the other
side. Squeezing the serrated parts should expand the sides of the collar outwards and release it - fat chance of that unless you have the grip
of a gorilla. Instead, stick a small screwdriver inside the collar 90 degrees from the serrations and pop each side out at a time. Once all
three are undone the complete assembly comes off.


Once all the gunge is out of the PCV assembly give it a good shake and re-assemble the housing with the new lid, spring and diaphragm. It’s
a lot easier to make sure each of the tangs click into place with the assembly removed from the car - then refit the insulation and click the
whole assembly back into place.
Why has this assembly been fitted when the one on Bank 2 is fitted to the valve cover - and that one doesn’t get full of gunge?
The new assembly was fitted because both sides could freeze and block the crankcase ventilation system - and when the engine was run the
crankcase pressure would blow the valve-cover gaskets out. BMW recalled cars to retro-fit the new assembly as detailed here
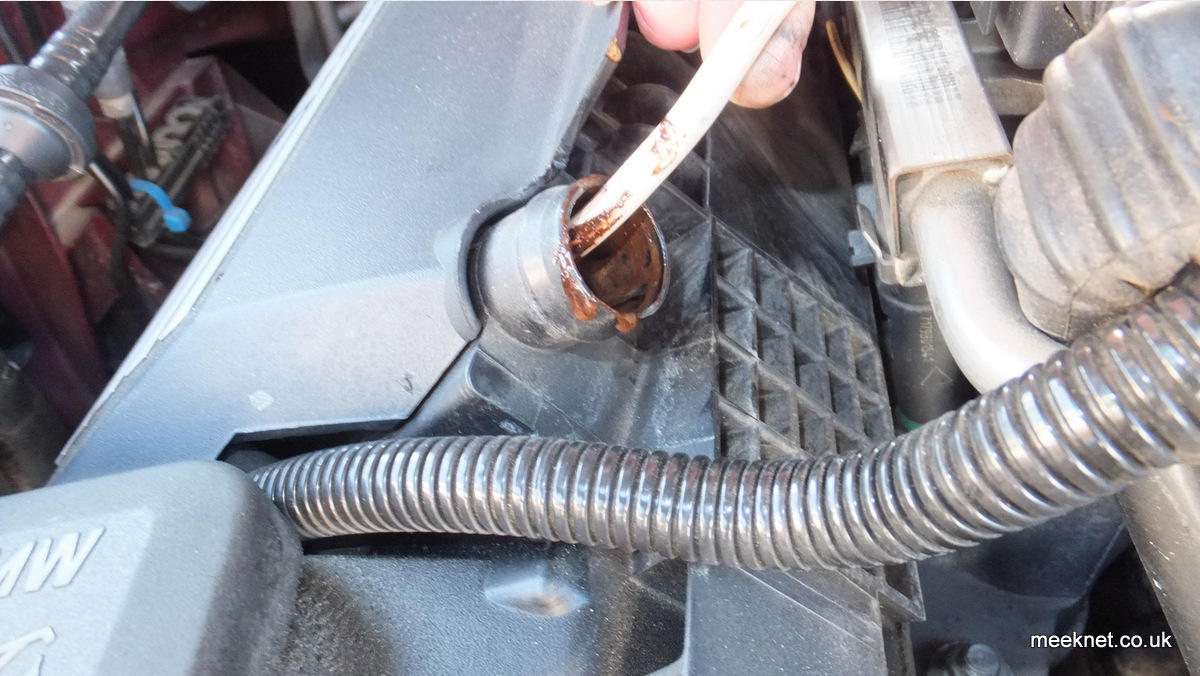
Using a 12” length of flexible 5A 3-core cable I gave the valve cover a good poking and managed to remove a lot more gunge - it’s a shame
it can’t be cleared out with washing-up liquid as well, possibly brake cleaner would help, but I’m not sure how much good it would do to the
plastic or the engine oil so I’ll make do with poking.


SEARCH MEEKNET
Timm's BMW E63 and E64 N62 Engine
Crankcase Ventilation Valves Replacement
Also known as CCV or PCV - Causes Rough Idle,
Smoke and Poor MPG
The symptoms of a failed PCV is often mistaken
for worn valve stem seals
It is much more likely to be the PCV’s than the
valve stem seals and much cheaper!
See 2018 update at end for further clearing
of PCV assembly
Here we go again, PCV (Pressure Control Valve) problems have been around
since the introduction of the M60 V8 in 1992, and here we are in 2015 with
the N62TUB48 - and I have PCV problems! Thank goodness they are a darn
sight easier to change on the N62 than they were on the M60/M62/M62TUB.
If you want to know a bit about what these things are for - more can be
found
So, no messing about, engine covers off - four 10mm conical nuts with
captive washers and lift the cover away:

The cylinder bank covers have plastic bosses which are simply pressed into
rubber bushes - you just give the cover a good pull in the right places:
I was expecting to find the PCV on top of the cylinder bank cover (as is
shown in RealOEM) - but this was moved in 2005 because of problems with
the valve retaining moisture which froze and then blocked the crankcase
gasses. This was covered in SIB 11 01 07

The PCV valve has been replaced with a self-contained unit which is
now insulated under a foam cover here:
Peel off the insulation to get to the valve:

The cover is held on with a number of clasps - as long as you don't
damage the body, just tweak off each one and apply upwards pressure:
A bit of tweaking and off comes the lid - looks OK so far:
But not so good when the diaphragm is lifted up and out:

A bit gummed up and oily! Nothing to worry about though - get the
diaphragm and the spring out and clean up the body with a microfibre
cloth. Then fit the new spring and then the new diaphragm:


Check the orientation of the new cap against these pictures and fit it in
place - it is best to apply pressure on the cap by squashing between your
thumb and fingers under the PCV body. Be absolutely certain that each
clasp clicks into place and that it is securely fitted:

Fit the insulating foam back over the PCV and Bank 1 is done!
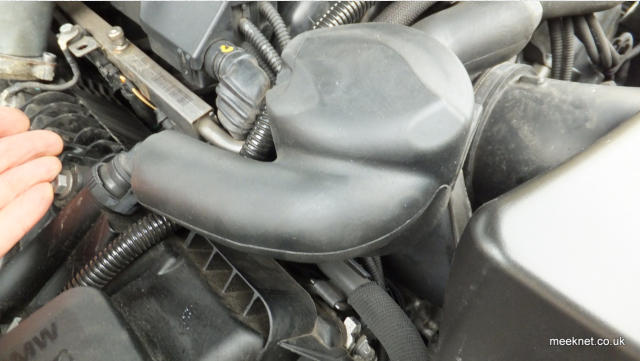
Remove the cover over Bank 2, it's a lot harder to get out (and back in
again) compared to Bank 1 but it does come out reasonably easy. Under
the cover you will find the second PCV valve in the place I expected the
other one to be:

The body of the PCV is the cylinder head cover - so make sure you don't
damage the locking tabs on this one! I've got a split diaphragm!
Now that's not going to help the air/fuel mixture as non-metered air
can reach the inlet manifold - there is also a streak of oil where the
blow-by gasses have - well, blown by!

So, same routine, diaphragm and spring out, clean up the housing, new
spring and diaphragm in:


And give it a good squashing back on - again making making
absolutely sure each clasp clicks into position:

When re-fitting the cylinder head plastic covers, lightly grease the bosses
as this makes it a darn sight easier to fit the bosses into the rubber bushes
- which can be difficult if both are dry.
Update 2017 - Removing and Clearing Bank 1
PCV assembly
It’s about a year later and I’m going to clear out the pipework this time as
it appears to be getting blocked up a bit. So, this time I am going to
remove the complete assembly and piping as pictured below:
All done, time for a cup of tea
Parts and tools used in the article


As before I have removed the insulation, lid, diaphragm, spring and quite
a bit of gunge. A good way to clear out the pipe (it is only the one on the
left that gets gunged-up and blocked) is to poke out as much as you can
with a length of 5A flexible 3-core cable and then off to the kitchen sink,
washing-up liquid, very hot water and just wash it out.
Removing this assembly was really easy when the car was new -
unfortunately the years of engine heat has made the plastic pipe
connectors less pliant that they used to be. Below is one of the
connectors - these are all that holds the assembly in place, no other
fixings.
The pipes are held on with these fixings, the skirt of the connector has
serrated areas as shown below and 180 degrees around on the other
side. Squeezing the serrated parts should expand the sides of the collar
outwards and release it - fat chance of that unless you have the grip of a
gorilla. Instead, stick a small screwdriver inside the collar 90 degrees
from the serrations and pop each side out at a time. Once all three are
undone the complete assembly comes off.

Once all the gunge is out of the PCV assembly give it a good shake and
re-assemble the housing with the new lid, spring and diaphragm. It’s a
lot easier to make sure each of the tangs click into place with the
assembly removed from the car - then refit the insulation and click the
whole assembly back into place.

Why has this assembly been fitted when the one on Bank 2 is fitted
to the valve cover - and that one doesn’t get full of gunge?
The new assembly was fitted because both sides could freeze and block
the crankcase ventilation system - and when the engine was run the
crankcase pressure would blow the valve-cover gaskets out. BMW
recalled cars to retro-fit the new assembly as detailed here
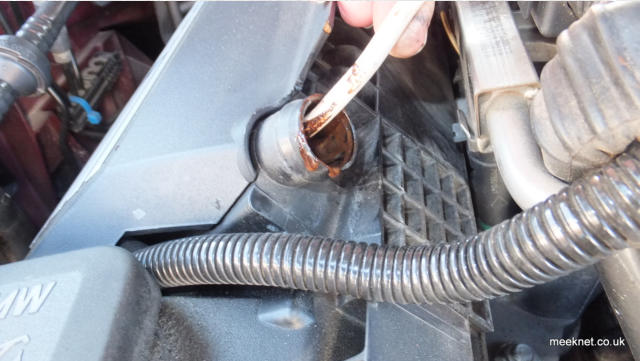
Using a 12” length of flexible 5A 3-core cable I gave the valve cover a
good poking and managed to remove a lot more gunge - it’s a shame it
can’t be cleared out with washing-up liquid as well, possibly brake cleaner
would help, but I’m not sure how much good it would do to the plastic or
the engine oil so I’ll make do with poking.


SEARCH MEEKNET
SEARCH MEEKNET