Timm’s BMW E63 and E64 Ignition Coil and Sparkplug Replacement
N62 Engine on the 645i and 650i
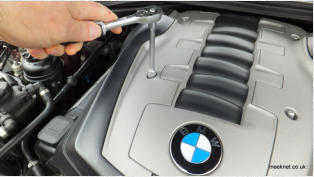
Break out the toolbox - you are going to need a few for this one
I’ve done plugs and coils on loads of BMW V8’s with the M60/M62M62TUB engines - but the N62/N62TUB has proven to be the most awkward,
I’ll never complain when I change the E31 plugs again. The main problem is that there is little room to get the coils out from the deep wells,
they hit all sorts of things, and these things need to be moved out of the way or removed entirely.
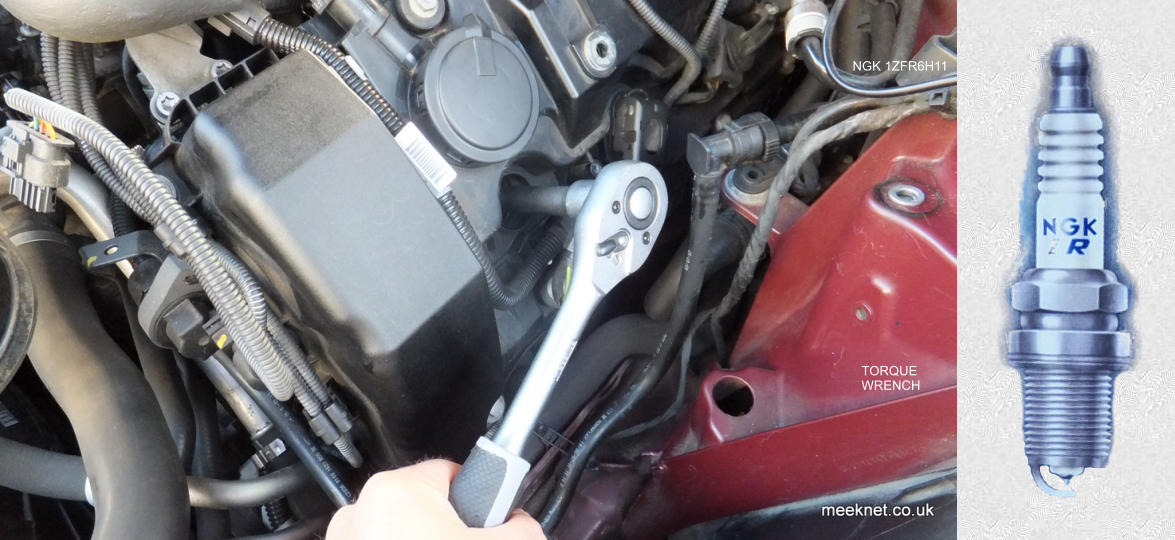
If this is the first time you have replaced plugs, then use a torque-wrench to make sure you have tightened the plugs correctly (set to 25
Newton-Metre). The new plugs have washer that needs to be compressed and this may feel as though the plug is tight enough as it begins to
get crushed. But, when the plug starts to feel tight, it is usually another 180 degrees before the washer is fully compressed. If the washer is
only partially compressed, the plug will slowly work loose and then come out with a loud pop, taking the threads with it - and the head will
then need to be Helicoiled before it can be used again.
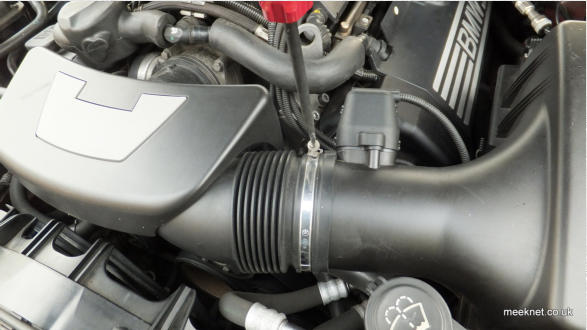
Right, let’s get on with it, to start with you need to get the engine covers off, the air filter housing off and a bunch of other stuff that is
covered later. The top cover is held with 4 x 10mm conical nuts, the side covers secured by bosses pushed into rubber grommets

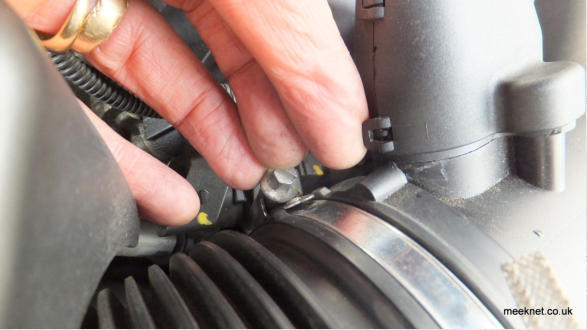
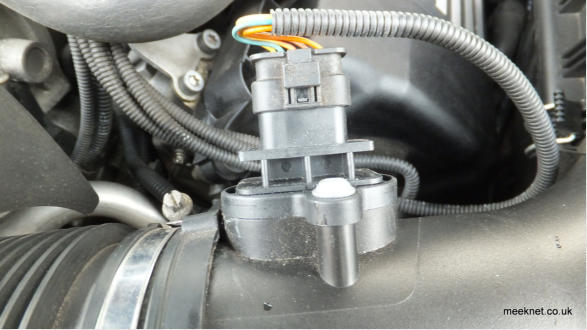
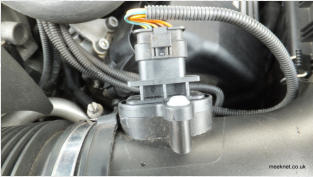
For Bank 2 (passenger side in the UK) the air filter housing needs to be removed to give access to the coils. Disconnect the MAF sensor by un-
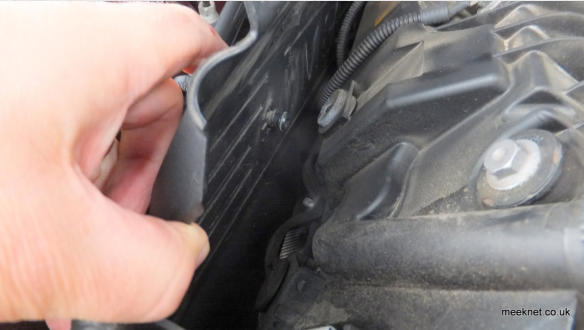
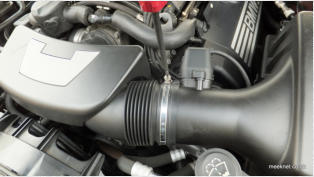
clipping the cover and then pulling the connector off. Loosen the large Jubilee clip and unclip all the fixings around the air-filter cover. The air-
filter cover can then be removed from the air intake hose by twisting the complete assembly
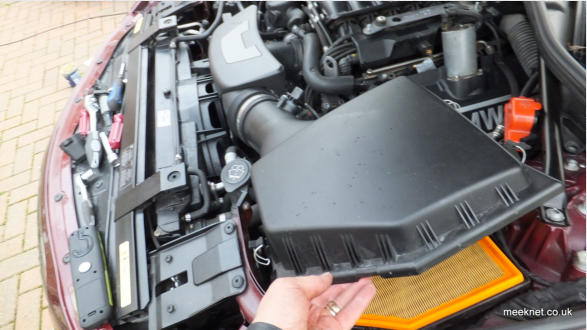
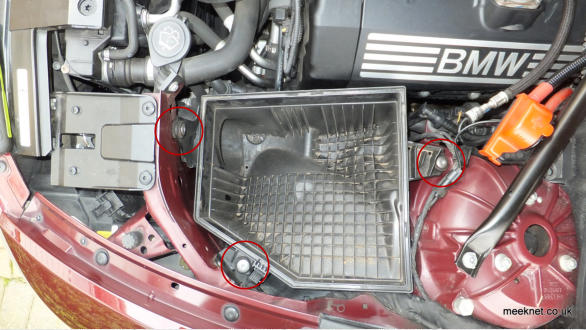
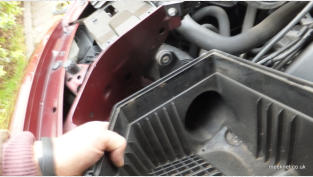
The lower half of the air-filter housing is held by three wide-head Torx bolts - the filter housing can then be pulled backwards and be
disconnected from the cold air inlet at the front of the car

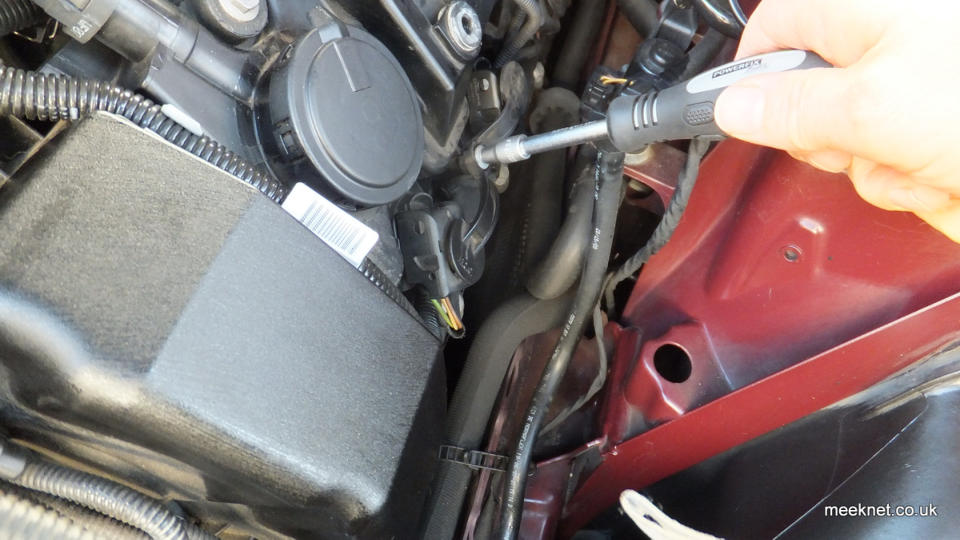
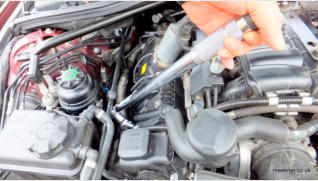
We are going to start with an easy one - good practice for the back ones. The sparkplug wells are deep and you will need a decent sparkplug
socket with a rubber insert to retrieve the plug. For the easy ones I’m using a 6” extension and a universal joint plus the sparkplug socket to
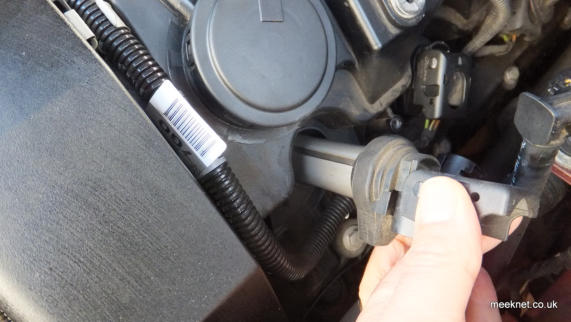
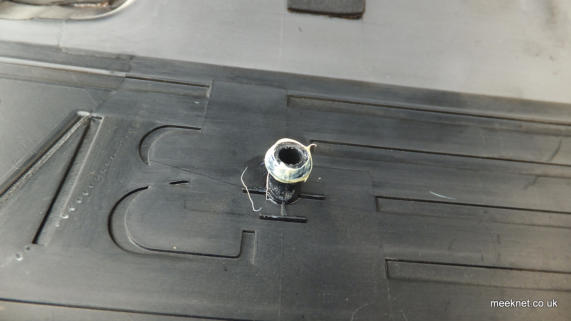
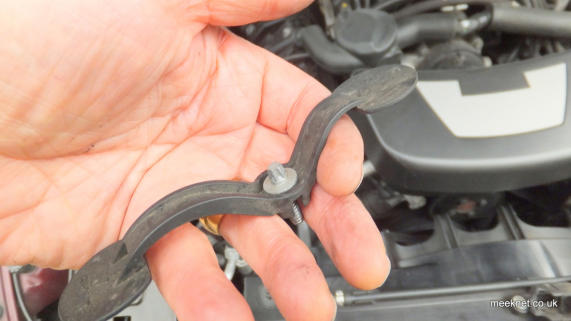
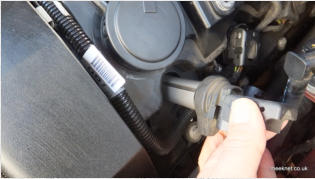
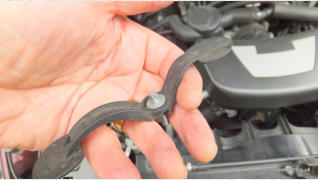
get the first plug out. First, there is a small clamp that hold down a pair of coils which needs to be removed as shown below, the fixing is a
male Torx - be careful when replacing as it is a plastic threaded hole:
Unclip the MAF connector housing
Unplug the MAF connector
Remove 4 x 10mm conical nuts
Unclip cylinder head covers
Twist air filter cover to release from air intake
Remove three Torx bolts
Pull air filter housing from cold-air inlet
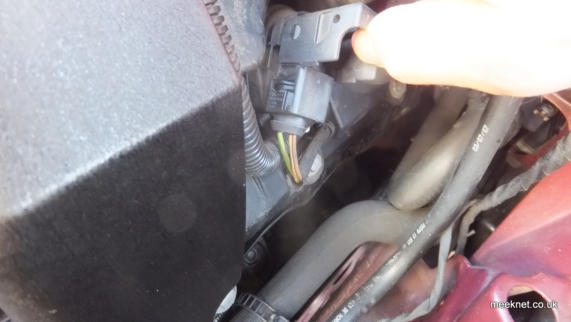
With the clamp removed you have access to the ignition coil’s connector - the connector is held in place with a plastic clamp, lever the
connector upwards as shown below, it will click and then allow you to pull the clip vertical which will separate the connector from the coil
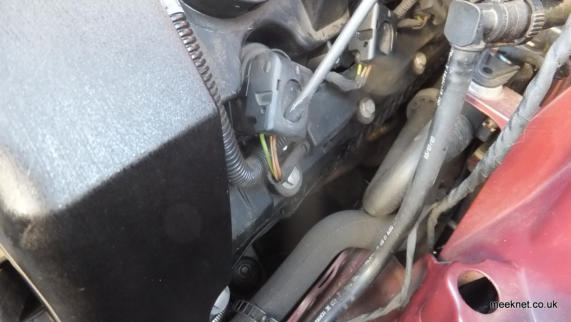
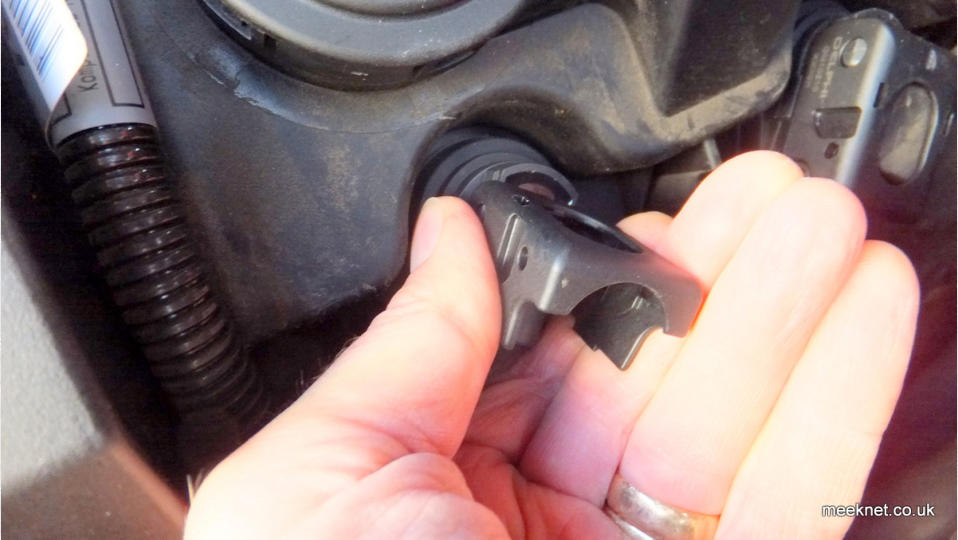
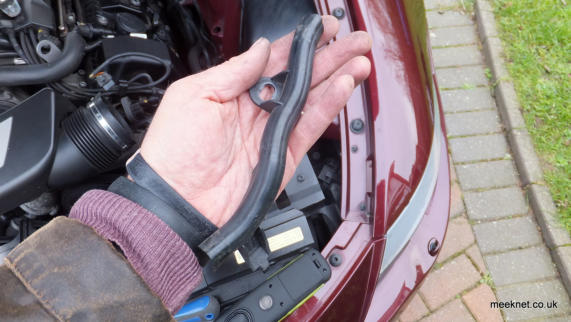
The coil needs a good pull to release it from the plug - it is easier to carefully lever the coil as shown below - and the coil is out

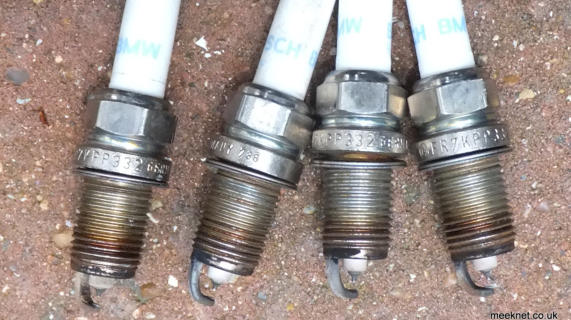
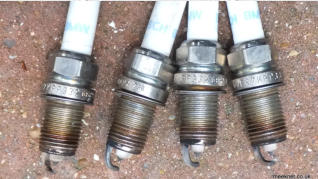
Next, the plug is removed, I’m using a 16mm plug socket, a 6” extension and a standard ratchet - the front plug is easy to remove without
the universal joint. I’m fitting the recommended plug, NGK Laser Iridium IZFR6H11. These are pre-gapped and don’t need adjusting. The
plugs have an exposed electrode (unlike twin electrode plugs), so be careful inserting the plug into the bore to ensure the electrode is not
knocked - as this will close the spark-gap.
When I fit a new plug I always put a small dab of LM grease on the very first thread - it makes it a bit easier when fitting the plug. Remove
the ratchet from the 6” extension, fit the plug into the sparkplug socket and carefully insert the plug into the well. The plug will centre itself
and you will find it is easy to twiddle the extension until the plug bottoms-out on the crush-washer.
You can now fit the torque-wrench to the extension and tighten to 25 Newton-Metre. As said before, you have to apply enough force to
compress the crush washer for around 180 Degrees before the torque will reach 25 Newton-Metre. Get used to the amount of torque needed
to fit the plug - it’s unlikely that you can fit it when you get to the back plugs!
Once the plug is torqued into position you can fit the new coil - this is pretty straight-forward, just align it as shown below and then give it a
good push to get it properly seated - it needs quite a shove due to the new rubber. To refit the connector, push the plug into the socket and
push down on the connector clamp. The plug will be drawn into the socket and held firmly.
Right, that’s the easy one done. The next one back, cylinder 6 is just as easy. Once you have fitted the coils and plugs in cylinder 5 and 6,
refit the plastic clamp - when it is fully tightened push down on each side of the clamp to ensure the coil is fully inserted.
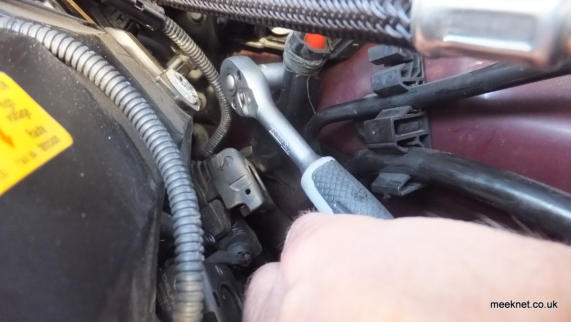
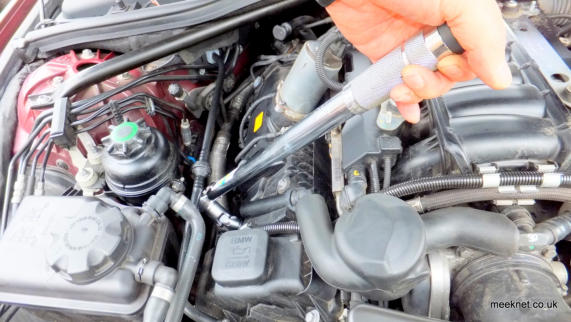
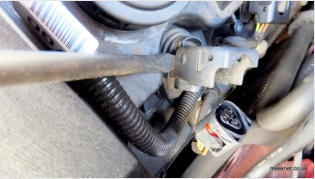
Well, that was the easy pair to do, it gets a bit harder now, you will need a ratchet to remove the coil clamp this time. For cylinder 7 you
will need the universal joint as shown below

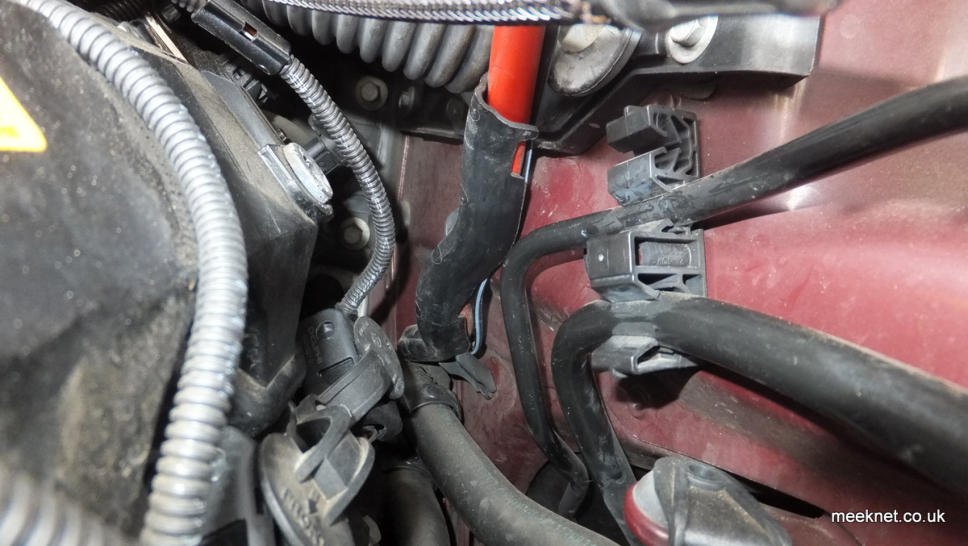
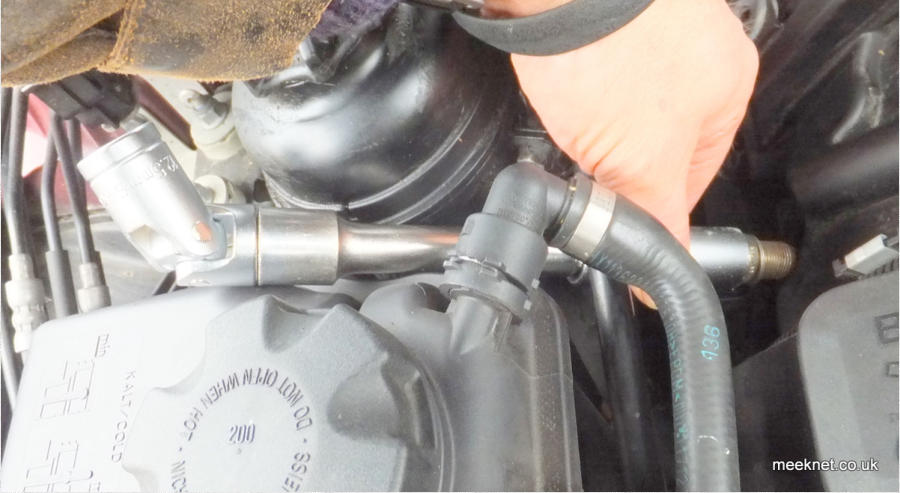
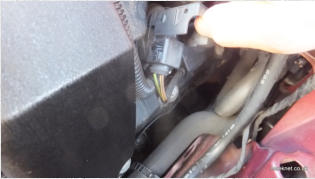
For cylinder 8 you will need a bit more hardware. You also need to remove the plastic cover that protects the battery positive cable - this
is held on with a single plastic nut - the other end of the cover fits into a hole in the metalwork. The pipe shown below is the petrol feed
to the injector rail. At some point when removing the coil this needs to be pulled out of the clamp and moved aside.
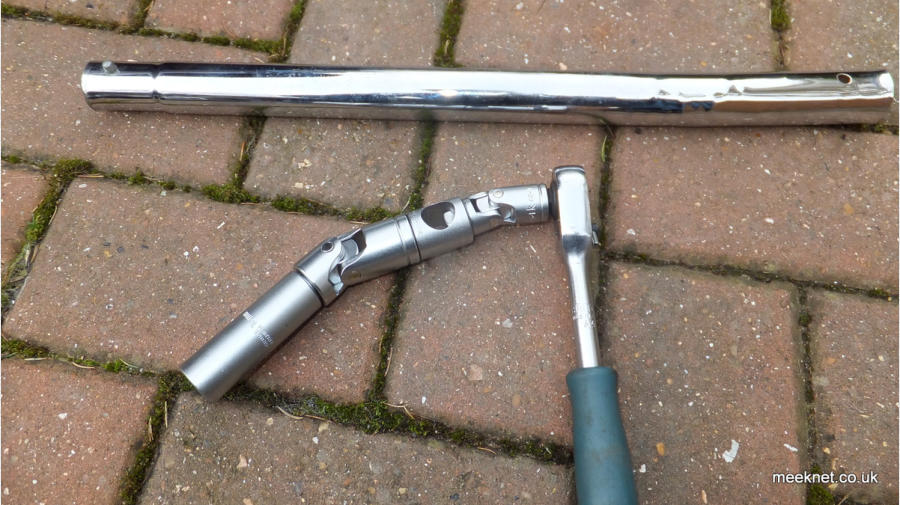
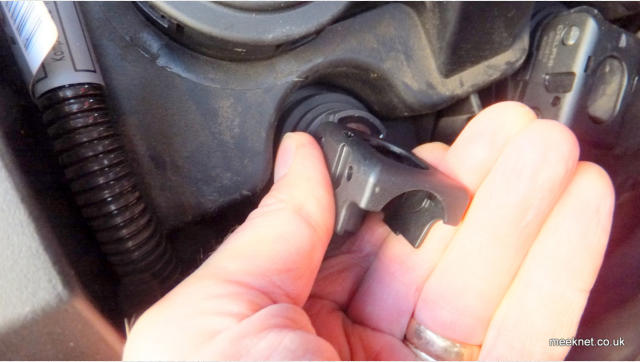
The combination of tools I needed for cylinder 8 are shown below - sparkplug socket, 1/2” universal joint, 1/2” to 3/8” converter, 3/8”
universal joint and a ratchet with a handle slim enough to fit a length of pipe:
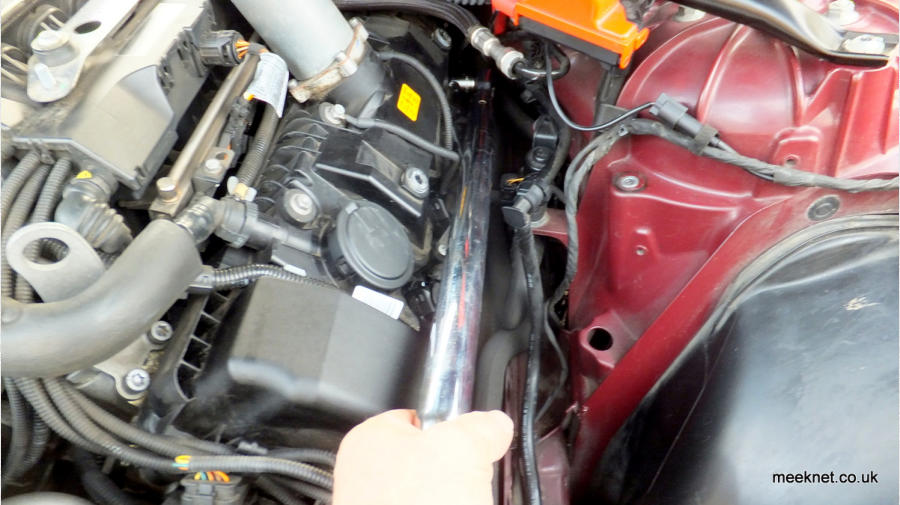
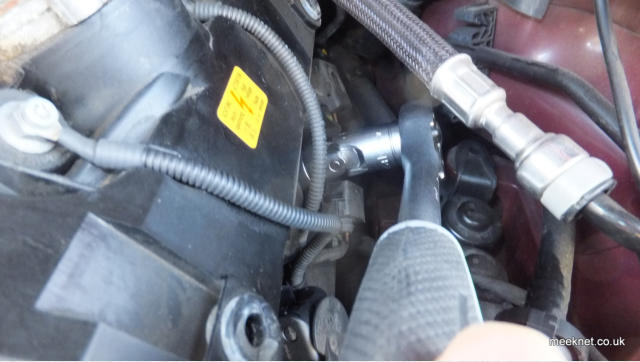
At this point it really just a case of struggling to get the coil out past the obstructions. Here’s the coil coming out:

My combination of universal joints and converters has a lot of backlash, so it took a while to get the plug out due to only managing a single
click on the ratchet each go - but it came out in the end:
Well, it looks easy in the pictures, but it isn’t - there is not really enough room to get the coil in and out, at one point the coil got well and
truly stuck and wouldn’t go in or come back out - and then it just popped in as if by magic. Fortunately, cylinder 8 is the hardest of all
eight. The other side, cylinders 1 to 4 are awkward, but a lot easier.
You still need a universal joint but you can use the torque wrench on most of the cylinders. Cylinders 1 and 2 come out reasonably easy
but the coil has to be threaded through the expansion tank and CHF reservoir.
Cylinder 2 and 4 are much the same, awkward but not impossible without removing anything. Cylinder 3 has a problem here:
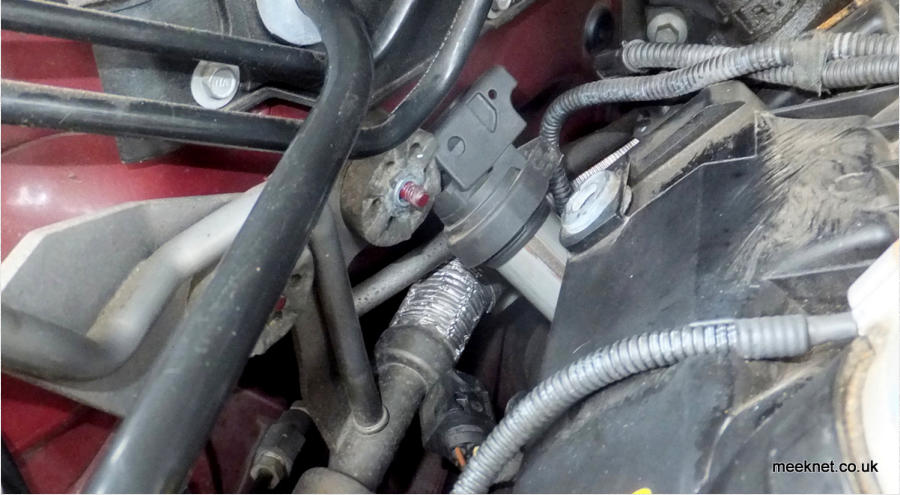
That’s the air-conditioning low-pressure servicing valve assembly - it’s bolted to the inner wing - I have removed the two nuts with captive
washers ready to move it. With the nuts removed the bracket can be moved inwards away from the studs and then pushed downwards so
the coil can get past, This means bending the refrigeration pipework which is a bit scary to say the least. It’s still a bit of a fiddle to get
the coil out but it will come out without much hassle.
At least on bank 1 the torque wrench fits (just about) on the first two cylinders - but that’s just about it. When refitting the side covers
wipe a bit of grease on the bosses - it makes it a lot easier to fit. And don’t forget to refit the clamps
All done - Time for a Cup of Tea
Parts used below


Timm’s BMW E63 and E64 Ignition
Coil and Sparkplug Replacement
N62 Engine on the 645i and 650i
Break out the toolbox - you are going to need a
few for this one
I’ve done plugs and coils on loads of BMW V8’s with the M60/M62M62TUB
engines - but the N62/N62TUB has proven to be the most awkward, I’ll
never complain when I change the E31 plugs again. The main problem is
that there is little room to get the coils out from the deep wells, they hit all
sorts of things, and these things need to be moved out of the way or
removed entirely.
If this is the first time you have replaced plugs, then use a torque-wrench
to make sure you have tightened the plugs correctly (set to 25 Newton-
Metre). The new plugs have washer that needs to be compressed and this
may feel as though the plug is tight enough as it begins to get crushed.
But, when the plug starts to feel tight, it is usually another 180 degrees
before the washer is fully compressed. If the washer is only partially
compressed, the plug will slowly work loose and then come out with a loud
pop, taking the threads with it - and the head will then need to be
Helicoiled before it can be used again.
Right, let’s get on with it, to start with you need to get the engine covers
off, the air filter housing off and a bunch of other stuff that is covered later.
The top cover is held with 4 x 10mm conical nuts, the side covers secured
by bosses pushed into rubber grommets

For Bank 2 (passenger side in the UK) the air filter housing needs to be
removed to give access to the coils. Disconnect the MAF sensor by un-
clipping the cover and then pulling the connector off. Loosen the large
Jubilee clip and unclip all the fixings around the air-filter cover. The air-
filter cover can then be removed from the air intake hose by twisting the
complete assembly


The lower half of the air-filter housing is held by three wide-head Torx
bolts - the filter housing can then be pulled backwards and be
disconnected from the cold air inlet at the front of the car
We are going to start with an easy one - good practice for the back ones.
The sparkplug wells are deep and you will need a decent sparkplug socket
with a rubber insert to retrieve the plug. For the easy ones I’m using a 6”
extension and a universal joint plus the sparkplug socket to get the first
plug out. First, there is a small clamp that hold down a pair of coils which
needs to be removed as shown below, the fixing is a male Torx - be careful
when replacing as it is a plastic threaded hole:

Unclip the MAF connector housing
Unplug the MAF connector
Remove 4 x 10mm conical nuts
Unclip cylinder head covers
Twist air filter cover to release from air intake
Remove three Torx bolts
Pull air filter housing from cold-air inlet

With the clamp removed you have access to the ignition coil’s connector
- the connector is held in place with a plastic clamp, lever the connector
upwards as shown below, it will click and then allow you to pull the clip
vertical which will separate the connector from the coil

The coil needs a good pull to release it from the plug - it is easier to
carefully lever the coil as shown below - and the coil is out
Next, the plug is removed, I’m using a 16mm plug socket, a 6” extension
and a standard ratchet - the front plug is easy to remove without the
universal joint. I’m fitting the recommended plug, NGK Laser Iridium
IZFR6H11. These are pre-gapped and don’t need adjusting. The plugs
have an exposed electrode (unlike twin electrode plugs), so be careful
inserting the plug into the bore to ensure the electrode is not knocked -
as this will close the spark-gap.
When I fit a new plug I always put a small dab of LM grease on the very
first thread - it makes it a bit easier when fitting the plug. Remove the
ratchet from the 6” extension, fit the plug into the sparkplug socket and
carefully insert the plug into the well. The plug will centre itself and you
will find it is easy to twiddle the extension until the plug bottoms-out on
the crush-washer.
You can now fit the torque-wrench to the extension and tighten to 25
Newton-Metre. As said before, you have to apply enough force to
compress the crush washer for around 180 Degrees before the torque
will reach 25 Newton-Metre. Get used to the amount of torque needed to
fit the plug - it’s unlikely that you can fit it when you get to the back
plugs!
Once the plug is torqued into position you can fit the new coil - this is
pretty straight-forward, just align it as shown below and then give it a
good push to get it properly seated - it needs quite a shove due to the
new rubber. To refit the connector, push the plug into the socket and
push down on the connector clamp. The plug will be drawn into the
socket and held firmly.
Right, that’s the easy one done. The next one back, cylinder 6 is just as
easy. Once you have fitted the coils and plugs in cylinder 5 and 6, refit
the plastic clamp - when it is fully tightened push down on each side of
the clamp to ensure the coil is fully inserted.
Well, that was the easy pair to do, it gets a bit harder now, you will
need a ratchet to remove the coil clamp this time. For cylinder 7 you will
need the universal joint as shown below
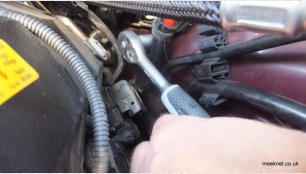
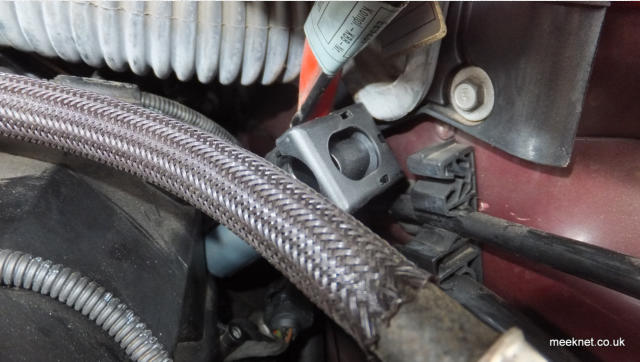
For cylinder 8 you will need a bit more hardware. You also need to
remove the plastic cover that protects the battery positive cable - this is
held on with a single plastic nut - the other end of the cover fits into a
hole in the metalwork. The pipe shown below is the petrol feed to the
injector rail. At some point when removing the coil this needs to be
pulled out of the clamp and moved aside.


The combination of tools I needed for cylinder 8 are shown below -
sparkplug socket, 1/2” universal joint, 1/2” to 3/8” converter, 3/8”
universal joint and a ratchet with a handle slim enough to fit a length of
pipe:

At this point it really just a case of struggling to get the coil out past
the obstructions. Here’s the coil coming out:
My combination of universal joints and converters has a lot of backlash,
so it took a while to get the plug out due to only managing a single click
on the ratchet each go - but it came out in the end:
Well, it looks easy in the pictures, but it isn’t - there is not really enough
room to get the coil in and out, at one point the coil got well and truly
stuck and wouldn’t go in or come back out - and then it just popped in as
if by magic. Fortunately, cylinder 8 is the hardest of all eight. The other
side, cylinders 1 to 4 are awkward, but a lot easier.
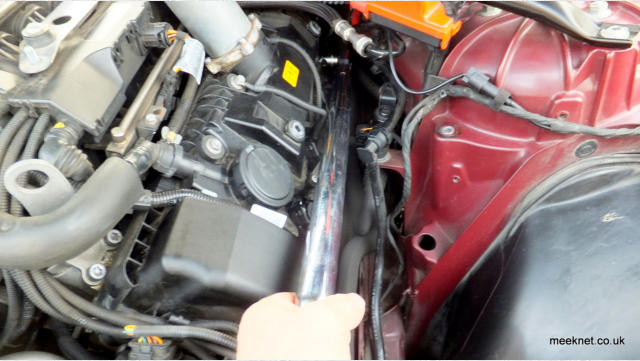
You still need a universal joint but you can use the torque wrench on
most of the cylinders. Cylinders 1 and 2 come out reasonably easy but
the coil has to be threaded through the expansion tank and CHF
reservoir.

Cylinder 2 and 4 are much the same, awkward but not impossible without
removing anything. Cylinder 3 has a problem here:
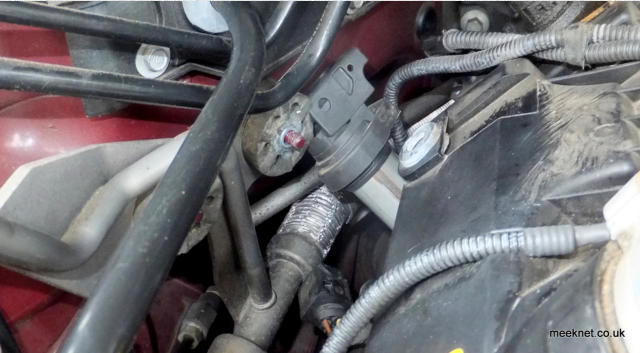
That’s the air-conditioning low-pressure servicing valve assembly - it’s
bolted to the inner wing - I have removed the two nuts with captive
washers ready to move it. With the nuts removed the bracket can be
moved inwards away from the studs and then pushed downwards so the
coil can get past, This means bending the refrigeration pipework which is
a bit scary to say the least. It’s still a bit of a fiddle to get the coil out but
it will come out without much hassle.
At least on bank 1 the torque wrench fits (just about) on the first two
cylinders - but that’s just about it. When refitting the side covers wipe a
bit of grease on the bosses - it makes it a lot easier to fit. And don’t forget
to refit the clamps

All done - Time for a Cup of Tea
Parts used below